This the multi-page printable view of this section. Click here to print.
User Guide
- 1: Welcome to the Connector for Veeva Vault
- 1.1: The Translation Lifecycle
- 1.2: How the Connector Helps You Manage Your Translation Lifecycle
- 1.3: Using this Guide
- 1.4: How to Contact Lionbridge Connector Support
- 2: Submitting Documents for Translation
1 - Welcome to the Connector for Veeva Vault
Welcome to the Lionbridge Connector for Veeva Vault (“Connector”) version 1.0.0. The Connector enables you to manage the translation lifecycle effectively in Veeva Vault. The Connector facilitates built-in review work-flows in which, the files or documents pass through a review workflow before and after the translation. The translations are done quick and easy with this Connector.
1.1 - The Translation Lifecycle
The translation lifecycle is the broad process of selecting content, sending it out for translation, and then receiving the translated content back from translation.
This set of steps usually fits inside a larger, more general process called the content lifecycle, which is the process of creating, reviewing, editing, approving, and publishing content.
When you consider the translation lifecycle and the content lifecycle together, you have the global content value chain, which is the strategy for managing multilingual content.
Remember that localizing content is a subset of steps in the broader content lifecycle. This will improve your focus on key localization considerations, improve processes, and keep all content stakeholders included. Together, this results in better content management.
1.2 - How the Connector Helps You Manage Your Translation Lifecycle
The Lionbridge Connector for Veeva Vault (Connector) is a plug-in module for Veeva Vault. The Connector features enable you to select, send, monitor, and retrieve content for translation into any language Veeva Vault supports.
These features automate the process, which reduces the effort and time required to export and re-import content that needs to be localized. This is very helpful when translating large volumes of content or ensuring that translated content is quickly re-imported to meet deadlines.
When you use the Connector, you manage your translation lifecycle entirely within the Veeva Vault:
- The Connector exports your content from Veeva Vault in XML format and delivers these content files to the Content API Platform.
- The Content API Platform delivers your content to your translation providers, based on routing rules that your company chooses and the Lionbridge Connector Team implements.
- When the translated content is ready, the Content API retrieves it from your translators and delivers it to the Connector.
- The Connector automatically re-imports the content into the correct location in Veeva Vault.
You can then review, revise, reject, or publish the translated content as needed.
Note: Neither the Connector nor the Content API performs any translation. Similarly, the Lionbridge Connector Team does not provide any translation services. Your company chooses the translation provider that performs the translation.
1.3 - Using this Guide
Purpose of this guide
This guide describes how to use the Lionbridge Connector (Connector) for Veeva Vault to manage your translation lifecycle. It describes how to send Veeva Vault components for translation and receive them back from translation.
Who should use this guide
This guide is intended for content editors, project, marketing, localization or translation managers, or others who are responsible for creating, editing, or approving content for translation that resides in your Veeva Vault CMS. This guide is also useful for translation providers who receive content from your Veeva Vault CMS, because it describes your company’s translation management process.
What your company setup should be
This document assumes that:
- Your company already has a functioning instance of Veeva Vault.
- The Lionbridge Connector for Veeva Vault (Connector) has been implemented, configured, and tested on your Veeva Vault CMS.
- The Lionbridge Connector Team has set up the Content API Platform to send content to your translation providers.
If Lionbridge is your company’s translation provider, it assumes that Freeway is already set up for your company.
What you should already know
This document assumes that:
- You are familiar with the Connector’s configuration for your Veeva Vault CMS, and the reasons for choosing certain configuration options. This is important because your company’s configuration determines which features are available.
- You have a strong working knowledge of the Veeva Vault Content Editor.
- You are familiar with your company’s translation process and requirements.
- You have valid user credentials to log into Veeva Vault.
- You have the required permissions to access the Connector functionality described in this guide.
Note: Not all the features described in this guide may be available. Feature availability depends on both your company’s Connector setup and the roles to which you are assigned. If you cannot access functionality that you need, contact your company’s Veeva Vault administrator.
How this guide is organized
This guide contains the following chapters:
| Chapter | Description |
|---|---|
| Welcome to the Connector for Veeva Vault | A brief description of the Lionbridge Connector for Adobe Experience Manager solution and how it fits into the translation lifecycle. It also includes information about this guide and Lionbridge Connector Support contact information. |
| Submitting Documents for Translation | How to use the Lionbridge Connector for Veeva Vault to send documents for translation. |
| Reviewing Translated Document | How to approve or reject the translated target document received. |
How to find out more about the Lionbridge Connector for Veeva Vault
For information on installing and configuring the Lionbridge Connector for Veeva Vault, read the Lionbridge Connector for Veeva Vault Installation and Configuration Guide.
Documentation conventions
This guide uses the following conventions:
| Convention | Description |
|---|---|
| Bold | Highlights screen elements such as buttons, menu items, and fields. |
| Courier | Highlights input, file names, and paths. |
| Italics | Highlights terms for emphasis, variables, or document titles. |
| > | Indicates a menu choice. For example, “Select Admin Tools > Configuration.” |
1.4 - How to Contact Lionbridge Connector Support
How to Contact Lionbridge Connector Support
You can submit a support ticket either:
- by emailing connectors@lionbridge.com
- from the Lionbridge Connector Zendesk page https://lionbridge-connectors.zendesk.com/
See also:
2 - Submitting Documents for Translation
This section talks about the process of submitting one or more documents to Lionbridge for translation. It also covers the approval and rejection process for the translated documents returned from Lionbridge.
The following ways are available for users to send one or more documents to translation:
-
Sending a single document for translation through user action on the selected document. For more information, see Submitting a Single Document for Translation.
-
Sending multiple documents for translation through a translation job that includes documents to be translated. For more information, see Submitting Multiple Documents for Translation.
2.1 - Submitting a Single Document for Translation
Veeva Vault allows users to submit a single document to Lionbridge for translation through the configured user action Send for Translation on the document.
Procedure:
To submit a single document for translation to Lionbridge:
-
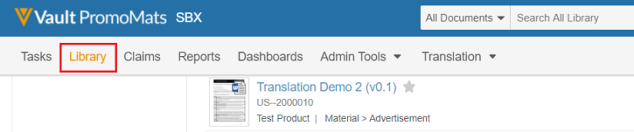
From the Library tab, click on the document intended for translation.
-
When the document opens, click the settings icon
 in the top right corner and select Send for Translation.
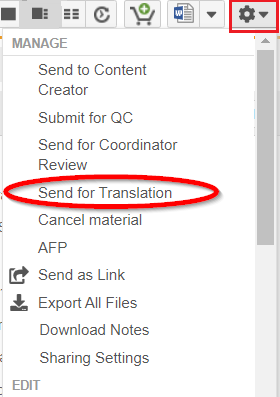
-
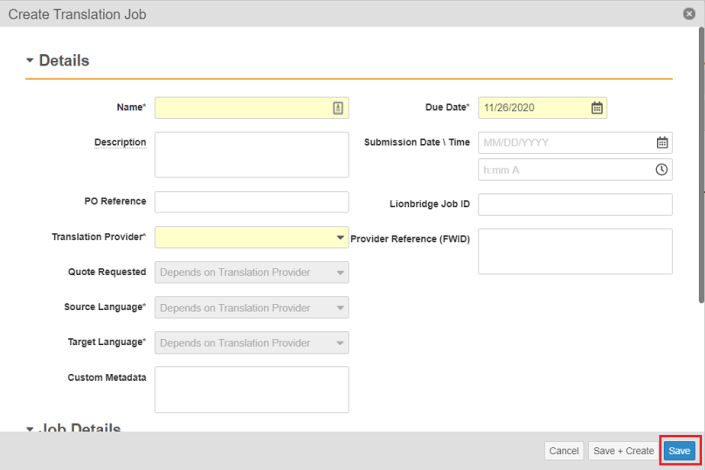
Select the Source and Target languages in the Create Translation Job page.
The Source and Target Language drop-downs contain the languages determined by the Translation Provider specified.
Note: Users can select a single Target Language, and the selected Target language must not be same as the selected Source Language.
-
Complete all the required fields and click Save.
-
To view your newly created translation job, go to Translation tab > Recent Translation Jobs, and select the job created.
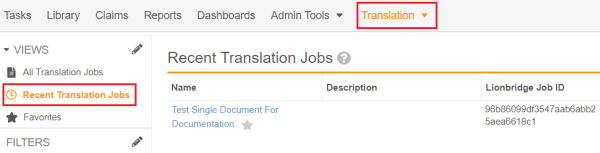
-
The job state now changes to the Pending Translation state. This state confirms that the job has been submitted to Lionbridge.
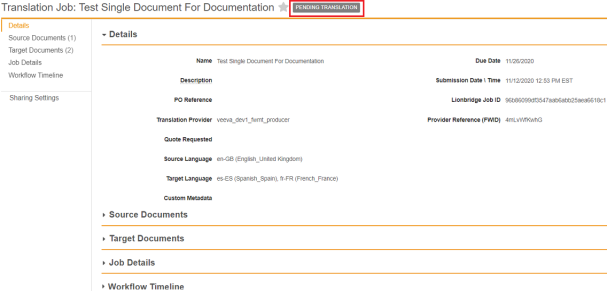
-
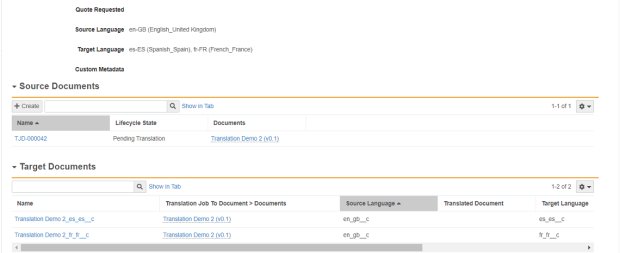
Veeva Vault automatically generates two separate objects to support the translation. One for Source Documents and the other for Target Documents.
Source Documents object contains the object representation of the documents to be translated. The user must not interface with the Source Documents as they are used by the Connector.
The Target Documents are placeholder objects which are used to store the translated documents returned from Lionbridge after the translation is completed. Approvals and Rejections of translated documents take place here. The Connector creates one Target Document record for each Target Language specified.
2.2 - Submitting Multiple Documents for Translation
Veeva Vault allows users to submit multiple documents to Lionbridge for translation through the configured user action Send for Translation on the Translation Job object.
Procedure:
To create a Translation job for submitting multiple documents for translation:
-
Select the available Translation Jobs under the Translation menu and click the Create button in the top right corner.

-
The user is navigated to the Create Translation Job page, select Source and Target language.
The Source and Target Language drop-downs contain the languages determined by the Translation Provider specified.
Note: Users can select a single Target Language, and the selected Target language must not be same as the selected Source Language.
- Complete all the required fields and click Save.
![]()
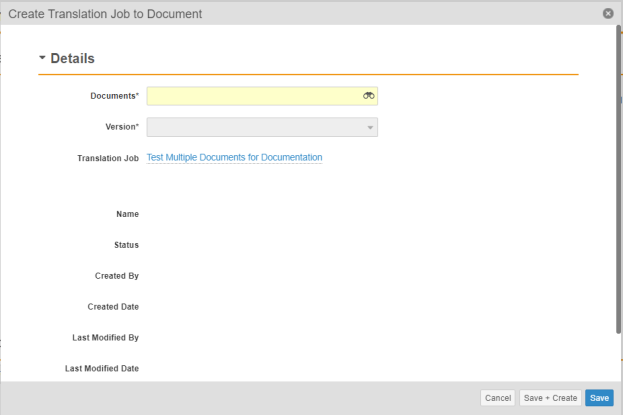
- To add documents to the newly created job, select the Source Documents drop-down and click Create.
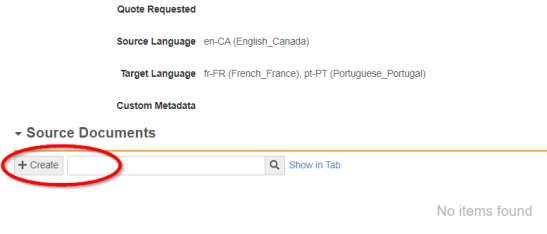
- Specify the document intended for translation in the Create Translation Job to Document page and click Save.
To submit any additional documents that need to be translated from the same Source Language into the same Target Languages, repeat Step 1 to Step 5.
- A Source Document record is created for each document added to the Translation Job.
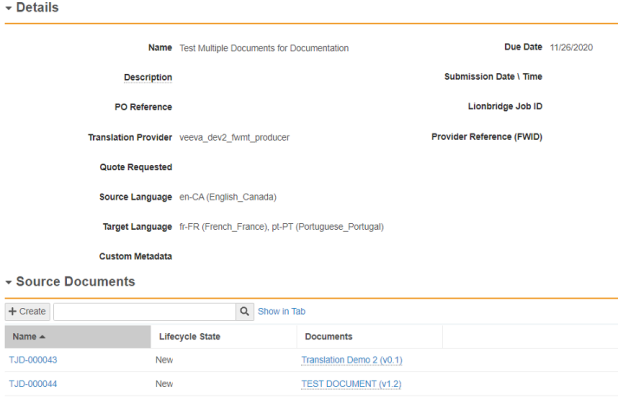
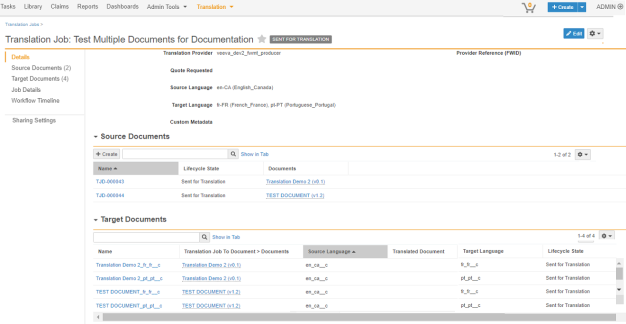
- When all the documents are added to the job and you are ready to submit the job to Lionbridge for translation, click the settings icon in the top right corner of the Translation Job and select Send for Translation.
![]()
- The job state now changes to the Pending Translation state. This state confirms that the job has been submitted to Lionbridge. It also indicates that the translation job is being processed for translation.
Veeva Vault automatically generates Target Document records. The Target Documents are placeholder objects used to store the translated documents returned from Lionbridge after the translation is completed. The Connector creates one Target Document record for each Target Language specified multiplied by the number of Source Documents added to the job.