Monitoring Items in a Workflow with the Enhanced Workbox
The Connector’s optional enhanced Workbox has more features than the standard Sitecore Workbox. These features help you manage large lists of content items in a workflow. You can sort by different column headings, approve many items at once, and easily manage the display of long lists.
Important: The enhanced Workbox is an optional feature that modifies the standard Sitecore Workbox. It must be installed as a separate package. For installation instructions, refer to the Lionbridge Connector for Sitecore Installation and Configuration Guide.
You open the enhanced Workbox the same way that you open the standard Sitecore Workbox.
To open the enhanced Workbox:
- In the Sitecore Content Editor, either:
- Click the Workbox link in the bottom left corner of the Content Editor.
- Click the dropdown arrow in the top right corner of the Content Editor and select the Workbox link.
When you open the Workbox, it displays all content items in a workflow, grouped first by workflow (if multiple workflows are selected), and then by workflow state.

In the enhanced Workbox, you can perform actions on all content items in a workflow, on all content items in a workflow state, or on individual content items.
1 - Displaying Content Items in the Workbox
The Workbox ribbon includes many features for controlling which content items to display in the Workbox and how to display these items.

| Ribbon Section |
Description of Functionality |
| Workflows |
Select the check box for one or more workflows. The Workbox displays the content items assigned to these workflows. The top-level grouping of content items is by workflow. |
| View |
In the Items per Page dropdown list, select the number of content items to display within a page in a workflow-state section, or select All.
Note: You can click page numbers in the bottom-right corner of each page to navigate. |
| Filter |
In the Language dropdown list, select the language of the content items to view, or to view content items in all languages, accept the default, -- ALL –. Depending on the workflow state of the content item, this may be the source or target language: |
-
Editing, Reviewing, Sending for Translation, and In Translation workflow states: source language of the content item.
-
Editing Translated Version, Reviewing Translated Version, and Done workflow states: target language of the content item. |
| Sort | In the Field dropdown list, select the field for sorting the content items in the Workbox. By default, the content items are displayed in descending order by the specified field. To sort the content items in ascending order, clear the Descending check box.
Note: All content items are grouped first by workflow and then by workflow state before they are sorted. |
-
To refresh the Workbox based on your changes, click Refresh  .
.
2 - Viewing Workflow Details and Receiving Updates
You can view the number of content items in a workflow and subscribe to updates about these items.
- If the workflow section is not already expanded, click
 to expand it.

You can now see the all the workflow states in the workflow, and the number of content items assigned to each workflow state.
You can perform the following actions:
-
To subscribe to an RSS feed of a workflow, so that you will be modified of any workflow-state changes to content items assigned to this workflow, click  in the top-right corner of the workflow section.
-
To collapse an expanded workflow section, click  .
.
-
To close a workflow section, click the Close (X) box in the top-right corner.
Note: This clears the selected check box for the workflow, in the Workflows section of the ribbon.
3 - Viewing All Content Items in a Workflow State and Receiving Updates
You can view the content items in a workflow state and receive updates about them.
-
If the workflow section is not already expanded, click  to expand it.
-
Click or click the title, which is the name of the workflow state, to expand the corresponding workflow-state section.
You can now see all the content items in that workflow state.
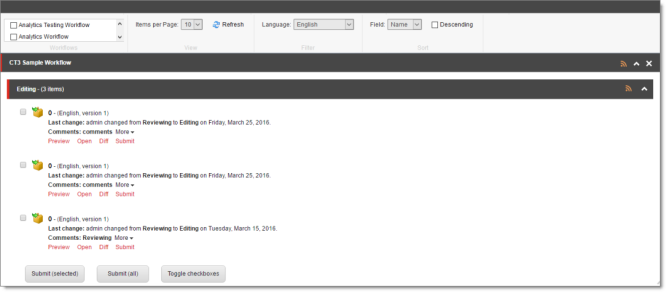
In the screen captures, the content items assigned to the Lionbridge Sample Workflow workflow are displayed in the Workbox. The section for the Editing workflow state is expanded, while the sections for the other workflow states are collapsed.
Note: If the number of items in a workflow state exceeds the number specified in the Items per Page setting, click a number in the bottom-right corner of the section to navigate to a different page, where you can see additional content items. To change the Items per Page setting, select another number, or All, from the dropdown list in the View section of the Workbox ribbon.
You can perform the following actions in a workflow-state section:
4 - Viewing Content Item Details
You can view detailed information about a content item in a specific workflow and workflow state.
-
Ensure that the section for the workflow to which the content item is assigned is displayed in the Workbox. If it is not displayed, select the corresponding check box in the Workflows section of the Workbox ribbon. For details, see Displaying Content Items in the Workbox.
-
Ensure that the section for the workflow to which the content item is assigned is expanded. If it is not expanded, click to expand it.
-
Ensure that the section for the workflow-state section to which the content item is assigned is expanded. If it is not expanded, click  , or click the title of the section, which is the name of the workflow state, to expand it.
When a workflow-state is expanded, you can see detailed information about a content item. The screen capture shows the section for the Editing Translated Version workflow state collapsed, while the section for the Reviewing Translated Version workflow state is expanded.
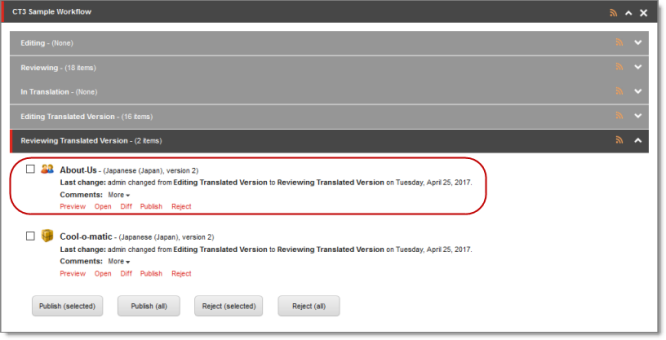
The information in brackets below indicates the information in the highlighted area in the screen capture above.
-
The name of the content item (About-Us).
-
The language of the content item (Japanese, Japan). Depending on the workflow state of the content item, this may be either the source or the target language:
- Editing, Reviewing, Sending for Translation, and In Translation workflow states: source language of the content item.
- Editing Translated Version, Reviewing Translated Version, and Done workflow states: target language of the content item.
-
The version number of the content item in the specified language (version 2).
-
The last change in the workflow state of the item, the user who made this change, the previous and current workflow states, and the date of this change (admin changed from Editing Translated Version to Reviewing Translated Version on Tuesday, April 25, 2017.).
You can also perform the following actions on any content item:
-
To open a content item in the Sitecore Content Editor, click the name of that item or click Open  .
.
-
To view a preview of a content item in the layout for the current device, click Preview  .
.
5 - Changing the Workflow State of Individual Content Items
You can change the workflow states of one or more content items in a workflow. The changes you can make depend on the workflow state of the items.
-
Ensure that the section for the workflow to which the content item is assigned is displayed in the Workbox. If it is not displayed, select the corresponding check box in the Workflows section of the Workbox ribbon. For details, see Displaying Content Items in the Workbox.
-
Ensure that the section for the workflow to which the content item is assigned is expanded. If it is not expanded, click to expand it.
-
Ensure that the section for the workflow-state section to which the content item is assigned is expanded. If it is not expanded, click , or click the title of the section, which is the name of the workflow state, to expand it.
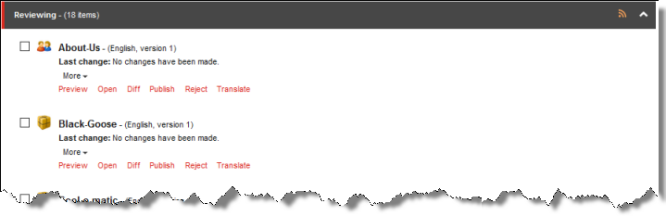
The screen capture shows the section for the Reviewing workflow state expanded. In this state, the Publish action is available.
- You can perform one of the following state-specific actions. The available actions depend on the content item’s workflow state. Refer to the table below for a list and description of actions you can perform on content items in different states of the
Lionbridge Sample Workflow workflow.
| Action |
Description |
Available in these Workflow States |
|
|
| Editing | Reviewing | In Translation | Editing Translated Version | Reviewing Translated Version |
|---|
|
| Submit |
Submits a content item to the next workflow state. |
|
| Publish |
Publishes the content item (i.e. puts the content item into the Done workflow state which is publishable):- Reviewing: publishes in the source language.
- Reviewing Translated Version: publishes in the target language.
|
|
| Reject |
Rejects the content item, so that it is not publishable:- Reviewing: rejects content in the source language.
- Reviewing Translated Version: rejects content in the target language.
|
|
| Translate |
Opens a dialog box for specifying translation settings before sending this content item for translation. |
|
| Language Translated |
Moves a content item to the next workflow state, Editing Translated Version. |
|
6 - Changing the Workflow State of Multiple Content Items
You can perform any workflow-state-specific actions on multiple content items that are in the same workflow state. For example, you can publish or reject multiple content items in the Reviewing Translated Version workflow state. Different actions are available, depending on the workflow state, as described in Changing the Workflow State of Individual Content Items.
To change the workflow state of multiple content items:
-
Ensure that the section for the workflow to which the content item is assigned is displayed in the Workbox. If it is not displayed, select the corresponding check box in the Workflows section of the Workbox ribbon. For details, see Displaying Content Items in the Workbox.
-
Ensure that the section for the workflow to which the content item is assigned is expanded. If it is not expanded, click to expand it.
-
Ensure that the section for the workflow-state section to which the content item is assigned is expanded. If it is not expanded, click , or click the title of the section, which is the name of the workflow state, to expand it.
-
Optional. Select the check boxes for the content items for which you want to perform the common action.
Note: If you want to perform the action on all the content items in the workflow-state section, skip this step.
- If necessary, scroll down to the bottom of the page of the workflow-state section, so that the toolbar at the bottom of the section is displayed.
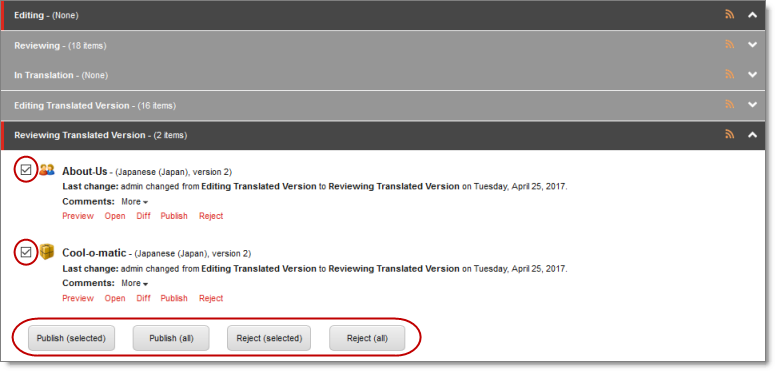
The screen capture shows the Reviewing Translated Version workflow state expanded. In this state, the Publish and Reject actions are available.
Note: The available actions depend on the workflow state. Refer to the table in Changing the Workflow State of Individual Content Items for a list and description of actions you can perform on content items in different states of the Lionbridge Sample Workflow workflow.
- Click the icon in the toolbar for the action you want to perform.
Tip: Click the Toggle check boxes icon to toggle your check box selection.
7 - Viewing the History of Workflow-State Changes to a Content Item
You can view the history of workflow-state changes to a content item.
-
Ensure that the section for the workflow to which the content item is assigned is displayed in the Workbox. If it is not displayed, select the corresponding check box in the Workflows section of the Workbox ribbon. For details, see Displaying Content Items in the Workbox.
-
Ensure that the section for the workflow to which the content item is assigned is expanded. If it is not expanded, click to expand it.
-
Ensure that the section for the workflow-state section to which the content item is assigned is expanded. If it is not expanded, click , or click the title of the section, which is the name of the workflow state, to expand it.
-
In the workflow-state section, locate the content item whose history you want to view.
-
To view the history of workflow-state changes to a content item, click More.

A window opens, displaying information about each change in the workflow state of this content item. The information in brackets below indicates the information in this screen capture:
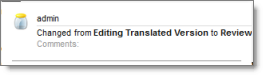
- The user name of the user who changed the workflow state of this item (admin).
- The date of the change to the workflow state of this item (Tuesday, April 25, 2017).
Tip: Use the scroll bar to scroll to the right side of the window, which displays the date.
- The previous and new workflow state. When an item is created, Item created is displayed.
- When you are done viewing the history of the item, click the Close box (X) in the top-right corner to close the window.
8 - Comparing Multiple Versions of a Content Item
You can compare multiple versions of a content item.
-
Ensure that the section for the workflow to which the content item is assigned is displayed in the Workbox. If it is not displayed, select the corresponding check box in the Workflows section of the Workbox ribbon. For details, see Displaying Content Items in the Workbox.
-
Ensure that the section for the workflow to which the content item is assigned is expanded. If it is not expanded, click to expand it.
-
Ensure that the section for the workflow-state section to which the content item is assigned is expanded. If it is not expanded, click , or click the title of the section, which is the name of the workflow state, to expand it.
-
In the workflow-state section, locate the content item whose versions you want to compare.
-
Under the content item, click Diff.

Note: This is not meaningful for version 1 of a content item.
The Compare Versions box opens, displaying the newer version in the left column, and the older version in the right column. The differences are displayed in blue bold.
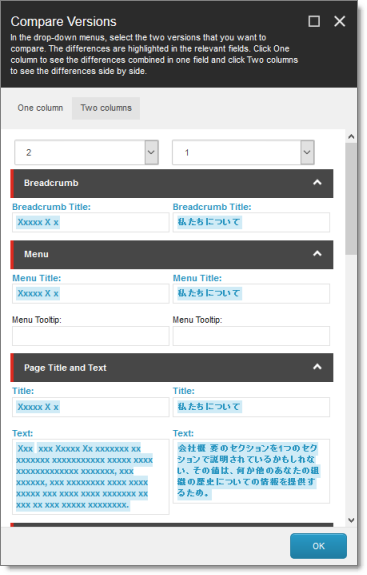
-
To view different versions of this content item, select the version numbers from the dropdown lists at the top of the box.
-
To collapse a section, click the collapse button  .
.
-
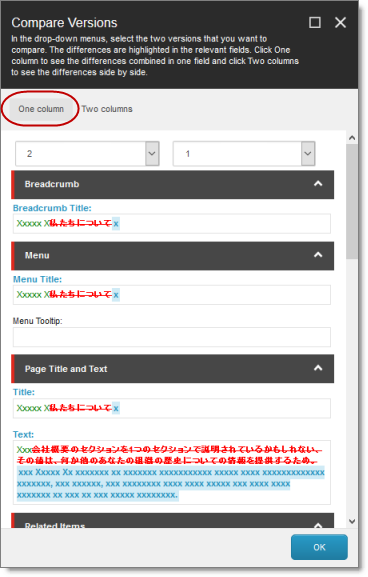
To view the differences between versions of this content item in a single column, click One column in the top-left corner of the box.
-
The new text is displayed in green bold.
-
The old text is displayed in red bold with strikethrough.
-
When you are done, click OK to close the Compare Versions box.