Getting Started with the Connector
The Connector supports the Mozilla Firefox, Google Chrome, and Microsoft Internet Explorer 11 web browsers.
To access the Connector, log into Sitecore.
Tip: To view the Connector user interface in Japanese, change your language setting in Sitecore. For detailed instructions, see https://doc.sitecore.net/sitecore_experience_platform/content_authoring/the_editing_tools/change_your_personal_settings. Note that your Sitecore administrator must install the Connector language pack to support viewing the Connector user interface in Japanese.
1 - Key Features
The Lionbridge Connector for Sitecore (the “Connector”) has the following key features:
1.2 - Optimizing Translation Costs (Use Local TM)
The Use Local TM feature helps you reduce translation costs, by reducing the quantity of content that Connector sends to translation providers. With this feature, the Connector sends only changed content fields out for translation. To do this, it checks each field of the source version for any content changes.
However, this feature needs Connector translation backup data, and it increases the Connector processing time before sending out the items for translation. For information on enabling Connector translation backup data, refer to the Lionbridge Connector for Sitecore Installation and Configuration Guide.
This feature is available:
1.3 - Selecting a Translation Provider
If your company has multiple translation providers, your company’s Connector setup may enable you to select which one to use when you send out items for translation.
This feature is available:
2 - The Connector at a Glance
You access the Lionbridge Connector for Sitecore (“Connector”) directly from the Sitecore user interfaces–from the Content Editor and the Experience Editor.
Note: Not all Connector features are available in all Sitecore user interfaces.
Sitecore Content Editor
- You can use the Lionbridge Translation tab in the Sitecore Content Editor to perform multiple translation-management tasks and to view a summary of the translation status of all the content items in your Sitecore instance:

- You can use the Translate button in the Review tab in the Sitecore Content Editor to send out a single item for translation:

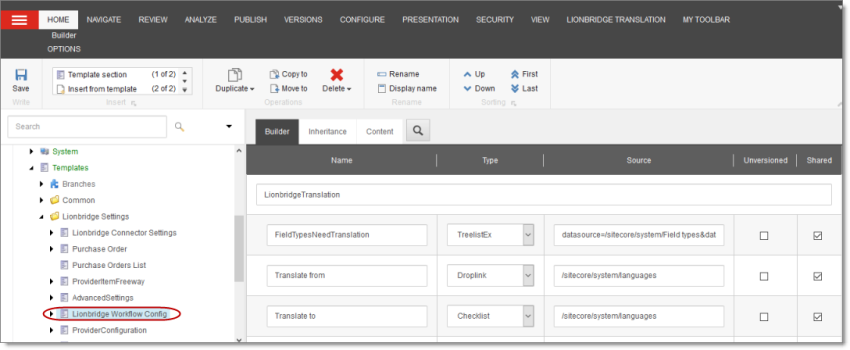
- You can use the Lionbridge Workflow Config template to build your own translation workflow:
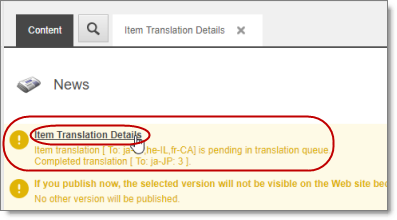
- You can view summary information about an item’s translation status in the information bars, and you can click the Item Translation Details link to view additional information about an item’s translation.
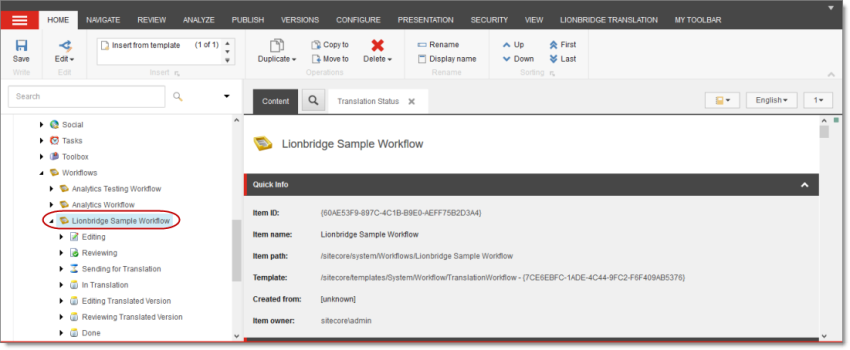
- You can use the Lionbridge Sample Workflow workflow to configure your translation workflow:
Sitecore Experience Editor
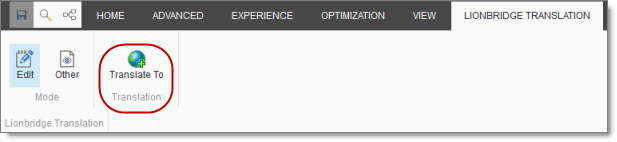
You can use the Translate To button on the Lionbridge Translation tab in the Sitecore Experience Editor to send a single content item for translation:
3 - Working with Lists
The Connector has many list pages, often for displaying lists of content items.
Tips: For lists where you can select multiple items, press the Shift key to select a range of adjacent items. Press the Ctrl key to select multiple non-adjacent items.
You can perform the following actions in list pages:
3.1 - Navigating Pages in a List
If there are many items in a list, the list may have multiple pages. The navigation bar below the list helps you navigate through the pages and displays your position in the list.
For example, the Add an Account dialog box may have multiple pages in its list.
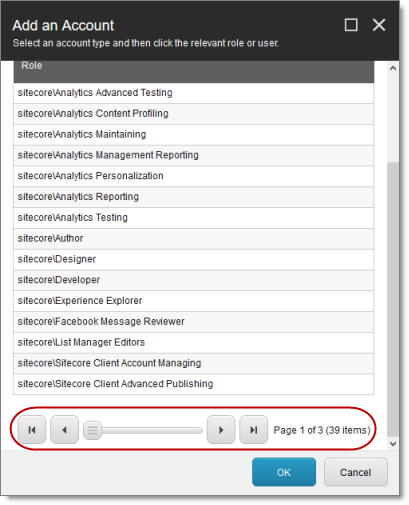
You use the arrow keys at the bottom of a list to navigate through multiple pages in a list.
| Arrow Key |
What It Does |
 |
Opens the first page. |
 |
Opens the previous page. |
 |
Opens the next page. |
 |
Opens the last page. |
The bottom right corner of the windows displays the current page in the list, the total number of pages in the list, and the total number of items in the list. The maximum number of items displayed in a list page depends on the particular list.
3.2 - Setting Column Width
You can set the width of any column in a list.
-
Mouse-over the right border of the column.
The cursor is displayed as a white line with arrows at each end.
-
Drag the column border to its new position.
- Dragging the column border to the left makes the column narrower.
- Dragging the column border to the right makes the column wider.
3.3 - Sorting by Column
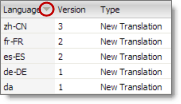
By default, items in a list are displayed by alphabetical order of the item in the first column of the list.
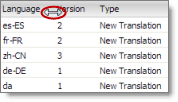
You can sort items in a list by any column. For example, suppose that you want to display all content items by language.
- Click the column heading.
For example, click the Language column heading.
The first time you click in the column heading, the column contents are sorted in ascending order. The arrow in the column heading indicates the sort order.
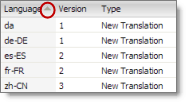
- If you want to reverse the sort order, click again in the column heading.
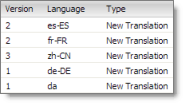
3.4 - Changing Column Order
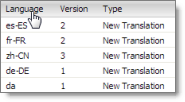
You can change the order in which columns in lists are displayed. For example, suppose you want to move the Language column to the right of the Version column.
- Click the column heading to move.
For example, click the Language column heading.
- While you hold down the cursor, drag the column heading to the new position. (A copy of the column heading “floats” above the table.) Red arrows indicate the new position of the column.
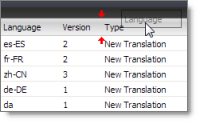
- Release the cursor when the column is in its new position.
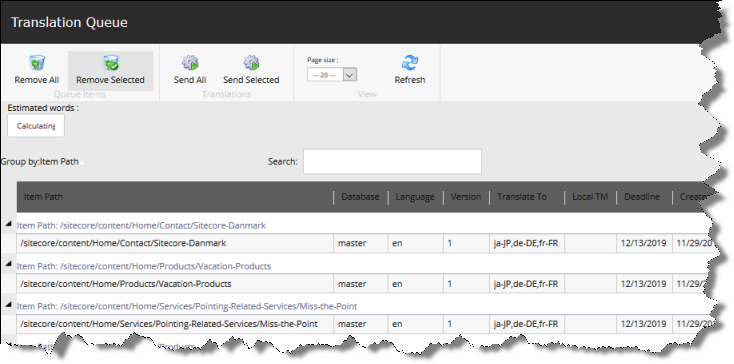
4 - Grouping Content Items by Column
In the Translation Queue, you can group the items by one of the columns. The example below shows how to group the content items by the Language column.
- Click the column heading. For example, click the Item Path column heading.
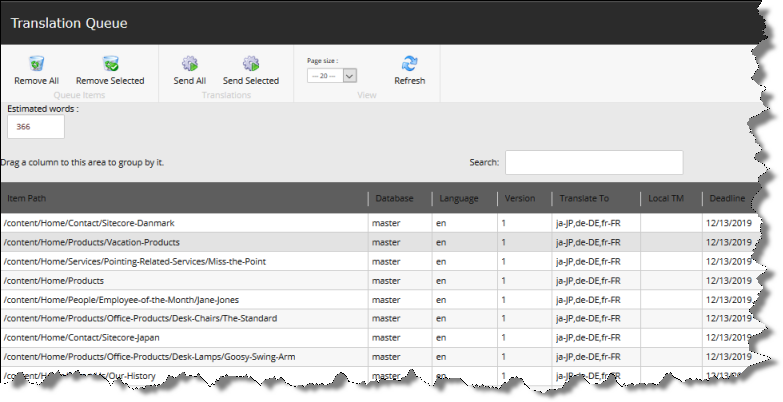
- While you hold down the cursor, drag the column heading to the Drag a column to this area to group by it area above the list on the left.
The list items are grouped by the column you dragged.

- Click an Expand button
 to view the items in each column group.
For a detailed description of the Translation Queue, see Submitting Content for Translation from the Translation Queue.