Sitecore uses workflows to control when a content item is published. The Connector uses workflows to control the translation process for a content item.
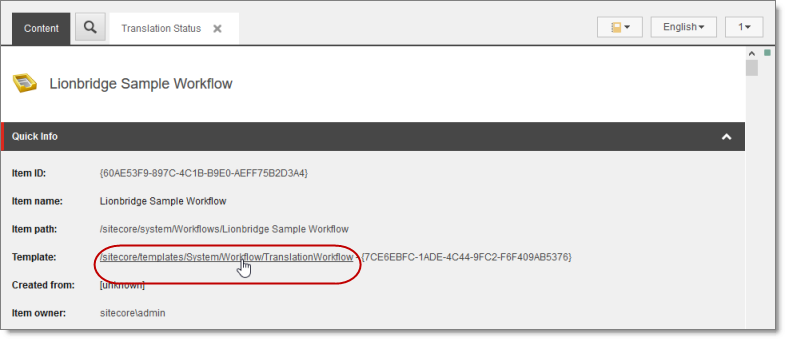
The Connector translation package installs a sample translation workflow, which you access in the Sitecore Content Editor as an administrator by navigating to sitecore/System/Workflows/Lionbridge Sample Workflow. Although you use this workflow to manage translation, you can duplicate, modify, or extend it to support additional requirements.
For general information about workflows, refer to the appropriate version of the Sitecore CMS Content Author’s Reference and Cookbook. This guide is in the documentation section available at https://doc.sitecore.net.
The Connector supports translating Sitecore items that have been configured in the following ways:
- with the Connector Sample workflow attached
- with a custom workflow that includes the Connector configuration section and the associated workflow states, which are listed and described in Connector Workflow States
- with a custom workflow that does not have the Connector configuration section (see the following notes)
- without a workflow (see the following notes)
Note: You can use the Bulk Translation feature to submit all the above types of item for translation. However, if you want to send items for translation individually, the Translate button in the Workflow section of the Review tab is displayed only for Sitecore items attached to Lionbridge Sample Workflow or to another workflow whose base template is TranslationWorkflow, as described in Using Your own Workflow for Translation.
Recommendation: Use a translation workflow that includes the basic Connector translation steps, which are implemented through workflow states. This ensures that the Connector can send out your content and retrieve it from your translation provider(s). For information on Connector workflow states, see Connector Workflow States.
To configure the following settings, navigate to sitecore/System/Workflows/Lionbridge Sample Workflow or your designated translation workflow. The settings are in the Lionbridge Translation section.
Tip: Hover over each setting for extended help text.
You use the following settings to configure a workflow and the items attached to the workflow:
Note: For instructions on attaching items to a workflow, refer to the Lionbridge Connector for Sitecore User Guide.
| Parameter | Description | Default Value |
|---|---|---|
| Translate From (Source Language) | The source language from which to translate the items. Select a language from the list. | Usually this is the Sitecore default language. |
| Translate To (Target Language) | The target languages that are available for translating the items attached to the workflow. To translate into specific target languages, select the corresponding check boxes. | n/a |
| Use Local TM (detect changed content and resend) | Determines whether the Use Local TM feature is available when translating items attached to this workflow. This feature checks each field of the source version for any content changes, and it sends only changed content fields out for translation, to ensure that all target versions reflect these changes. * When this check box is selected, you can activate this feature by selecting a check box in either the **Bulk Translation** wizard or the **Automatic Item Export for Translation** dialog box. The **Use Local TM** feature may reduce translation costs, but it needs the Connector translation backup data, and it increases the Connector processing time before the Connector sends out the items for translation. * When this check box is cleared, you cannot activate this feature, because the related user interface is not displayed. The Connector sends all specified source content for translation, even if it has not changed since it was previously sent for translation. |
check box is cleared |
| Requested Translation Timeframe (Days) | Determines the translation deadline when sending out the translation automatically, without using the user interface that supports entering this information in the Delivery Date field. This information is sent to the translation provider as metadata of the translation package. If you set this parameter to 14, the deadline will be two calendar weeks after you submit an item for translation. Recommendation: Discuss whether to use this feature with your translation provider(s). |
15 |
| Workflow State to set when Sending Content for Translation | The workflow state to set when a source item has been selected for translation. | /sitecore/system/ Workflows/Lionbridge Sample Workflow/ Sending for Translation |
| Workflow State to set (for Source Content) once content has been sent for translation | The workflow state to set for a source item after the Connector has sent it out for translation. For example, in some companies, when you send out the content for translation, the source is ready for publishing. In this scenario, you can set this state to Done, which is a publishable state. Alternatively, if your company has a final review process, you can set this to another state that is not publishable. | By default, this state is not set, so the source item’s state does not change when you send it out for translation. |
| Workflow State to set for Content while it is out for translation | The workflow state to set for target content when an item is being translated. The default In Translation workflow state enables you to see which items are still out for translation. It facilitates following up with your translator about items that you have sent out for translation, but that you have not yet received back. | /sitecore/system/ Workflows/Lionbridge Sample Workflow/In Translation |
| Workflow State to set when a translation has been cancelled | The workflow state to set when an item’s translation request has been cancelled. A user can cancel translation from the Translation Queue. A translation request is automatically cancelled if a fatal error occurs while sending out an item for translation, such as an incorrect language code, or insufficient user permissions. |
/sitecore/system/ Workflows/Lionbridge Sample Workflow/ Reviewing |
| Workflow State to set for target items when no translation is required | The workflow state to set for all items that do not require translation. This is useful in when using the following features: * **Copy source to target only** * **Use local TM** **Tip:** Set this state to Done, and select the **Automatically Publish content when it reaches the Final State** check box, described below. |
field is blank |
| Workflow State to set when content Translation is complete | The workflow state to set when an item translation has been completed, and it is back in Sitecore for review and publishing. | /sitecore/system/ Workflows/Lionbridge Sample Workflow/ Editing Translated Version |
| Send Content automatically using pre-configured language settings | Enables sending all items to the Translation Queue without further user action. That is, the Connector automatically uses the Translate from, Translate to and Requested Translation Timeframe information, defined above, to immediately send content to the Translation Queue without enabling the user to change these parameters: the Language Selection pop-up window does not open. * If this check box is selected, the **Language Selection** pop-up window does not open when you send content to the Translation Queue: you cannot select the target languages or the destination, but sending items for translation is streamlined. * If this check box is cleared, the Language Selection pop-up window opens when you send content out for translation: you can select the target languages, so the process is less streamlined. However, this provides greater control for the user. |
check box is cleared |
| Automatically Publish content when it reaches the Final State | Determines whether the Connector automatically publishes the content when an item reaches the final state of the translation workflow. * If this check box is selected, the Connector automatically publishes the content when an item reaches the final state. * If this check box is cleared, the Connector does not automatically publish the content when an item reaches the final state. |
check box is cleared |
| Publish to which Database? | The target databases for publishing content if the Connector needs to publish an item. | n/a |
| Publish child items? | Determines whether the Connector publishes child items when it publishes their parent item. * If this check box is selected, the Connector publishes child items when it publishes their parent item. * If this check box is cleared, the Connector does not publish child items when it publishes their parent item. |
check box is selected |
| Keep final state for source items? | Determines whether the workflow state of the source item changes during the translation process if it was in a final workflow state before that process started. When you translate published source items into other language versions, this setting prevents Sitecore from unpublishing those source items. | check box is selected |
For a list and description of Connector workflow states, see Connector Workflow States, below.