Configuring the Connector for Sitecore
1 - Configuring Content API URL
Important: This section is only applicable for Sitecore Connector version 6.0.1.
The Staging and Production URLs are given in the Confiuration file which is available at the following path:
C:\inetpub\wwwroot\[your_instance]\App_Config\Include\CT3_Internal.config

The following are the URLs for the Staging and Production environment:
2 - Configuring Your Client ID and New Translation Providers
-
Your company’s Client ID is your company’s license for the Content API Platform.
-
The Connector uses account keys to control communicate with translation providers. If you are using multiple translation providers, you require one account key for each provider.
Very important: Do not use the same provider keys on multiple Production instances. Otherwise, installation of the same keys on more than one Production server will cause unpredictable behaviour by the Connector resulting in, at least, lost translation content, orphaned projects and inaccurate status reports. You can use the same test provider key on multiple non-Production instances.
Before you can send assets for translation, you must set up your Client ID, Client Secret ID, and configure your translation providers with account keys.
Important: Before starting, ensure you obtain your Client ID, Client Secret ID, and account keys from the Lionbridge Connector team. Verify that the Lionbridge Connector team has set up your account keys for each of your translation providers.
- In the Content Editor, in the content tree, navigate to /sitecore/system/Settings/Lionbridge Settings/Content API Translation Providers Configuration.

The Provider tab opens. From the Sitecore Connector version 6.0.x release onwards, Content API Provider option is added in the Provider tab.
- Click ContentAPIProvider tab. Enter the client ID, client secret ID and host in the Client ID, Client Secret and Host fields and click the Set button.

- Scroll down to the New provider section.
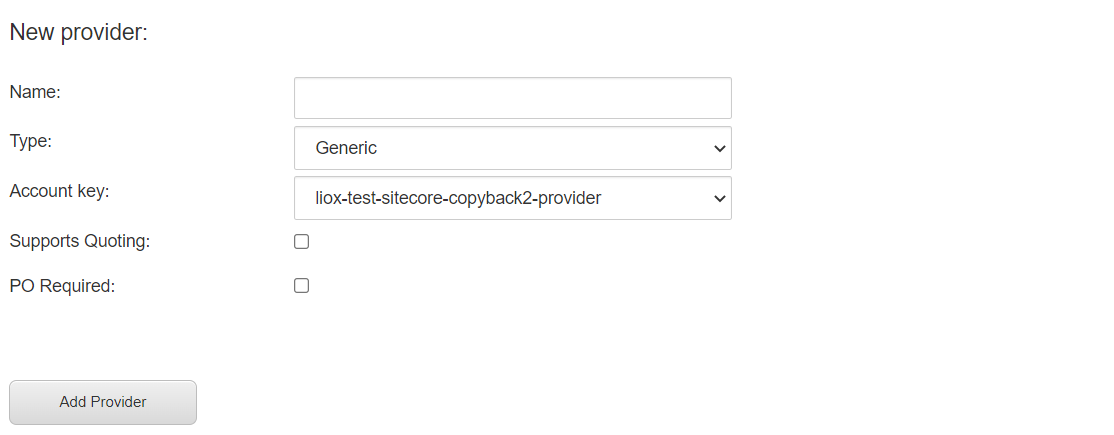
- In this section, enter the following information about your translation provider:
| Setting |
Description |
| Name |
Enter your name for the translation provider. If you configure multiple translation providers, this is the name that will be displayed when selecting a translation provider while sending out content for translation. |
| Type |
Select the type of translation provider. This supports sending translation metadata to specific translation providers. If you do not see your translation provider, select Generic. If you select Freeway, additional fields are displayed, as described in the following steps. |
| Account key |
Select the account key for the translation provider. There is one account key for each of your translation providers, as specified by your Client ID. |
| Supports quoting |
If this translation provider supports providing quotes before the translation process starts, and you want to enable users to request a quote before sending content for translation, select this check box.
Important: The Request Quote feature is available only when sending content for translation to a translation provider (LSP) that supports this feature.
When enabled, this feature displays the Send for Quote check box in:- the Bulk Translation wizard
- the Automatic Item export for translation dialog box
- the Send Items Out for Translation dialog box, which opens from Translation Queue
Selecting the Send for Quote check box informs the translation provider that you want to receive a quote before the translation process starts. |
| PO Required |
You can configure this translation provider so that the PO Reference field is required when submitting content for translation to this provider. |
- If you selected Freeway as the translation provider Type, in the previous step, the New provider section expands, and the following additional fields are displayed in the Freeway provider details sub-section:
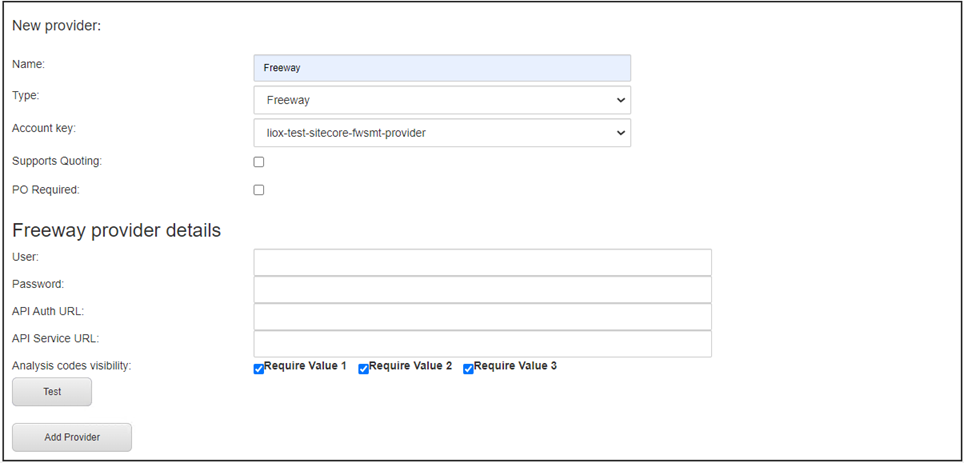
a. Enter the following information:
| Field |
Description |
| User |
The username for logging into the Lionbridge Freeway server. |
| Password |
The password for logging into the Lionbridge Freeway server. |
| API Auth URL |
Optional. The URI where the Connector receives an authentication token for Lionbridge Freeway. This is https://fwapi.lionbridge.com/obvibundles/freewayauth.asmx. |
| API Service URL |
Optional. The URI where the Connector can request a list of Lionbridge Freeway analysis codes. This is https://fwapi.lionbridge.com/obvibundles/service.asmx. |
| Analysis codes visibility |
Optional. Each check box indicates whether to display the corresponding analysis-code field to users when they send out content for translation to Lionbridge Freeway.- Require Value 1: If this check box is selected, the first analysis code configured for your company (for example, region) must be displayed to users when sending content to Freeway.
- Require Value 2: If this check box is selected, the second analysis code configured for your company (for example, department) must be displayed to users when sending content to Freeway.
- Require Value 3: If this check box is selected, the third analysis code configured for your company (for example, priority) must be displayed to users when sending content to Freeway.
Warning: This configuration is required for full integration between the Connector and Freeway. Otherwise, the Connector cannot retrieve and display analysis code options, and the user cannot specify analysis codes for projects submitted to Freeway. However, even without this configuration, the Connector can still send submitted content to Freeway. |
b. Click Test to test your Freeway settings.
Warning: This configuration is required for full integration between the Connector and Freeway. Otherwise, the Connector cannot retrieve and display analysis code options, and the user cannot specify analysis codes for projects submitted to Freeway. However, even without this configuration, the Connector can still send submitted content to Freeway.
-
Click Add Provider.
-
Repeat the previous steps for any additional translation providers to add.
Note: The list at the top of the section displays the name, type, quotation-support status and key of all configured providers. To remove a translation provider, select the corresponding row in the table, and then click Remove.
3 - Updating the Configuration Settings of Translation Providers
You can update the configuration settings for translation providers that were created in versions 4.0 or higher of the Connector, or were already upgraded from an earlier version of the Connector.
You can update the following configuration settings for your translation provider:
- whether a quote is required before the translation job starts (not supported for all translation providers)
- whether a purchase order number (PO number) is required when submitting a job for translation
To update configuration settings for your translation provider:
-
In the Content Editor, in the content tree, navigate to the /sitecore/system/Settings/Lionbridge Settings/Content API Translation Providers Configuration.
-
Scroll down to the bottom of the Item parameters section:
-
Update the values of the following options:
| Setting |
Description |
| Supports quoting |
If this translation provider supports providing quotes before the translation process starts, and you want to enable users to request a quote before sending content for translation, select this check box.
Important: The Request Quote feature is available only when sending content for translation to a translation provider (LSP) that supports this feature.
When enabled, this feature displays the Send for Quote check box in:- the Bulk Translation wizard
- the Automatic Item export for translation dialog box
- the Send Items Out for Translation dialog box, which opens from Translation Queue
Selecting the Send for Quote check box informs the translation provider that you want to receive a quote before the translation process starts. |
| PO Required |
You can configure this translation provider so that the PO Reference field is required when submitting content for translation to this provider. |
- In the top-left corner, click the Save icon
 .
.
4 - Configuring the Connector with the Azure App Service for Blue/Green Deployment
This section describes how to configure the Connector installation with the Azure App Service for Blue/Green Deployment. In this scenario, you install the Connector on multiple Sitecore instances that have the same IP address. These Sitecore instances share the same Sitecore database and they will share the same Connector database. Each instance has its own settings.
Prerequisites
- Both Sitecore instances, where you will install the Connector, must be hosted on the same server or local machine, so that they have the same IP address.
- Both Sitecore instances must share the same Sitecore database.
Note: These instances will share the same Connector database.
- Both Sitecore instances must have the same Client ID and Secret ID, which are configured in /sitecore/system/Settings/Lionbridge Settings/Content API Translation Providers Configuration Configuration.
-
On the first Sitecore instance, configure the translation provider. For detailed instructions, see Configuring Your Client ID and New Translation Providers.
-
Open the Website_root/Website/App_Config/Include/CT3Translation.config configuration file for editing.
-
Locate the following line:
<setting name=“ClayTablet.LionbridgeSettings.TranslationProvidersConfiguration.ItemPath” value=“NONE” />
By default, this value is set to NONE.
- Change the value of this setting, to indicate that the translation-provider configuration path is different for each instance:
/sitecore/system/Settings/Lionbridge Settings/Content API Translation Providers Configuration.
For example:
<setting name=“ClayTablet.LionbridgeSettings.TranslationProvidersConfiguration.ItemPath” value="/sitecore/system/Settings/Lionbridge Settings/Content API Translation Providers Configuration"/>
- You can configure a different default translation provider for each instance. For example:
- /sitecore/system/Settings/Lionbridge Settings/Content API Translation Providers Configuration 1
- /sitecore/system/Settings/Lionbridge Settings/Content API Translation Providers Configuration 2
-
Create a copy of the configured translation provider item, under /sitecore/system/Settings/Lionbridge Settings/Content API Translation Providers Configuration.
-
On the second instance, navigate to /sitecore/system/Settings/Lionbridge Settings/Content API Translation Providers Configuration in the Content Tree. Ensure that you can see the same copy of the configured translation provider item. This validates that both instances are sharing the Connector database.
-
On the second instance, modify the copy of the configured translation provider, so that it has a different value than on the first instance. For detailed instructions, see Updating the Configuration Settings of Translation Providers.
-
From each instance, send jobs to translation to validate that the complete translation round trip is successful.
Next you configure additional Connector parameters, as described in Configuring the Lionbridge Connector for Sitecore.
5 - Configuring Content Encryption
You can configure content encryption and decryption. You can generate your own keys to encrypt and decrypt content you send for translation from the Connector to any translation provider.
When this feature is enabled:
- The Connector automatically encrypts the files before submitting them for translation.
- The Connector automatically decrypts encrypted translated files that it receives.
Important: Before sending encrypted content for translation, ask your translation provider to contact the Lionbridge Connector Support Team to obtain the encryption utility for the Connector. For details, see How to Contact Lionbridge Connector Support.
Before translation:
- You enable content encryption in the Connector, and you generate the encryption key and export it as an .xml file, as described below.
- When you submit a job for translation, the Connector automatically encrypts the files for translation before sending them to your translation provider.
- You send the encryption key to your translation provider, for example, by email.
- The Connector sends the encrypted files to your translation provider via the Content API Platform and the translation connector.
- Your translation provider uses the encryption utility to decrypt the encrypted files it receives.
After translation:
- Your translation provider uses the encryption key and the encryption utility to encrypt the translated files.
- Your translation provider sends the encrypted files to the Connector via the translation connector and the Content API Platform.
- The Connector automatically decrypts the encrypted translated files it receives before importing them into Sitecore and processing them further.
To enable content encryption in the Connector:
-
In the Content Editor, in the content tree, navigate to the /sitecore/system/Settings/Lionbridge Settings/Lionbridge Connector Settings/Encryption item.
-
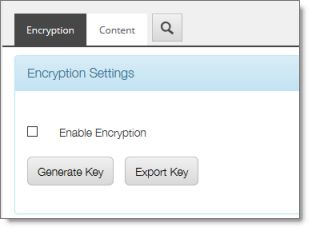
Click the Encryption item in the folder to open it in the content area.
-
Select the Enable Encryption check box.
-
Click Generate Key.
The Encryption item updates and displays the generated key.
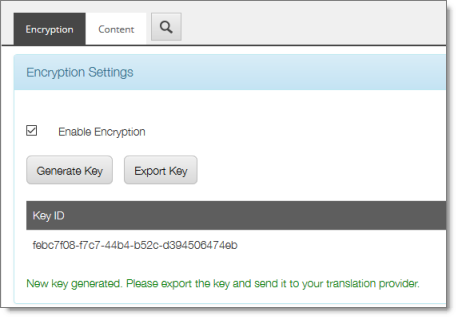
- Click Export Key.
A browser dialog prompts you to open or save the key in an .xml file.
- Send the Key.xml key file to your translation provider, for example, by email.
6 - Importing Content into a Local Translation Memory (TM)
Suppose that most of your website has been translated before installing Sitecore and the Connector. You want to leverage your current translations by storing both the source and the target content in a local translation memory (TM), which is a type of database. This enables you to use the Connector’s Use Local TM feature, which helps you reduce translation costs by reducing the quantity of content that Connector sends to translation providers. With this feature, the Connector sends only new and changed content fields out for translation. To do this, it checks each field of the source version for any content changes.
Note: Importing content into a local TM overwrites any previous content that already exists there in the corresponding source and target languages.
Important: Do not use this feature in bulk, on all languages on your site. Use this feature only where:
- Source-item content and target-item content are in sync.
- The target content is fully translated.
For information about best practices, please contact Lionbridge Connector Support. For details, see How to Contact Lionbridge Connector Support.
To import content into a local translation memory (TM):
-
In the Content Editor, in the content tree, navigate to /sitecore/system/Settings/Lionbridge Settings/Import to local TM/.
-
Click the Import to local TM tab to select it.
The Import to local TM tab opens.
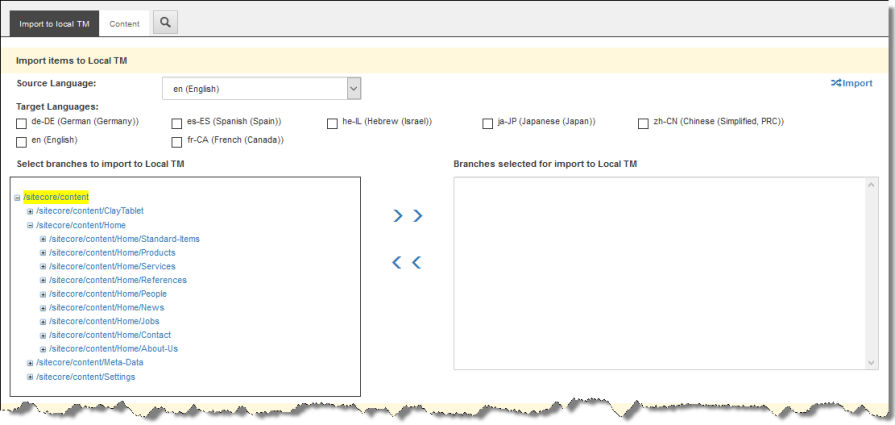
In the Import items to Local TM section, you specify the source and target languages and the content items to import into the local TM. The Connector will import the content items in the specified source and target languages into the local TM.
a. In the Source Language dropdown list, select the source language of the content items to import to the local TM.
b. Under Target Languages, select the check boxes for one or more target languages of the content items to import to the local TM.
c. Specify which branches or items to import to the local TM. By default, no branches or items are selected.
- Use the blue arrows
 to move the content items from the Select branches to import to Local TM pane to the Branches selected for import to Local TM pane.
Note: Selecting a branch also selects all items and sub-items in the branch recursively.
- Click the Expand icon
 to expand a branch.
- Click the Collapse icon
 to collapse a branch.
d. In the top-right corner, click the Import icon  .
.
- Scroll down to the Status of items to import section.

a. Click the Expand icon  next to a status to view the items being imported to the local TM. You can view content items with the following statuses:
- Pending: These content items have not been imported yet.
- In Progress: These content items are currently being imported.
- Completed: These content items have been imported.
b. To update the displayed import status of the content items, in the top-right corner, click the Refresh icon  .
.
7 - Configuring the Connector to Run in a Clustered Environment
Note: This section applies only to multi CM architecture, follow Sitecore setup recommendation.
In a clustered environment of multiple load-balanced Sitecore servers, all servers can provide the Connector’s user-interface features. However, only one server can send and receive translation jobs. This server is the primary server. You can specify which Sitecore server is the primary server.
InstanceName Assign unique instance names to each Sitecore server in the cluster to identify them and select one of the instance by typeing their InstanceName into Primary Server Host Name or IP.
Notes: In a single-server environment with one Sitecore server, this setting is not relevant, so do not configure it. You only need to configure this setting on one Sitecore server in the cluster, because it is shared with the other servers.
-
On any Sitecore server in the cluster, in the Content Editor, in the content tree, navigate to /sitecore/system/Settings/Lionbridge Settings/Lionbridge Connector Settings/.
-
Click the Lionbridge Connector Settings item to select it and open it in the content area.
-
Scroll down to the Cluster section and expand it.

Tip: Select the Auto Update check box. This automatically populates the Primary Server Host Name or IP field with the name of the first server that acts as the primary server.
- If you did not already select the Auto Update check box, as described in the previous tip, you can specify one or more of the following options:
| Option |
Description |
| Primary Server Host Name or IP |
Enter the InstanceName, host name or IP address of the primary server. If you leave this blank, and you click the Auto Update check box, described below, then this field auto-populates with the name of the first server that acts as the primary server. |
| Primary Server Host Name Exception |
If your Sitecore cluster is running under Kubernetes, please type a distinctive word, contained within the instances names, which are not to be the primary instance on each node. For example: If you differenciate primary from secondary instances by the last ones names containing the word “secondary”, then we can exclude this ones by typing the word “secondary” under this field. |
| Expires |
Do not modify this value. This field is for internal use only. |
| Auto Update |
Select this check box to automatically populate the Primary Server Host Name or IP field with the name of the first server that acts as the primary server. By default, this check box is cleared. |
| Auto Update Timeout Minutes |
This determines the interval, in minutes, for the secondary server in the cluster to take over from the primary server if the primary server shuts down or otherwise fails. The default value is 5 minutes. |
- Click the Save button
 in the top-left corner to save your changes.
8 - Configuring Network Settings for a Firewall
Optional step. If you have a firewall, you must configure your ports so that the Connector can communicate with the Content API Platform. The Connector must be able to communicate with the Content API Platform by initiating the following outbound network connections:
9 - Configuring Global Translation Settings
The Connector’s global translation settings determine how the Connector sends out all translation jobs. These translation settings are in the following locations:
- the following configuration file: Website_root/Website/App_Config/Include/CT3Translation.config
- configuration settings in the Content Editor in: /sitecore/System/Settings/Lionbridge Settings/Lionbridge Connector Settings
You can perform the following configuration steps:
9.1 - Logging Settings
You can configure logging settings in either the Sitecore user interface or the Website_root/
Website/App_Config/Include/CT3Translation.config configuration file.
The configuration in the Sitecore user interface overrides that in the configuration file.
There are multiple places to configure settings for the Bulk Translation wizard:
| Setting |
Where to Configure |
For Details, See… |
| The location of the log files. |
the Website_root/
Website/App_Config/
Include/
CT3Translation.config configuration file |
Configuring Logging Settings in the Configuration File |
The minimum logging level written to the log files.
Note: If this is configured in both locations, then the setting in the Sitecore user interface overrides the setting in the configuration file. If this is not configured in the Sitecore user interface, then the Connector uses the value specified in the CT3Translation.config file. |
the Sitecore user interface |
Configuring Logging Settings in Sitecore |
the Website_root/
Website/App_Config/
Include/
CT3Translation.config configuration file |
Configuring Logging Settings in the Configuration File |
|
9.1.1 - Configuring Logging Settings in the Configuration File
You configure the Connector’s logging settings by modifying the following configuration file: Website_root/Website/App_Config/Include/CT3Translation.config. You can specify the following settings:
| Setting Name |
Description |
Supported Values |
Default Value |
ClayTablet.
LogFolder |
By default, the Connector logs are in the same folder as the Sitecore logs. This enables you to use the Sitecore Log Viewer tool to view Connector logs as well. Connector log files use the following file-name format: log.CTTLOG.yyyymmdd.txt. |
a path |
$(dataFolder
/Logs/ |
ClayTablet.
LogLevel |
The minimum logging level written to the log files.
Note: This setting can be overridden by the Logging Level setting specified in the Sitecore user interface, which is described in Configuring Logging Settings in Sitecore. |
From the highest to lowest log level:
* DEBUG
* Diagnose
* ERROR
* INFO
* Warn |
INFO |
9.1.2 - Configuring Logging Settings in Sitecore
In the Sitecore user interface, you can specify the minimum logging level written to the log files.
Note: This setting overrides the ClayTablet.LogLevel setting specified in the Website_root/Website/App_Config/Include/CT3Translation.config file, which is described in Configuring Logging Settings in the Configuration File.
-
In the Content Editor, in the content tree, navigate to /sitecore/system/Settings/Lionbridge Settings/Lionbridge Connector Settings/.
-
Click the Lionbridge Connector Settings item to select it and open it in the content area.
-
Scroll down to the Logging section.

- Specify the following option:
| Option |
Description |
| Logging Level |
The minimum logging level written to the log files. Select one of the values below from the dropdown list. They are listed from the highest to lowest log level:
* DEBUG
* Diagnose
* ERROR
* INFO
* Warn |
- Click the Save button
 in the top-left corner to save your changes. This change takes effect immediately.
9.2 - Translation Queue
You can specify settings for the Translation Queue.
-
In the Content Editor, in the content tree, navigate to /sitecore/system/Settings/Lionbridge Settings/Lionbridge Connector Settings/.
-
Click the Lionbridge Connector Settings item to select it and open it in the content area.
-
Scroll down to the Translation Queue section.

- Specify the following option:
| Option |
Description |
| Only keep latest source versions in Translation Queue |
You can configure the Connector to keep only the latest source version of a content item in the Translation Queue when the same source item has been added to the queue for translation into the same target languages multiple times. This means that the Connector automatically removes duplicate copies of the source content items from the queue, so that only the newest version remains.- To automatically keep only the latest source version of a content item in the Translation Queue, select this check box.
- To keep all source versions of a content item in the Translation Queue, clear this check box (default setting). The Translation Queue contains all the versions of the source content item that were explicitly added. This is useful when you do not want to translate the latest version of a content item.
|
- Click the Save button
 in the top-left corner to save your changes.
9.3 - Bulk Translation
There are multiple places to configure settings for the Bulk Translation wizard:
| Setting |
Where to Configure |
For Details, See… |
* the default value of the Use Local TM check box in the Advanced Translation Options section of the Translation Options page in the wizard
* which target languages to display in the **Settings** page
* the default value of the **Send Dependent Items** check box in the **Choose Items** page of the wizard
* whether to collect Sitecore items in specific templates, including item buckets, to send out for translation
* the sort order of languages in all user interfaces when sending out content items for translation |
the Sitecore user interface |
Configuring Bulk Translation Settings in Sitecore |
| all other settings |
the Website_root/
Website/App_Config/
Include/
CT3Translation.config configuration file |
Configuring Bulk Translation Settings in the Configuration File |
Note: You can also create an extension to modify the behavior of the Send Dependent Items check box in the Choose Items page of the wizard. For details, see Configuring the Behavior of the Send Dependent Items Check Box.
9.3.1 - Configuring Bulk Translation Settings in the Configuration File
You can specify the following settings in the Website_root/Website/App_Config/Include/CT3Translation.config configuration file:
| Setting Name |
Description |
Supported Values |
Default Value |
ClayTablet.Bulk
Translation
RootID |
This sets the /Sitecore/content directory (ID: {0242E282-E7B0-4C57-98D1-B63F0C4F2F76}) as the default root from which the Connector collects items for translation for the Bulk Translation feature. This feature collects large batches of content from the site tree for bulk export. If you want content from only one site to be translated, then you must change the value of this item’s ID to that path. For example if you want to translate items only from Sitecore/Content/home/site1/, then you must change the value of this item’s ID to Sitecore/Content/home/site1/.
Note: There can be only one root directory. |
either the default ID or a path |
{0DE95AE4-41AB-4D01-9EB0-67441B7C2450} |
ClayTablet.
Maximum
ItemsInOne
TranslationFile |
This setting determines the maximum number of Sitecore items to pack into a single file for translation. You can adjust the number to better suit your translation requirements.
Recommendation: Discuss this with your translation provider. |
an integer |
100 |
ClayTablet.
PreventSenting
ItemsWithout
Workflow |
When using the Bulk Translation wizard, determines whether or not the Connector sends out items for translation that are not assigned to a workflow.
* If you set this value to True, then when using the Bulk Translation wizard to send out content for translation, the Connector does not send out items not assigned to a workflow.
* If you set this value to False, then using the Bulk Translation wizard sends out all selected items for translation, even if they are not assigned to a workflow.
**Warning:** This creates a target version with source language content, which becomes publishable immediately. |
* True
* False |
* True for new Connector
installations
* False for upgraded Connector installations |
ClayTablet.State
ToAssignInBulk
Translation |
Determine the default translation workflow displayed in Workflow Option: applied to all items selected > With state dropdown list in the Translation Options page of the Bulk Translation wizard. This is the default workflow to assign to source items without a workflow when sending them out for translation from the wizard.
Note: For backwards compatibility with the Connector versions 4.0.8 and lower, the configured value can be either a workflow state or a workflow. If the configured value is a workflow state, it specifies the workflow that the state belongs to. |
a workflow or a workflow state |
4B7E2DA9-DE43-4C83-88C3-02F042031D04 |
9.3.2 - Configuring Bulk Translation Settings in Sitecore
You can specify some settings for the Bulk Translation wizard in the Sitecore user interface.
Note: Some of the settings in this section are also relevant to other methods of sending content for translation.
-
In the Content Editor, in the content tree, navigate to /sitecore/system/Settings/Lionbridge Settings/Lionbridge Connector Settings/.
-
Click the Lionbridge Connector Settings item to select it and open it in the content area.
-
Scroll down to the Bulk Translation section.
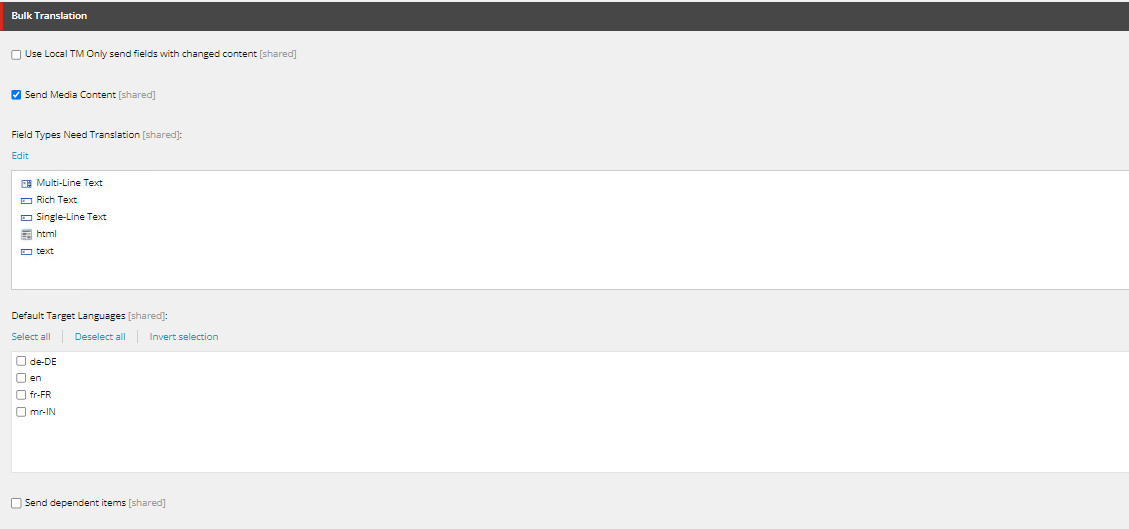
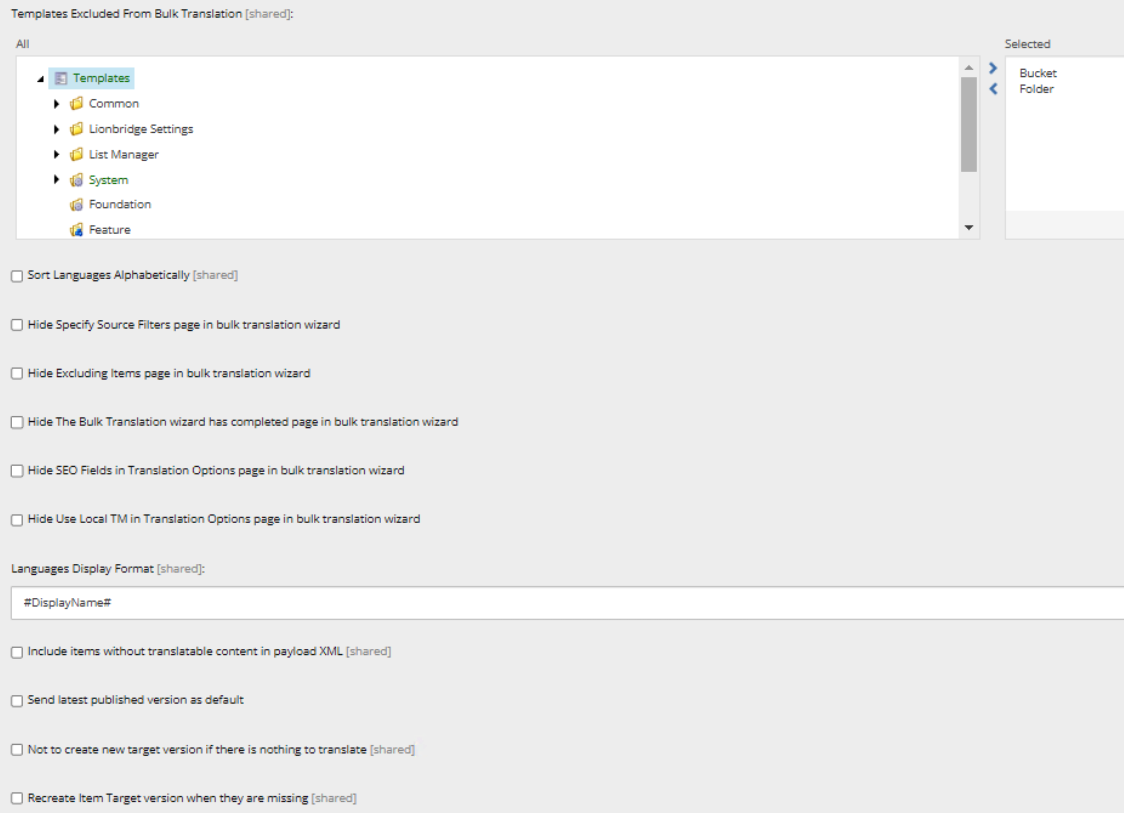
- Specify one or more of the following options:
| Option |
Description |
| Use Local TM Only send fields with changed content |
Select or clear this check box to specify the default value of the Use Local TM check box in the Advanced Translation Options section of the Translation Options page in the wizard. For a detailed explanation of this option, refer to “Sending Multiple Content Items for Translation” in the Lionbridge Connector for Sitecore User Guide. |
| Send Media Content |
Select or clear this check box to allow or prevent sending binary files of any file type for translation. |
| Field Types Need Translation |
Determines which types of fields the Connector can send out for translation when it sends an item for translation. This is relevant for all templates. If you create a custom field type, you must add it to this list so that you can send it out for translation.
Note: You cannot set Shared Fields to be sent out for translation, because these fields are shared across all versions and languages of an item.
To change these fields:- Click the Edit button above the list.
- In the dialog box that opens, select the field types to add, and use the blue arrow
 to copy them to the Selected column. When you are done, click OK. to copy them to the Selected column. When you are done, click OK.
Tip: You can use the Shift key to select multiple adjacent field types.
By default, the Connector sends out fields of the following field types for translation: - text
- Rich Text
- html
- Single-Line Text
- Multi-Line Text
|
| Default Target Languages |
In this section, you can select which target languages to select by default in the Settings page of the wizard by selecting the corresponding check boxes. If you do not select any target languages, then all the check boxes for the target languages are blank. |
| Send dependent items |
Select or clear this check box to specify the default value of the Send Dependent Items check box in the Choose Items page of the wizard.
Note: This also specifies the default value of the Send Dependent Items check box in the Automatic Item Export for Translation dialog box. |
| Templates Excluded from Bulk Translation |
Use the arrows to move items to exclude to the Selected list. This instructs the wizard to exclude Sitecore items with the corresponding templates when it collects items for translation. By default, Bucket and Folder are selected, so that the wizard excludes item buckets and folders from items that it collects to send out for translation. |
| Sort Languages Alphabetically |
You can specify the sort order of languages displayed in all user interfaces when sending out content items for translation.- To sort languages alphabetically, select this check box.
- To sort languages in the order specified in
sitecore/System/Languages, clear this check box (default setting).
|
| Hide Specify Source Filters page in bulk translation wizard |
You can configure the Connector to hide the Specify Source Filters page of the Bulk Translation wizard for all users.- To hide this page, select this check box.
- To display this page, clear this check box (default setting).
|
| Hide Excluding Items page in bulk translation wizard |
You can configure the Connector to hide the Excluding Item(s) page of the Bulk Translation wizard for all users.- To hide this page, select this check box.
- To display this page, clear this check box (default setting).
|
| Hide Excluding Items page in bulk translation wizard |
You can configure the Connector to hide the final page of the Bulk Translation wizard for all users.- To hide this page, select this check box.
- To display this page, clear this check box (default setting).
|
| Hide SEO Fields in Translation Options page in bulk translation wizard |
You can configure the Connector to hide the SEO Fields section in the Translation Options page of the Bulk Translation wizard for all users.- To hide this section, select this check box.
- To display this section, clear this check box (default setting).
|
| Hide Use Local TM in Translation Options page in bulk translation wizard |
You can configure the Connector to hide the Use Local TM check box in the Translation Options page of the Bulk Translation wizard for all users. - To hide the Use Local TM check box, select this check box.
- To display the Use Local TM check box, clear this check box (default setting).
|
| Languages Display Format |
You can configure how the Connector displays languages in the user interfaces for sending out content for translation. You can use any language item’s field name as a string. You can view these fields in sitecore/System/Languages/<individual language>.
Type a # at the beginning and end of the string, for example:- #DisplayName#, which can display French (Canada) | français(Canada). This is the default setting.
- #Name#, which can display
fr. #iso#, which can display fr-CA.
You can include a combination of multiple fields, for example #DisplayName# - #iso#. |
| Include items without translatable content in payload XML [shared] |
You can configure the Connector to include content items without any translatable content in the XML payload files. This facilitates translators and reviewers performing in-context review (ICR) of all items submitted for translation. Since these content items do not have any translatable content, the corresponding XML files do not contain any FieldContent tags, which are the tags that identify content for translation.- To include content items without any translatable content in the XML payload files, select this check box.
- To exclude content items without any translatable content from the XML payload files, clear this check box (default setting).
|
| Send latest published version as default |
You can configure the Connector to display Send the latest published version as the default value in the Item version filter dropdown list in the Specify Source Filters page of the Bulk Translation wizard.- To display Send the latest published version as the default value in the Item version filter dropdown list, select this check box.
- To display Send only the latest version as the default value in the Item version filter dropdown list, clear this check box (default setting).
|
| Not to create new target version if there is nothing to translate |
You can configure the Connector not to create a new target item version if there is nothing to translate in the source Item. If this option is not selected then the Connector creates a new target version item even when there are no words to translate. By default this setting is not selected or enabled. |
| Recreate item target version when they are missing |
This option allows you to recreate a deleted target item if it is currently in translation. By default this setting is not selected or enabled. |
- Click the Save button
 in the top-left corner to save your changes.
9.4 - Email Notifications
There are multiple places to configure email-notification settings:
| Setting |
Where to Configure |
For Details, See… |
| The default amount of time, in hours, that a job is stuck, and it fails to reach 10% (In Translation) status. After this interval, the Connector automatically sends an email notification that the job is stuck. |
the Sitecore user interface, specifically /sitecore/system/Settings/Lionbridge Settings/Lionbridge Connector Settings/ |
Configuring Email Notifications in Sitecore |
| All other settings. |
the Website_root/
Website/App_Config/
Include/
CT3Translation.config configuration file |
Configuring Email Notifications in the Configuration File |
| Settings for a team profile. |
the Sitecore user interface, specifically /sitecore/System/Settings/Lionbridge Settings/Team Profiles/ |
Configuring Team Profiles |
9.4.1 - Configuring Email Notifications in the Configuration File
You can specify the following settings in the Website_root/Website/App_Config/Include/CT3Translation.config configuration file:
| Setting Name |
Description |
Supported Values |
Default Value |
ClayTablet.
Email
Notification.
SendEmail |
Determines whether or not the Connector sends email notifications when it sends items out for translation or it receives translated items back from translation.
* To receive email notifications, keep this setting as True.
* To prevent receiving email notifications, change this setting to False. |
* True
* False |
False |
ClayTablet.
Email
Notification.
WaitMinutes |
The Connector does not send a separate email notification for each item sent for translation. This setting determines the interval, in minutes, that the Connector waits to send one notification email. That email contains information about all the items that were sent for translation since the previous notification. |
integer |
4 |
ClayTablet.
LOCAL.
SMTP.
Server |
The IP address of the local SMTP service that sends notification emails. |
an IP address |
127.0.0.1 |
ClayTablet.
LOCAL.
SMTP.Port |
The port number of the local SMTP service that sends notification emails. Relevant only if the value of the ClayTablet.EmailNotification.
SmtpService setting, described above, is LocalSmtp. |
a port number |
25 |
ClayTablet.
LOCAL.
SMTP.
EnableSSL |
Determines whether the SMTP server uses SSL. |
* True
* False |
False |
ClayTablet.
LOCAL.
SMTP.
From
Address |
The “From” email address that the local SMTP service uses to send notification emails. Relevant only if the value of the ClayTablet.EmailNotification.
SmtpService setting, described above, is LocalSmtp. |
an email address |
CttNotification
@Clay-Tablet.com |
ClayTablet.
LOCAL.
SMTP.User |
The username for authentication for the SMTP server, if required.
Note: To use SMTP authentication, uncomment this section. |
username |
blank |
ClayTablet.
LOCAL.
SMTP.
Password |
The password for authentication for the SMTP server, if required.
Note: To use SMTP authentication, uncomment this section. |
password |
blank |
ClayTablet.
Email
Notification.
NotifySent
Out |
Determines whether or not the Connector sends email notifications when it sends items out for translation.
* To receive email notifications, keep this setting as True.
**Note:** You must also set the ClayTablet.
EmailNotification.SendEmail setting, described above, to True.
* To prevent receiving email notifications, change this setting to False. |
* True
* False |
True |
ClayTablet.
Email
Notification.
NotifySent
Out.
Users.Role
Name |
The Connector sends email notifications when it sends items out for translation to all users that have been added to this role.
This role is installed by default. You must add users to this role, or change the role name and this setting to fit your requirements. For information about roles, see Configuring Connector Roles and Adding Users. |
a role name |
sitecore\
Translation ItemSent
Notification Receiver |
ClayTablet.
Email
Notification.
Notify
Completed |
Determines whether or not the Connector sends email notifications when it receives translated items back from translation.
* To receive email notifications, keep this setting as True.
**Note:** You must also set the ClayTablet.EmailNotification.
SendEmail setting, described above, to True.
* To prevent receiving email notifications, change this setting to False. |
* True
* False |
True |
ClayTablet.
Email
Notification.
Notify
Completed.
Users.
RoleName |
The Connector sends email notifications when it receives translated items back from translation to all users that have been added to this role.
This role is installed by default. You must add users to this role, or change the role name and this setting to fit your requirements. For information about roles, see Configuring Connector Roles and Adding Users. |
a role name |
sitecore\
Translation ItemCompleted
Notification Receiver |
ClayTablet.
Email
Notification.
NotifyErrors |
Determines whether or not the Connector sends notification emails when an error occurs related to a translation job. |
* True
* False |
True |
ClayTablet.
Email
Notification.
Notify
Errors.
Users.
RoleName |
Sitecore users assigned to this role will receive notification emails. You can change the role name to fit your business, or you can add users to this default role. |
|
Translation Administrator (installed by the Connector) |
9.4.2 - Configuring Email Notifications in Sitecore
You can specify an email-notification setting in the Sitecore user interface.
-
In the Content Editor, in the content tree, navigate to /sitecore/system/Settings/Lionbridge Settings/Lionbridge Connector Settings/.
-
Click the Lionbridge Connector Settings item to select it and open it in the content area.
-
Scroll down to the Notification section.

- Specify the following option:
| Option |
Description |
| Delay Threshold Hours |
Enter the number of hours after which sending out a translation job is considered “stuck.” If a job is still not at 10% (In Translation) status after this interval, the Connector sends out an email notification. |
- Click the Save button
 in the top-left corner to save your changes.
9.5 - Platform
You can configure the Connector’s setting for the Content API Platform by modifying the following configuration file: Website_root/Website/App_Config/Include/CT3Translation.config. You can specify the following setting:
| Setting Name |
Description |
Supported Values |
Default Value |
ClayTablet.
HeartBeat
Interval
InMinutes |
Determines how frequently, in minutes, the Connector sends a heartbeat message to the Clay Tablet Platform that enables the Platform to monitor the health of the Connector. To disable the heartbeat, set this to zero (0). |
integer |
30 |
9.6 - SEO Fields
Your Sitecore items may contain fields specially designed for search engine optimization (SEO), which require special treatment in translation. You can specify which fields are considered SEO fields, so that you can send out those fields separately for translation. You can limit these fields to specific templates, or you can specify fields that are relevant to all templates. You can also specify how the fields are identified in the XML translation files that the Connector sends to your translation provider, to facilitate proper handling by the translators.
When sending out content for translation, the user can indicate whether to include only SEO fields, or only standard fields, or both. For detailed instructions, refer to the Lionbridge Connector for Sitecore User Guide.
-
In the Content Editor, in the content tree, navigate to /sitecore/system/Settings/Lionbridge Settings/Lionbridge Connector Settings/.
-
Click the Lionbridge Connector Settings item to select it and open it in the content area.
-
Scroll down to the SEO Fields section.
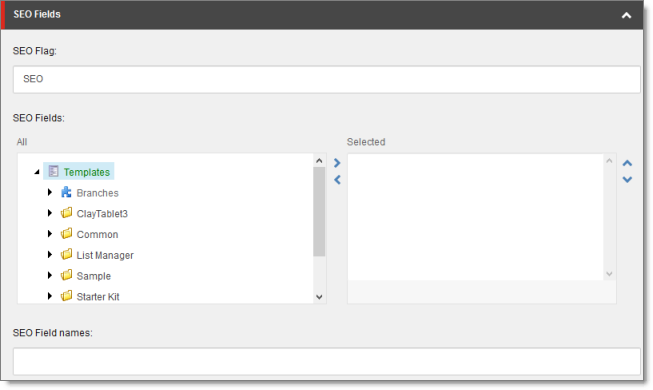
- Specify the following options:
| Option |
Description |
| SEO Flag |
Optional. You can specify a custom value for the SEO_Flag attribute, which identifies SEO fields for translation. By default, the Connector specifies the SEO value for the SEO_Flag attribute tag in any standard fields you specify as SEO fields, in the SEO Fields section and/or SEO Field Names field, described below. The SEO_Flag attribute is displayed in the XML files that the Connector sends to your translation provider.
* For example, a standard field is displayed as:
<FieldContent FieldName=“Title”>…</FieldContent>
* For example, an SEO field is displayed as:
<FieldContent FieldName=“Title” SEO_Flag=“SEO”>…</FieldContent>
This setting changes the value of the SEO_Flag attribute for the SEO fields. For example, if you configure this as Metadata, then your SEO field is displayed as:
<FieldContent FieldName=“Title” SEO_Flag=“Metadata”>…</FieldContent>
This may be useful if your translation provider is looking for a particular attribute value to identify SEO fields or other metadata for translation.
**Note:** If you modify the value in this field so that it is blank, you configure the value for the SEO_Flag attribute to be empty. In this scenario, the Connector does not add the SEO_Flag attribute to SEO fields, and they are displayed exactly like standard fields. |
| SEO Fields |
Use the arrows to move fields in a specific template to the Selected list. This marks those fields as SEO fields for translation. These fields are identified in the XML translation files with the SEO_Flag attribute, which has a default value of SEO. However you can specify a custom value for this attribute in the SEO Flag field, as described above. |
| SEO Field Names |
Enter the comma-separated (,) names of fields to mark as SEO fields for translation. The Connector marks these fields as SEO fields for translation in all templates.These fields are identified in the XML translation files with the SEO_Flag attribute, which has a default value of SEO. However you can specify a custom value for this attribute in the SEO Flag field, as described above. |
- Click the Save button
 in the top-left corner to save your changes.
9.7 - Target Data
You configure the Connector’s settings for target translation data by modifying the following configuration file: Website_root/Website/App_Config/Include/CT3Translation.config. You can specify the following settings:
| Setting Name |
Description |
Supported Values |
Default Value |
ClayTablet.
OnlyKeep
Translation
DataFrom
Latest
Version |
Determines whether the Connector keeps translation data only for the latest version of a content item.
* To keep translation data only for the latest version of a content item, keep this setting as True.
* To keep translation data for all versions of a content item, change this setting to False. |
* True
* False |
True |
ClayTablet.
Target
Translation
KeepAll
Data |
When the Connector sends out content for translation, this setting determines which field values it copies to the target location.
* To copy the field values from the previous version (if it exists) of the target items to the target location, change this setting to True.
* To copy the field values from source items to the target location, keep this setting as False.
**Note:** You specify the setting for copying the values of non-translatable fields separately, in the TargetTranslationKeepNot
TranslatableData setting, as described below. |
* True
* False |
False |
ClayTablet.
Target
Translation
KeepNot
Translatable
Data |
When the setting of TargetTranslationKeepAllData, described above is False, then when the Connector sends out content for translation, this setting determines which values of non-translatable fields it copies to the target location.
* To copy the values of non-translatable fields from the previous version (if it exists) of the target items to the target location, change this setting to True.
* To copy the values of non-translatable fields from source items to the target location, keep this setting as False. |
* True
* False |
False |
ClayTablet.
Sitecore.
Update
Latest
Existing
Target
Version |
Supports configuring which version of a target item to update when sending out a translation job.
* To update the latest version of a target item when sending out a translation job, change this setting to true.
* To create a new version of a target item when sending out a translation job, keep this default setting of false. |
* true
* false |
false |
9.8 - Translation Settings
There are multiple places to configure translation settings:
9.8.1 - Configuring Translation Settings in the Configuration File
You configure the Connector’s translation settings by modifying the following configuration file: Website_root/Website/App_Config/Include/CT3Translation.config. You can specify the following settings:
| Setting Name |
Description |
Supported Values |
Default Value |
ClayTablet.
Project
Identifier |
This creates the prefix for identifying the client in translation projects. For example, if the “ABC” client sets this to ABC and sends out the marketing_post_Aug08 item for translation, the name of the translation project is ABC_marketing_post_Aug08.
Note: Relevant only when Lionbridge Freeway is the translation provider. |
a text string |
ClientName |
ClayTablet.
PackedFile
Format |
The Connector can export Sitecore content (field content) in two different formats: XML and HTML. XML is the default format, which is acceptable to most translation providers. If your translation provider has difficulties handling XML files and can handle only HTML files, then you can change this setting to HTML. |
either XML or HTML |
XML |
ClayTablet.
Translate
Common
FolderItem |
Determines whether or not the Connector sends out for translation content items that are based on a common-folder template, located in: Templates/Common/Folder. This determines whether the Connector sends out the folder’s fields, including the folder name, for translation. |
* True
* False |
False |
ClayTablet.
Preview
URL |
Determines whether or not to include a preview URL in the XML file, which enables translators and reviewers to preview the content. You can include the following parameters in the preview:
* {id}: Sitecore item ID of the translated item.
* {version}: The source version of the translated item.
* {lang}: The source language of the translated item.
* {targetversion}: The target version created as result of the translation.
* {targetlang}: The target language for the translation.
* {jobid}: The Connector translation job ID.
**Note:** You must replace & with &. Otherwise the configuration file will not be valid XML, for example: <setting name=“ClayTablet.PreviewURL” value=“http://www.yourcompany.com/ preview?id={id}&language={lang}&version={version}&jobid={jobid}” />
**Note:** To configure this setting, uncomment this section. |
|
|
ClayTablet.
SendJob
Metadata |
Determines the format for sending job metadata.
* To send job metadata in a format compatible with the Connector for Sitecore version 3.6 or higher, set this value to True.
* To send job metadata in a format compatible with the Connector for Sitecore version 3.5 or lower, set this value to False. |
* True
* False |
* True for new Connector installations
* False for upgraded Connector installations |
ClayTablet.
Remove
Control
Characters |
Some translation providers and translation management systems may not be able to handle control characters, such as 0X10 and 0X13. They may treat an XML file with these characters as invalid. This option instructs the Connector to automatically remove all control (non-printing) characters (0x00-0x1F) from an XML file before sending it out for translation.
* To automatically remove all control (non-printing) characters from an XML file before sending it out for translation, change this setting to True.
* To keep all control characters in an XML file sent out for translation, keep this default setting of False. |
* True
* False |
False |
ClayTablet.
Translate
Display
Name |
Supports sending out an item’s display name for translation. |
* true
* false |
false |
ClayTablet.
Sitecore.
Preserve
Temporary
Files |
Supports saving the temporary, generated files in the following scenarios:
* The Connector sends out files for translation (source folder).
* The Connector sends out files for TM update.
* The Connector receives translated files from the Platform (target folder).
Usually the Connector deletes these temporary files when it finishes processing them. However, they are useful for debugging and general troubleshooting. |
* true
* false |
false |
ClayTablet.
CheckItems
InTranslation |
Determines whether the Connector checks that items in a new translation job were not previously sent out in another job that is currently in progress. The default value of this new setting is true, which maintains the previous behavior. |
* true
* false |
true |
9.8.2 - Configuring Translation Settings in Sitecore
You can specify a translation setting in the Sitecore user interface.
- In the Content Editor, in the content tree, navigate to the /sitecore/system/Settings/Lionbridge Settings/Lionbridge Connector Settings/Advanced Settings item.
Tip: Scroll down to the bottom of the Settings folder to locate the Lionbridge Settings sub-folder.
-
Click the Advanced Settings item in the folder to open it in the content area.
-
Locate the Standard fields to copy to target item section.
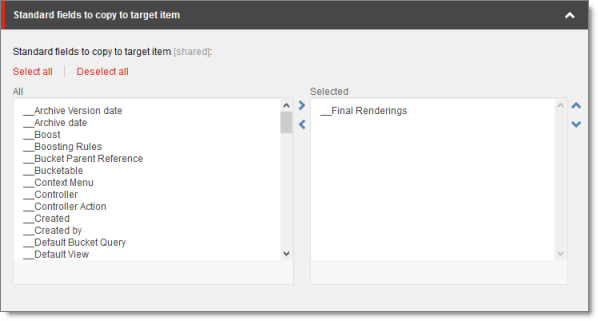
- If there are standard fields to copy to target items, select them in the All list and user the arrow to move them to the Selected list.
Note: The standard fields are usually shared and therefore identical in all versions. Therefore, they are not usually copied or sent for translation.
- Click the Save button
 in the top-left corner to save your changes.
9.9 - Update-TM Settings
You can specify an Update-TM (translation memory) setting in the Sitecore user interface.
-
In the Content Editor, in the content tree, navigate to /sitecore/system/Settings/Lionbridge Settings/Lionbridge Connector Settings/.
-
Click the Lionbridge Connector Settings item to select it and open it in the content area.
-
Scroll down to the Update TM section.

- Specify the following option:
| Option |
Description |
| Always Update TM using latest target version |
This determines which target version the Connector uses to send to update a remote TM (translation memory) server.- If this check box is cleared (default value), then the Connector always sends the target version that is the translation to the remote TM server. If the target version was edited post translation, then the Connector sends the version from the translation provider to the remote TM server.
- If this check box is selected, then the Connector always sends the latest available target version to the remote TM server. If the target version was edited post translation, then the Connector sends this update of the translation to the remote TM server.
|
- Click the Save button
 in the top-left corner to save your changes.
9.10 - Job Metadata Settings
You can which, if any, user information the Connector includes as job metadata when it sends out jobs for translation. You can configure the Connector to include the following job metadata:
- the name of the logged-in Sitecore user who creates the translation job
- the email address of the logged-in Sitecore user who creates the translation job
By default, the Connector does not include either the name or the email address of the logged-in Sitecore user who creates the translation job. However, you can configure the Connector to include either or both of these.
Tip: Including the name and email address in the job metadata facilitates communication with the translation provider.
-
In the Content Editor, in the content tree, navigate to /sitecore/system/Settings/Lionbridge Settings/Lionbridge Connector Settings/.
-
Click the Lionbridge Connector Settings item to select it and open it in the content area.
-
Scroll down to the Job metadata section.

- Specify the following option:
| Option |
Description |
| Send out email of job creator |
This determines whether the email address of the Sitecore user is included in the job metadata that the Connector sends to the translation provider. This feature supports the EU’s General Data Protection Regulation.
* If this check box is cleared (default value), then the Connector does not include the user’s email address in the job metadata.
* If this check box is selected, then the Connector includes the logged-in Sitecore user’s email address as job metadata. |
| Send out job creator |
This determines whether the username of the Sitecore user is included in the job metadata that the Connector sends to the translation provider. This feature supports the EU’s General Data Protection Regulation.
* If this check box is cleared (default value), then the Connector does not include the username of the logged-in Sitecore user as job metadata.
* If this check box is selected, then the Connector includes the username of the logged-in Sitecore user as job metadata. |
- Click the Save button
 in the top-left corner to save your changes.
9.11 - Sitecore User for Connector Background Processes
You can specify the Sitecore user that the Connector uses to run its background processes. This user will be displayed as the user who modified an item’s target version.
Note: If you do not configure this feature, the Connector uses the Anonymous user.
- In the Content Editor, in the content tree, navigate to the /sitecore/system/Settings/Lionbridge Settings/Lionbridge Connector Settings item.
Tip: Scroll down to the bottom of the Settings folder to locate the Lionbridge Settings sub-folder.
-
Click the Lionbridge Connector Settings item in the folder to select it and open it in the content area.
-
Locate the Security - User context for services section, and click the arrow in the top-right corner to expand it.

- Click Select.
The Associated Sitecore User dialog box opens.
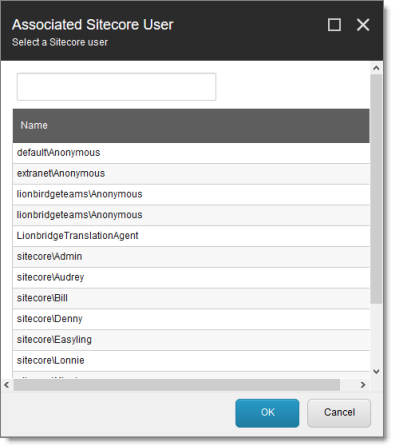
- Click to select the Sitecore user to run the Connector background processes.
Recommendation: Select the LionbridgeTranslationAgent user. This user is installed by default when installing the full Connector package.
-
Click OK to save your selection.
-
Click the Save button  in the top-left corner to save your changes.
9.12 - Send Dependent Items Check Box
There are multiple places to configure the behavior of the Send Dependent Items check box, which is displayed in:
- the Choose Items page of the Bulk Translation wizard
- the Automatic Item Export for Translation dialog box
For a description of the default behavior of this check box, see Understanding the Send Dependent Items Check Box.
9.12.1 - Configuring the Behavior of the Send Dependent Items Check Box in the Configuration File
The Send Dependent Items check box is displayed in:
- the Choose Items page of the Bulk Translation wizard
- the Automatic Item Export for Translation dialog box
By default, if the Send Dependent Items check box is selected, the Connector sends out data source items from the layout and final layout of the item itself. For a detailed illustration and scenarios of the default behavior of the Send Dependent Items check box, see Understanding the Send Dependent Items Check Box.
Alternatively, you can develop your own pipeline to determine which dependent items the Connector sends for translation when this check box is selected. You configure this pipeline in the <pipelines> section of the Website_root/Website/App_Config/Include/CT3Translation.config configuration file. If the Send Dependent Items check box is selected and the pipeline is defined, then when you run the Bulk Translation wizard:
-
The Connector calls the pipeline for each selected item.
-
On its own, the pipeline finds dependent items recursively.
Important: The pipeline overrides the default Connector behavior of sending out only data source items of the item itself. The Connector does not call the pipeline again using a dependent item as a source for recursively searching for additional dependent items.
- The Connector adds the results to the list of items to send out for translation.
To develop a pipeline:
- Insert the logic to recursively determine all dependent items of an item to send out for translation, similar to the following example:
<CustomRecursiveDependentItemsPipeline>
<!-- Insert the logic to recursively determine all dependent items of an item to send out for translation.
–>
<processor type=“Your.Class, Your.Assembly” method=“getDependentItems”/>
</CustomRecursiveDependentItemsPipeline>
- Ensure that the processor method has the following signature:
public void getDependentItems(ClayTablet.SC.Pipelines.DependentItemsPipelineArgs args);
- Use the args parameter to retrieve information about a source item. You will search for dependent items of this source:
public class DependentItemsPipelineArgs {
String ItemDatabase { get; }
String ItemId { get; }
String SourceLanguage { get; }
String SourceVersion { get; }
String[] TargetLanguages { get; }
List<String> DependentItems { get; }
}
- Insert the item IDs of all dependent items of the source item into the DependentItems that the pipeline returns.
9.12.2 - Configuring the Behavior of the Send Dependent Items Check Box in the Sitecore User Interface
The Send Dependent Items check box is displayed in:
- the Choose Items page of the Bulk Translation wizard
- the Automatic Item Export for Translation dialog box
By default, if the Send Dependent Items check box is selected, the Connector sends out data source items from the layout and final layout of the item itself. For a detailed illustration and scenarios of the default behavior of the Send Dependent Items check box, see Understanding the Send Dependent Items Check Box.
You can configure the Connector to exclude dependent content items by their paths or templates if the Send Dependent Items check box is selected.
-
In the Content Editor, in the content tree, navigate to /sitecore/system/Settings/Lionbridge Settings/Lionbridge Connector Settings/.
-
Click the Lionbridge Connector Settings item to select it and open it in the content area.
-
Scroll down to the Dependent items section.
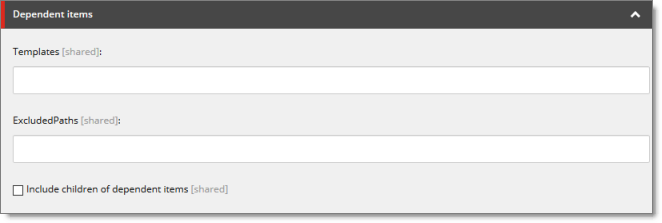
- Specify one or more of the following options:
| Option |
Description |
| Templates |
Enter the ID of each template whose content items you want to include as dependent items, if the Send Dependent Items check box is selected. Separate multiple template IDs with a pipe ( | ). If this field is blank, then all templates are included.
Tip: The template ID is located in the Item ID field of the Quick Info section of the template. |
| Excluded Paths |
Enter the paths of content items you want to exclude as dependent items, if the Send Dependent Items check box is selected. Separate multiple paths with a pipe ( | ). |
| Include children of dependent items |
Select this check box to automatically include branches under dependent items.
Note: This setting applies only to items not excluded by the Templates or Excluded Paths fields, described above. |
- Click the Save button
 in the top-left corner to save your changes.
9.12.3 - Understanding the Send Dependent Items Check Box
The Send Dependent Items check box is displayed in:
- the Choose Items page of the Bulk Translation wizard
- the Automatic Item Export for Translation dialog box
The following diagram and scenarios illustrate which data sources the Send Dependent Items check box sends to translation by default.
Note: The behavior of the Send Dependent Items check box is configurable. For detailed configuration instructions, refer to the Lionbridge Connector for Sitecore Installation and Configuration Guide.
`-- sitecore
|-- content
| `-- home
| |-- pages
| | |-- page 1 Datasource: /sitecore/content/home/partials/about us/
| | |-- page 2 Datasource: /sitecore/content/home/components/component 2
| | |-- page 3
| | `-- page 4
| |-- partials
| | |-- about us Datasource: /sitecore/content/home/components/component 2
| | | `-- more details page
| | `-- more info
| `-- components
| |-- component 1
| |-- component 2 Datasources: (empty)
| | |-- sub-component 1
| | `-- sub-component 2
| |-- component 3
| `-- component 4
`-- system
Scenario 1
When sending the single item /sitecore/content/home/pages/page 1 for translation:
- /sitecore/content/home/pages/page 1 is included as the item
- /sitecore/content/home/partials/about us is included as the dependent item
- /sitecore/content/home/components/component 2 is included as the dependent item of the dependent item
Children of about us and component 2are not included, because these are not dependent items of dependent items: rather, they are children of dependent items.
Scenario 2
When sending the single item /sitecore/content/home/pages/page 2 for translation:
- /sitecore/content/home/pages/page 2 is included as the item
- /sitecore/content/home/components/component 2 is included as the dependent item
Children of component 2are not included, because these are not dependent items of dependent items: rather, they are children of dependent items.
Scenario 3
When sending the branch /sitecore/content/home/pages for translation:
- /sitecore/content/home/pages/page 1 is included as the item
- /sitecore/content/home/partials/about us is included as the dependent item
- /sitecore/content/home/components/component 2 is included as the dependent item of the dependent item
- /sitecore/content/home/pages/page 2 is included as the item
- /sitecore/content/home/pages/page 3 is included as the item
- /sitecore/content/home/pages/page 4 is included as the item
Children of component 2are not included, because the branch of /sitecore/content/home/pages is sent for translation: the branch of component 2 is not sent for translation.
10 - Configuring the Upload and Download Scheduled Tasks
The Connector uses two Sitecore scheduled tasks:
- The Upload Schedule task uploads files for translation to the Content API Platform.
- The Download Schedule task downloads translated files from the Content API Platform.
Running these scheduled tasks has minimal impact on the performance of the Content API Platform server, because if there are no active jobs when they contact the server, they just wait until the next scheduled invocation before contacting the server again. If the network is unavailable temporarily, these tasks log error messages on each invocation.
The default polling interval for these scheduled tasks is 2 minutes.
You can configure the following aspects of these scheduled tasks:
Note: For instructions on configuring how the Upload Schedule creates translation jobs when automatically sending out items in the Translation Queue, see Using Custom Logic to Configure how the Upload Schedule Creates Jobs when Automatically Sending Out Items from the Translation Queue.
10.1 - Modifying the Polling Interval of the Scheduled Tasks
You can modify the polling interval of the Connector’s two Sitecore scheduled tasks:
- The Upload Schedule task uploads files for translation to the Content API Platform.
- The Download Schedule task downloads translated files from the Content API Platform.
The default polling interval for these scheduled tasks is 2 minutes.
Note: The Sitecore Scheduler controls all scheduled tasks, and therefore it schedules and triggers both these tasks. The polling frequency of the tasks cannot be more frequent than the Sitecore Scheduler’s own frequency, because it will not have an impact.
Recommended polling intervals for these scheduled tasks:
- Lowest = 1 minute
- Optimal = 5 minute
To change the polling interval:
- In the Content Editor, in the content tree, navigate to either:
- /sitecore/system/Tasks/Schedules/Lionbridge/Download Schedule
- /sitecore/system/Tasks/Schedules/Lionbridge/Upload Schedule
- Click the Upload Schedule or Download Schedule item to select it and open it in the content area.
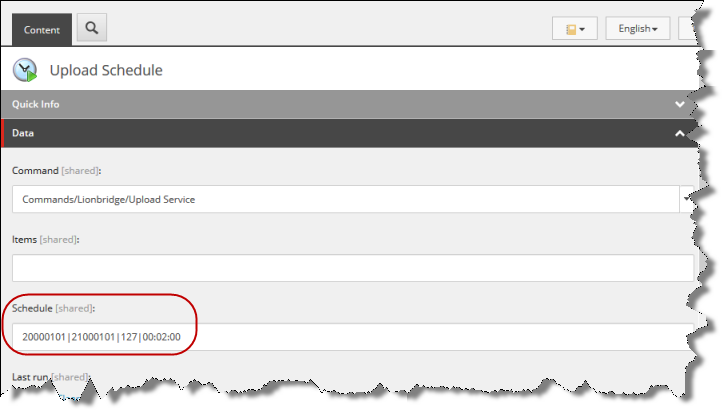
- In the Data section, modify the value in the Schedule field.
By default, the scheduled tasks poll the Content API Platform every 2 minutes, as indicated by the default value of this field: 20000101T000000|21000101T000000|127|00:02:00.
The Schedule field is a pipe-separated string that determines when the scheduled task will run:
{start timestamp}|{end timestamp}|{days to run bit pattern}|{interval}
- start timestamp and end timestamp: Determine the start and end date and time of the scheduled task, in the Sitecore ISO datetime format:
YearMonthDayTHoursMinutesSeconds
For example, 20000101T000000 represents January 1, 2000, at 00:00:00.
- days to run bit pattern: The bit pattern is a logical combination of seven bits, determining which days the task will run. Each day of the week is represented by a different bit:
- 1 represents Sunday.
- 2 represents Monday.
- 4 represents Tuesday.
- 8 represents Wednesday.
- 16 represents Thursday.
- 32 represents Friday.
- 64 represents Saturday.
For each day you want to run the scheduled task, add the value of the corresponding bit. For example:
- If you want to run the task every day, you add the bits for each day, and you enter 127.
- If you want to run the task only on Saturdays and Sundays, you add 1 and 64, and you enter 65.
- interval: Determines the interval that the scheduled task runs, in
hh:mm:ss format. For example, if you want the scheduled task to run every five minutes, you enter 00:05:00.
- Click the Save button
 in the top-left corner to save your changes.
10.2 - Configuring the Connector to Send All Items in the Queue for Translation
You can configure the Upload Schedule task, described in Configuring the Upload and Download Scheduled Tasks, so that the Connector automatically sends all items in the Translation Queue for translation.
Note: For instructions on configuring how the Upload Schedule creates translation jobs when automatically sending out items in the Translation Queue, see Using Custom Logic to Configure how the Upload Schedule Creates Jobs when Automatically Sending Out Items from the Translation Queue.
-
In the Content Editor, in the content tree, navigate to: /sitecore/system/Tasks/Schedules/Lionbridge/Upload Schedule/Upload Service Options
-
Click the Upload Service Options item to select it and open it in the content area.
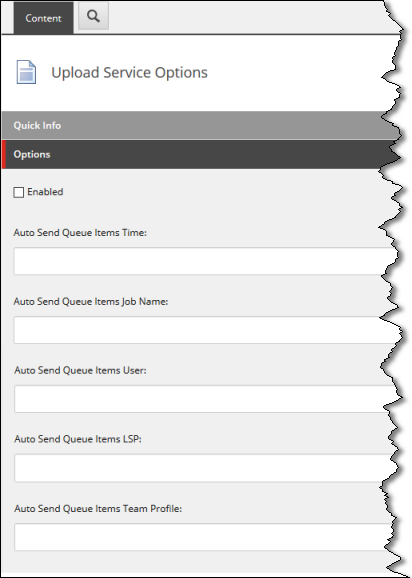
- In the Options section, you can configure one or more of the following options:
| Setting Name |
Description |
| Enabled |
Select this check box to instruct the Connector to send all content items in the Translation Queue, using the parameters configured in this section. |
| Auto Send Queue Items Time |
This field is a pipe-separated string that determines the day of the week and the time (or times) when the Connector sends the content items in the Translation Queue out for translation as a single job.
{days to run bit pattern}|{time(s)}
Note: To send out a job every day, you specify only the {time(s)} parameter, as described below. You omit the optional {days to run bit pattern} parameter and the pipe ( | ).
* days to run bit pattern: Optional. The bit pattern is a logical combination of seven bits, determining which days the Connector will send out a job from the Translation Queue. Each day of the week is represented by a different bit:
* 1 represents Sunday.
* 2 represents Monday.
* 4 represents Tuesday.
* 8 represents Wednesday.
* 16 represents Thursday.
* 32 represents Friday.
* 64 represents Saturday.
For each day you want to send out the content items in the Translation Queue as a single job, add the value of the corresponding bit. For example:
* If you want to send out a job every day, you add the bits for each day, and you enter 127.
* If you want to send out a job only on Saturdays and Sundays, you add 1 and 64, and you enter 65.
* time(s): You specify the time in the following format: hh:mm.
You can use a delimiter to specify multiple times. The following example includes only the time parameter, so it sends a new job at 6 AM and 6 PM daily: 06:00;18:00.
**Note:** For each time entry, specify the day parameter. For example, if you want to send out a job every Sunday at 14:00 and 23:00, enter: 1|14:00;1|23:00. |
| Auto Send Queue Items Job Name |
Specifies the job name.
* {d} is a placeholder for the day the job is sent.
* {t} is a placeholder for the time the job is sent. |
| Auto Send Queue Items User |
Optional. Specifies the username for sending the job. If this is not configured, the user is Anonymous. |
| Auto Send Queue Items LSP |
Optional. Specifies the translation provider where the Connector sends the job. If this is not configured, then the Connector sends the job to the default translation provider, which is the first provider configured in /sitecore/system/Settings/Lionbridge Settings/Translation Providers Configuration. |
| Auto Send Queue Items Team Profile |
Optional. Specifies the team profile for sending the job. |
- Click the Save button
 in the top-left corner to save your changes.
11 - Configuring the Sitecore Languages in the Sitecore Content Editor
The Connector uses the Regional ISO code field of the language item in Sitecore to define the Connector language codes. You must set up the correct Connector language codes for every Sitecore language your company uses for translation, both source and target languages. The Connector language codes are in the following location in the delivery package: <Delivery Package/Lionbridge Documents/CT3_LanguageCodes.txt>. These language codes are also listed in Appendix: Language Codes.
-
Log into the Sitecore Content Editor as an administrator.
-
Navigate to sitecore/System/Languages. This is where Sitecore languages are defined.
Note: If a source or target language is not defined, you must add it to Sitecore. For detailed instructions, refer to the Sitecore CMS Content Cookbook. This guide is in the documentation section available at https://doc.sitecore.net.
- For each source or target language, in the Regional Iso Code field, enter the Connector language code from the <Delivery Package/Lionbridge Documents/CT3_LanguageCodes.txt> file.
Note: The Connector includes error trapping for improperly configured language codes. If you make a mistake or forget to configure a language, when you try to send out content for translation, the language is not available for selection, and the CT Language code is misconfigured error is displayed beside the language.
11.1 - Adding Custom Language Codes to Sitecore
You can also add custom language codes into Sitecore by editing the Website/bin/CTAddedLanguageCodes.xml file. However you must also contact Connector Support and your translation provider to ensure the custom languages are set up appropriately in the Provider as well as in the Translation Management systems.
Example:
<CTLanguageCodes>
  <LanguageCode>
    <Name>Danish</Name>
    <Code>da</Code>
  </LanguageCode>
</CTLanguageCodes>
Note: If your company sends content to your translation provider via the FTP Provider on the translation side, it is not necessary to contact Connector Support, because the FTP Provider automatically creates folders based on the job name and language pairs, even for a custom language pair. However, you must inform your translation provider about the standard language code into which to translate the content.
12 - Configuring the Translation Workflow
Sitecore uses workflows to control when a content item is published. The Connector uses workflows to control the translation process for a content item.
The Connector translation package installs a sample translation workflow, which you access in the Sitecore Content Editor as an administrator by navigating to sitecore/System/Workflows/Lionbridge Sample Workflow. Although you use this workflow to manage translation, you can duplicate, modify, or extend it to support additional requirements.
For general information about workflows, refer to the appropriate version of the Sitecore CMS Content Author’s Reference and Cookbook. This guide is in the documentation section available at https://doc.sitecore.net.
The Connector supports translating Sitecore items that have been configured in the following ways:
- with the Connector Sample workflow attached
- with a custom workflow that includes the Connector configuration section and the associated workflow states, which are listed and described in Connector Workflow States
- with a custom workflow that does not have the Connector configuration section (see the following notes)
- without a workflow (see the following notes)
Note: You can use the Bulk Translation feature to submit all the above types of item for translation. However, if you want to send items for translation individually, the Translate button in the Workflow section of the Review tab is displayed only for Sitecore items attached to Lionbridge Sample Workflow or to another workflow whose base template is TranslationWorkflow, as described in Using Your own Workflow for Translation.
Recommendation: Use a translation workflow that includes the basic Connector translation steps, which are implemented through workflow states. This ensures that the Connector can send out your content and retrieve it from your translation provider(s). For information on Connector workflow states, see Connector Workflow States.
To configure the following settings, navigate to sitecore/System/Workflows/Lionbridge Sample Workflow or your designated translation workflow. The settings are in the Lionbridge Translation section.
Tip: Hover over each setting for extended help text.
You use the following settings to configure a workflow and the items attached to the workflow:
Note: For instructions on attaching items to a workflow, refer to the Lionbridge Connector for Sitecore User Guide.
| Parameter |
Description |
Default Value |
| Translate From (Source Language) |
The source language from which to translate the items. Select a language from the list. |
Usually this is the Sitecore default language. |
| Translate To (Target Language) |
The target languages that are available for translating the items attached to the workflow. To translate into specific target languages, select the corresponding check boxes. |
n/a |
| Use Local TM (detect changed content and resend) |
Determines whether the Use Local TM feature is available when translating items attached to this workflow. This feature checks each field of the source version for any content changes, and it sends only changed content fields out for translation, to ensure that all target versions reflect these changes.
* When this check box is selected, you can activate this feature by selecting a check box in either the **Bulk Translation** wizard or the **Automatic Item Export for Translation** dialog box. The **Use Local TM** feature may reduce translation costs, but it needs the Connector translation backup data, and it increases the Connector processing time before the Connector sends out the items for translation.
* When this check box is cleared, you cannot activate this feature, because the related user interface is not displayed. The Connector sends all specified source content for translation, even if it has not changed since it was previously sent for translation. |
check box is cleared |
| Requested Translation Timeframe (Days) |
Determines the translation deadline when sending out the translation automatically, without using the user interface that supports entering this information in the Delivery Date field. This information is sent to the translation provider as metadata of the translation package. If you set this parameter to 14, the deadline will be two calendar weeks after you submit an item for translation.
Recommendation: Discuss whether to use this feature with your translation provider(s).
|
15 |
| Workflow State to set when Sending Content for Translation |
The workflow state to set when a source item has been selected for translation. |
/sitecore/system/
Workflows/Lionbridge Sample Workflow/
Sending for Translation |
| Workflow State to set (for Source Content) once content has been sent for translation |
The workflow state to set for a source item after the Connector has sent it out for translation. For example, in some companies, when you send out the content for translation, the source is ready for publishing. In this scenario, you can set this state to Done, which is a publishable state. Alternatively, if your company has a final review process, you can set this to another state that is not publishable. |
By default, this state is not set, so the source item’s state does not change when you send it out for translation. |
| Workflow State to set for Content while it is out for translation |
The workflow state to set for target content when an item is being translated. The default In Translation workflow state enables you to see which items are still out for translation. It facilitates following up with your translator about items that you have sent out for translation, but that you have not yet received back. |
/sitecore/system/
Workflows/Lionbridge Sample Workflow/In Translation |
| Workflow State to set when a translation has been cancelled |
The workflow state to set when an item’s translation request has been cancelled.
A user can cancel translation from the Translation Queue. A translation request is automatically cancelled if a fatal error occurs while sending out an item for translation, such as an incorrect language code, or insufficient user permissions. |
/sitecore/system/
Workflows/Lionbridge Sample Workflow/
Reviewing |
| Workflow State to set for target items when no translation is required |
The workflow state to set for all items that do not require translation. This is useful in when using the following features:
* **Copy source to target only**
* **Use local TM**
**Tip:** Set this state to Done, and select the **Automatically Publish content when it reaches the Final State** check box, described below. |
field is blank |
| Workflow State to set when content Translation is complete |
The workflow state to set when an item translation has been completed, and it is back in Sitecore for review and publishing. |
/sitecore/system/
Workflows/Lionbridge Sample Workflow/
Editing Translated Version |
| Send Content automatically using pre-configured language settings |
Enables sending all items to the Translation Queue without further user action. That is, the Connector automatically uses the Translate from, Translate to and Requested Translation Timeframe information, defined above, to immediately send content to the Translation Queue without enabling the user to change these parameters: the Language Selection pop-up window does not open.
* If this check box is selected, the **Language Selection** pop-up window does not open when you send content to the Translation Queue: you cannot select the target languages or the destination, but sending items for translation is streamlined.
* If this check box is cleared, the Language Selection pop-up window opens when you send content out for translation: you can select the target languages, so the process is less streamlined. However, this provides greater control for the user. |
check box is cleared |
| Automatically Publish content when it reaches the Final State |
Determines whether the Connector automatically publishes the content when an item reaches the final state of the translation workflow.
* If this check box is selected, the Connector automatically publishes the content when an item reaches the final state.
* If this check box is cleared, the Connector does not automatically publish the content when an item reaches the final state. |
check box is cleared |
| Publish to which Database? |
The target databases for publishing content if the Connector needs to publish an item. |
n/a |
| Publish child items? |
Determines whether the Connector publishes child items when it publishes their parent item.
* If this check box is selected, the Connector publishes child items when it publishes their parent item.
* If this check box is cleared, the Connector does not publish child items when it publishes their parent item. |
check box is selected |
| Keep final state for source items? |
Determines whether the workflow state of the source item changes during the translation process if it was in a final workflow state before that process started. When you translate published source items into other language versions, this setting prevents Sitecore from unpublishing those source items. |
check box is selected |
For a list and description of Connector workflow states, see Connector Workflow States, below.
12.1 - Connector Workflow States
The sitecore/System/Workflows/Lionbridge Sample Workflow workflow contains all required states for the Connector translation management process.
By default, it has the following seven states, which are listed, in order, below. Your company can modify this translation workflow to meet your business requirements. Your company can also create your own translation workflow, removing some of these states or adding additional states as required.
| Workflow State |
Relevant for Source Content |
Relevant for Target Content |
| Editing |
ü |
|
| Reviewing |
ü |
|
| Sending for Translation |
ü |
|
| In Translation |
|
ü |
| Editing Translated Version |
|
ü |
| Reviewing Translated Version |
|
ü |
| Done |
ü |
ü |
Note: Only content in the Done state is publishable.
Source content
A source content item can move through the workflow in several different ways, depending on the configuration, which depends on your company’s translation processes:
Example 1
Editing > Reviewing > Sending for Translation > Done
Example 2
Editing > Reviewing > Sending for Translation > Reviewing > Done
Target content
Similarly, a target content item can move through the workflow in several different ways, depending on the configuration, which depends on your company’s translation processes:
Example
In Translation > Editing Translated Version > Reviewing Translated Version > Done
Note: When the state of a target content item is In Translation, that content is a copy of the source language item. Users can use the In Translation and Editing Translated Version workflow states to keep track of which translations have returned and which are still pending.
12.2 - Using your own Workflow for Translation
The sample translation workflow, sitecore/System/Workflows/Lionbridge Sample Workflow contains all the fields that the Connector requires. It contains both translation settings and some information about states and how the workflow proceeds between states. For a detailed description of these fields, see Connector Workflow States.
There is a hierarchy of templates in Sitecore:
The sample translation workflow is actually a template for the workflow provided in the Connector. It links to its parent template in the Quick info section:
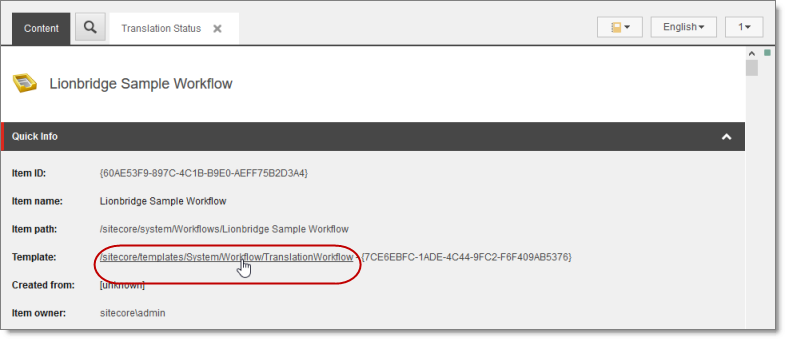
The parent of this is the /sitecore/templates/System/Workflow/TranslationWorkflow base template. If you click the link and navigate to that template, you can see its base templates:
12.3 - Modifying Controls in a Workflow
The Templates/Lionbridge Settings/Lionbridge Workflow Config/ Workflow Config template defines the controls in the Lionbridge Sample Workflow workflow.
For example:
- The Translate from leaf in the tree represents the control for defining source languages for translation.
- The Type field represents the type of user-interface control used to specify the source languages.
- The Source field defines the location where the Connector retrieves source languages in Sitecore.
View screen capture.
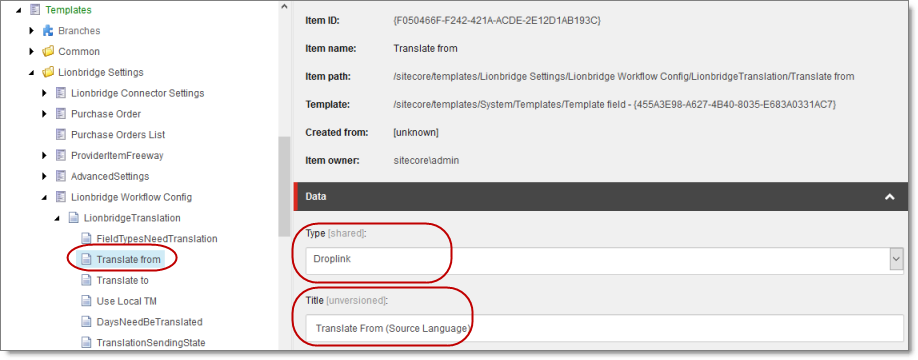
There are multiple ways to modify controls in a workflow:
- You can modify the Templates/Lionbridge Settings/Lionbridge Workflow Config template.
- You can copy the values from the Templates/Lionbridge Settings/Lionbridge Workflow Config template into your own template.
There are many ways to implement modifications:
- You can remove a control. For example, if you decide you do not need a particular field, you can remove it from Lionbridge Workflow Config, using the Builder tab. (The Content tab is the default tab.)
- You can modify a control. For example, if you want to change a control, make a copy of the Templates/Lionbridge Settings/Lionbridge Workflow Config template, and then make the modifications you want.
- You can modify your own workflow by selecting Insert > Insert from template in the context menu, selecting the Templates/Lionbridge Settings/Lionbridge Workflow Config template, and then selecting a control.
12.4 - Modifying States in a Workflow
You can modify the states in a workflow and the linkages between states, which determines the workflow.
Warning: Do not modify the values in the Data section, Type string field of states in Lionbridge Sample Workflow or in states that originate from there. Otherwise, the Connector will not work property. The values in that field are Content API Platform classes that call the Connector functionality.
You can add or remove states from the template, or modify how the linkages between states, such as which state follows another state. There are two recommended ways to do this:
- Modify states in Lionbridge Sample Workflow: In the Lionbridge Sample Workflow folder, right-click and select Insert > Insert from template in the context menu. Navigate to the Workflow/State template. All the states are based on this template. Then, after you create the state within the workflow, you create an action. For example:
- To specify the next state, in the Data section, select the next state in the Next state dropdown list.
- To specify the final state, in the Data section, select the Final check box. By default, the final state is the Publish state.
Tip: First create all the states and then link them, as described above.
- Copy a state to a new workflow: You can create a new state based on an existing state. To do this, select the state you want to want to copy. Right-click and select Copying > Copy To in the context menu. Then select the workflow where you want to copy this state, and click Copy. The copied state has the same settings as the original state.
For more information, refer to the Sitecore CMS Workflow Cookbook. This guide is available in the documentation section available at https://doc.sitecore.net.
Note: Your custom workflow must include the required translation statuses.
12.5 - Changing the Base Template of Your Workflow
To change the base template of your workflow, so that you can use it with the Connector to manage translations:
-
In the content tree, select your workflow that you want to use as a translation workflow. For example, select sitecore\System\Workflow\MyWorkflow.
-
In the ribbon, click the Configure tab.
-
In the Template section of the Configure tab, click Change.
-
In the Select the Template page of the wizard, navigate to Templates\System\Workflow\TranslationWorkflow, and click Next.
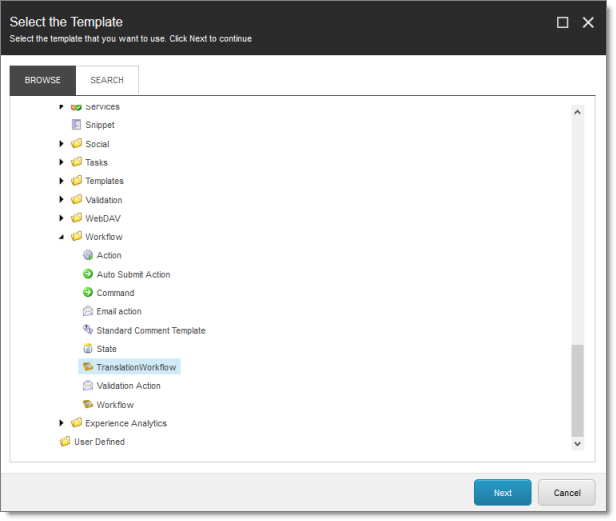
-
In the Change page of the wizard, click Next to confirm this change.
-
Click Finish.
13 - Filtering Fields in Items that Do Not Need Translation
You can use the Translation Filter window to filter out fields that never need translation. You can access this feature from the Sitecore Content Editor.
You initially specify which types of fields the Connector sends for translation using the Field Types Need Translation parameter. For details, see Configuring Bulk Translation Settings in Sitecore.
You use the Translation Filter feature to further exclude certain types of fields from content that the Connector sends for translation, per the template. You can create filters when initially configuring the Connector, or you can create or update the filters at any time.
When a user sends out an item for translation, the Connector collects the content from all fields in the item with the field types specified in that parameter, in preparation for sending them out for translation. Then, if there are some fields that you do not want to send for translation, even though they belong to field types that the Connector sends out for translation, you can use the Translation Filter to exclude them.
- Do one of the following to open the Translation Filter window:
- In the Sitecore Content Editor ribbon, click the Lionbridge Translation tab, and then in the Translation Tools section, click Translation Filter.

- In the Sitecore Desktop, click the Sitecore menu, and then select All Applications > Lionbridge Translation > Translation Filter from the menu.
The Translation Filter window opens.
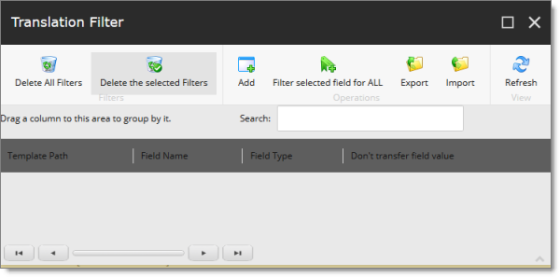
- Click the Add button
 to add a new filter.
The Welcome page of the Field Filter wizard opens.
- Click Next.
The Choose a content template page of the Field Filter wizard opens.
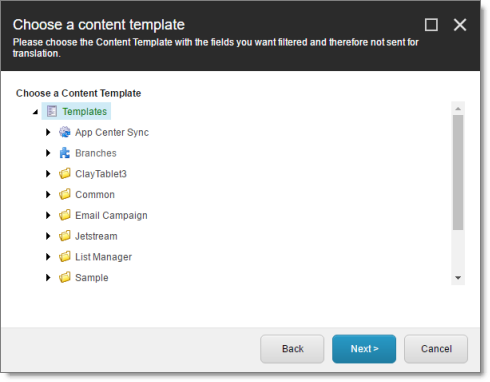
- Select the content template to associate with the fields you want to filter, and exclude from translation. Use the Expand
 and Collapse
  icons to navigate the tree. Click Next.
The Select Fields that you don’t want sent out for translation page of the Field Filter wizard opens.
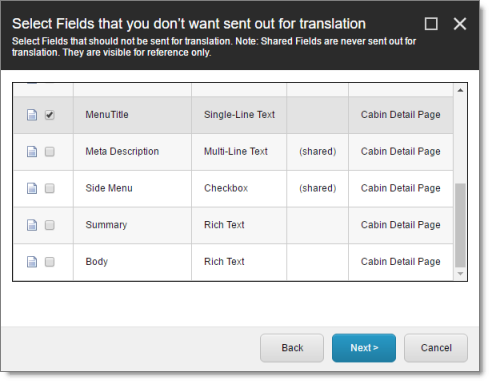
This page displays the following information about all the fields in the template you selected:
| Column |
Description |
| Field |
The name of a field type in the template. |
| Type |
The description of the field type. |
| Shared |
Indicates whether the field type is shared. |
| Template |
The template where the field type is located. |
- Select the check boxes of the field types you want to exclude from translation, and click Next.
Note: Shared fields are never sent for translation, so they are automatically excluded from translation. You do not need to select them.
The Don’t transfer field value page of the Field Filter wizard opens.
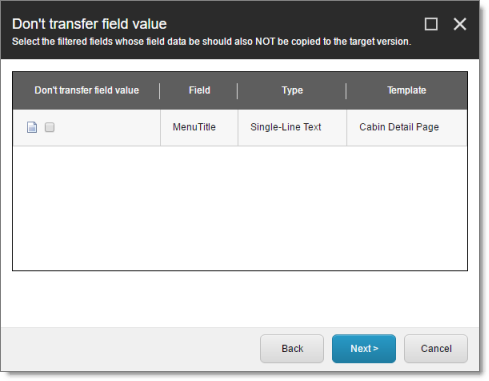
This page displays only the field types you selected in the previous page of the wizard.
- For each field type, indicate whether you want the Connector to copy the source-language content to the target version.
-
If you do not want the Connector to copy the source-language content of a field type to the target version, select the corresponding check box. This field type will be excluded from the target content.
-
If you want the Connector to copy the source-language content of a field type to the target version, clear the corresponding check box. This field type will be included in the target content; however, the content will be in the source language.
Click Next.
The summary page of the wizard opens.
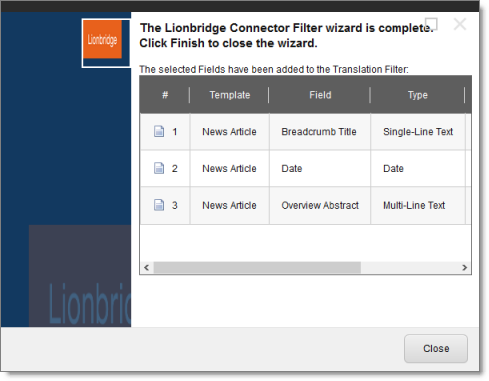
This page displays the following information about the fields to exclude in the new filter.
| Column |
Description |
| Template |
The name of the template where the field type to exclude from translation is located. |
| Field |
The name of the field type to exclude from translation. |
| Type |
The type of field to exclude from translation. |
| Don’t transfer field value |
Indicates whether the Connector copies the source-language content to the target version for this field type.
* Blank indicates that the Connector does copy the source-language content of a field to the target version, select the corresponding check box. This field will be included in the target content; however, it will be in the source language.
* yes indicates that the Connector does not copy the source-language content of a field type to the target version. The Connector does not automatically transfer the value of the field in the source version to the field in the target version. |
-
Click Finish.
-
A message box opens, confirming that you want to close the wizard. Click OK.
The wizard closes, and the Translation Filter window displays each filter you created in a separate row:
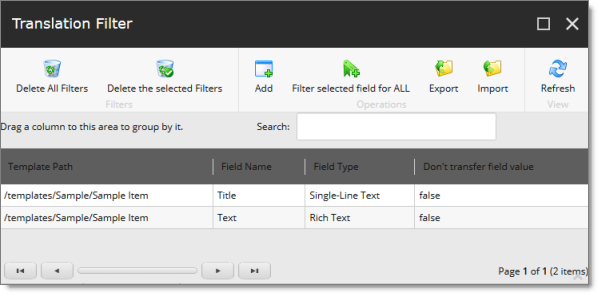
This window displays the following information about the filters:
| Column |
Description |
| Template Path |
The path and name of the template. Field types in this template can be excluded from translations. |
| Field Name |
When the Connector sends out content items based the specified template for translation, it does not send out this field’s content for translation. |
| Field Type |
The type of this field to exclude from translation. When [ALL] is displayed, then all types of this field are excluded from translation. |
| Don’t transfer field value |
Indicates whether the Connector copies the source-language content to the target version for this field type.
* false indicates that the Connector does copy the source-language content of a field type to the target version, select the corresponding check box. This field will be included in the target content, however it will be in the source language.
* true indicates that the Connector does not copy the source-language content of a field to the target version. The Connector does not automatically transfer the value of the field in the source version to the field in the target version. |
Now that you have created a filter, you can perform the following actions in the Translation Filter window (in addition to the Add Filter button, which was described above in step 3):
| Button |
Description |
 |
Deletes all filters displayed in the Translation Filter window. |
 |
Deletes all selected filters from the Translation Filter window. |
 |
Applies the selected filter to all templates with the same field type. |
 |
Opens a browser dialog box that prompts you to download the displayed filters as a .json file. |
 |
Enables you to import a previously downloaded .json file containing translation filters, by opening the Select file to import dialog box.
1. Click Browse to browse to and select the .json file to import.
2. Click Upload.
A message at the bottom of the dialog box states that the file upload was successful. |
 |
Refreshes the list of displayed filters. |
14 - Adding Purchase Order Numbers and Descriptions
You can add purchase order (PO) numbers and descriptions to the Connector. This facilitates users selecting the correct number when sending out content for translation. Users can still manually enter any PO number that is not already in the system.
To add a purchase order number:
-
In the Content Editor, in the content tree, navigate to /sitecore/system/Settings/Lionbridge Settings/Purchase Orders/.
-
Click the Purchase Orders item to select it.
Right-click and select Insert > Purchase Order from the context menu that opens.
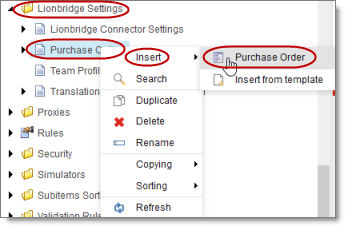
The Message dialog box opens.
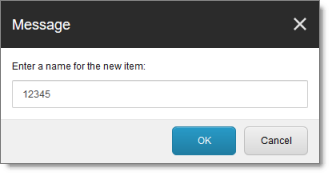
- Enter the purchase order number and click OK. For example, enter 12345.
A new child item is created for the purchase order you just created.
This purchase order number will be available for selection when users send out content for translation.
- Optional. You can enter a description for the purchase order number you just created. This description will be displayed beside the purchase order number when it is available for selection.
a. In the content tree, navigate to the purchase order you just created, and select it.
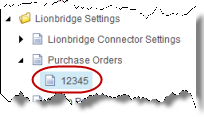
b. In the content area, scroll down to the Information section and expand it.

c. In the Information section, in the Description field, enter the description of the purchase order.
d. Click the Save button  in the top-left corner to save your changes.
15 - Configuring Connector Roles and Adding Users
The Connector installs the roles described below into Sitecore:
| Role |
Description |
| sitecore\Translation Administrator |
Users added to this role can set translation filters, remove completed job status, and delete the Connector backup data. Users can submit content to the translation queue or send it out immediately to translation. |
| sitecore\Translation Operator |
Users added to this role can submit content to the translation queue. They can also send items from the queue for translation and remove items from the queue. When using the Bulk Translation feature, these users can skip the translation queue. They cannot send out individual content items directly to translation. |
sitecore\
Translation ItemSent
Notification Receiver |
Users added to this role receive email notifications from the Connector when it sends items out for translation. |
sitecore\
Translation ItemCompleted
Notification Receiver |
Users added to this role receive email notifications from the Connector when it receives translated items back from translation. |
sitecore\Translation
QueueOperator |
Users added to this role can submit content only to the Translation Queue. They cannot send out items from the queue for translation, but they can remove items from the queue. When using the Bulk Translation wizard, these users must send content to the Translation Queue. They cannot send out individual content items directly to translation. |
You must assign your users to these roles so they can access the functionality described above. For detailed instructions, refer to the Sitecore CMS Security Administrator’s Cookbook. This guide is in the documentation section available at https://doc.sitecore.net.
16 - Configuring Team Profiles
A team profile defines a set of Connector users who are allowed to send content out for translation from the specified source languages, to the specified target languages, using the specified translation providers. If email notifications are configured, a team profile also determines the email-notification settings for the team about team activities.
Users who are member of multiple teams are prompted to select a team profile when sending out content for translation.
To configure a team profile, you complete the following basic steps:
- You create a new role that you will link to the team profile.
- You assign users to the role that you created.
- You create a team profile, and configure it.
- In the Sitecore Content Editor ribbon, click the Security tab, and then in the Tools section, click User Manager.

The User Manager window opens.
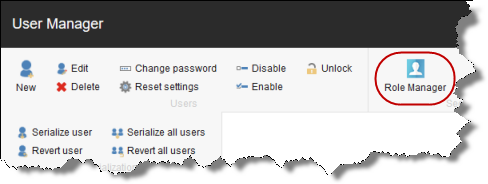
- In the ribbon, click Role Manager.
The Role Manager window opens.
- In the ribbon, click New to create a new role.
The New Role dialog box opens.
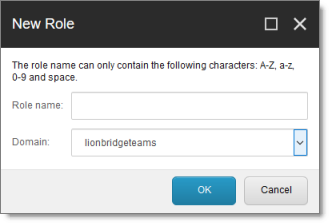
-
Create your role:
- In the Role name field, enter a name for your role, for example Team A.
- In the Domain dropdown list, select lionbridgeteams.
- Click OK.
The Role Manager window reopens, and the role you just created is displayed in the list.
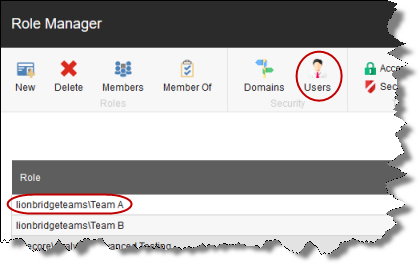
- In the ribbon, click Users to open the User Manager window.
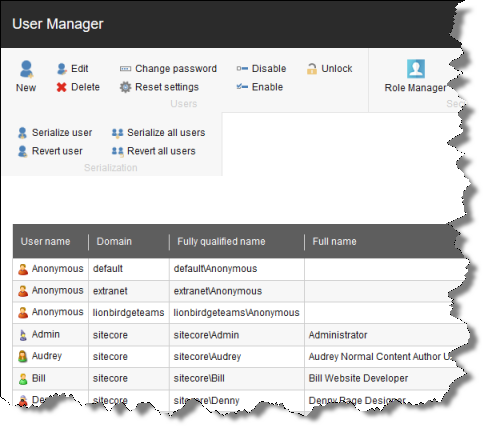
- Assign a user to a role:
a. Click a user to select it.
b. In the ribbon, click Edit.
The Edit User dialog box opens for that user.
c. Click the Member Of tab.
d. Click the Edit button in the bottom-left corner.
The Edit User Roles dialog box opens.
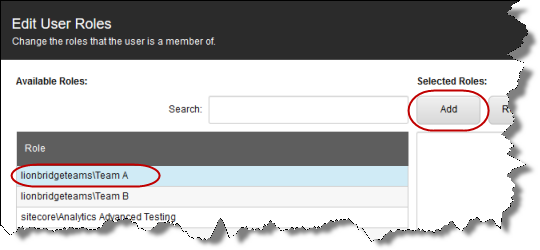
e. Click the role you just created to select it.
f. Click Add, and then click OK to close the Edit User Roles dialog box.
The Edit User dialog box now displays the role you assigned.
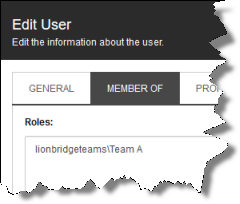
g. Click OK to close the Edit User dialog box.
h. Repeat the previous sub-steps for each user to assign to the role.
i. When you are done, close the User Manager window.
-
In the Content Editor, in the content tree, navigate to /sitecore/System/Settings/Lionbridge Settings/Team Profiles/.
-
Click the Team Profiles item to select it and to open it in the content area.
-
Click the Custom Editor tab.
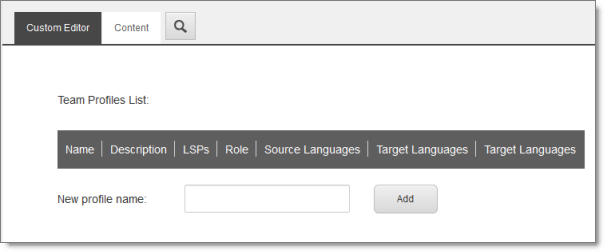
-
In the New profile name field, enter your name for the team profile and click Add.
-
In the content tree, the new team profile is added under /sitecore/system/Settings/Lionbridge Settings/Team Profiles/.
Tip: In the content tree , close the Lionbridge Settings folder and reopen it to display the team profile you just created under /Lionbridge Settings/Team Profiles/.
- Click the new team profile item to select it and to open it in the content area.
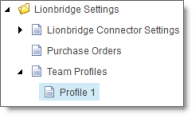
- Click the Custom Editor tab.
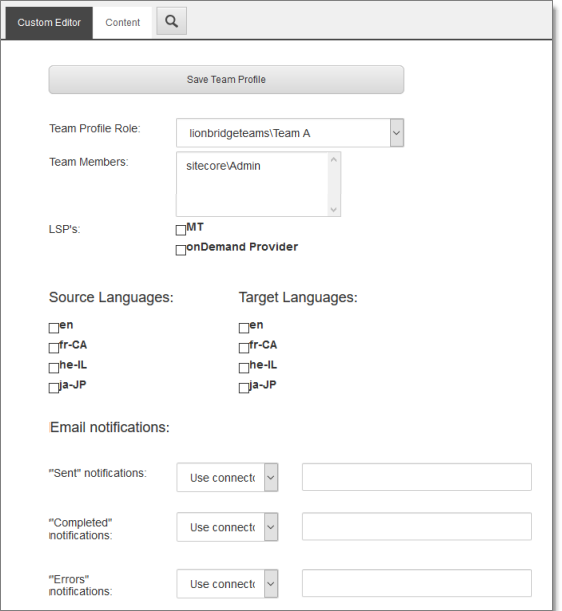
- Enter the following settings for your team profile:
| Setting |
Description |
| Team Profile Role |
In the dropdown list, select the role you created earlier. Selecting a role populates the Team Members list, described below, with the users assigned to this role. |
| Team Members |
Read only. This list is populated with the users assigned to the role selected in Team Profile Role, above. |
| LSPs |
Select the translation providers (LSPs) to assign to the team profile. All the configured translation providers are available for selection. |
| Source Languages |
Select the check boxes of the source languages in which team members can send out content for translation. The list of available languages is based on the configured languages. For details, see Configuring the Sitecore Languages in the Sitecore Content Editor. |
| Target Languages |
Select the check boxes of the target languages for which team members can send out content for translation. The list of available languages is based on the configured languages. For details, see Configuring the Sitecore Languages in the Sitecore Content Editor. |
| Email Notifications |
For each type of email notification, select one of the following settings:- Use Connector settings: (Default selection) The Connector sends email notifications to the users assigned to a role for receiving specific email notifications, as defined by the configuration option described in the list below.
- Don’t send: The Connector does not send any email notifications.
- Email address list: The Connector sends email notifications to the email addresses listed in the corresponding text box.
Note: Separate email addresses by a comma ( , ) or a semicolon ( ; ). - Team members: The Connector sends email notifications to all team members.
You can configure the following types of email notifications for the team profile:- “Sent” notifications: The Connector sends email notifications when it sends items out for translation. The Use Connector setting option, above, is defined by the Content API.EmailNotification.NotifySentOut.Users.RoleName option in the CT3Translation.config file.
- “Completed” notifications: The Connector sends email notifications when it receives translated items back from translation. The Use Connector setting option, above, is defined by the Content API.EmailNotification.NotifyCompleted.Users.RoleName option in the CT3Translation.config file.
- “Errors” notifications: The Connector sends email notifications when an error occurs related to a translation job. The Use Connector setting option, above, is defined by the Content API.EmailNotification.NotifyErrors.Users.RoleName option in the CT3Translation.config file.
For more information about the configuration options in the CT3Translation.config file, see Configuring Email Notifications in the Configuration File.
|
- When you are done, scroll up to the top of this page, and then click Save Team Profile.
A message box confirms that the team profile was successfully saved.
17 - Configuring How the Connector Handles Special Characters
You can configure how the Connector handles special characters. This is important because it determines how special characters are displayed for your translators.
Background
The Connector exports your content from Sitecore and sends it for translation as XML files. A valid XML file cannot contain any of the special characters listed in the table below. Instead, a valid XML file must use the following entity references to represent special characters:
| Special Character |
Represented by This Entity Reference |
| < |
< |
| > |
> |
| & |
& |
| ' |
' |
| " |
" |
Escaping is the term that describes creating valid XML by converting any XML special characters to their entity references.
How does Sitecore handle special characters?
There are two types of text within Sitecore:
- plain text
- rich text, which can contain HTML formatting, links. etc.
You can use the HTML editor in Sitecore’s Content Editor to view how Sitecore stores content.
Sitecore handles special characters differently, depending on whether they are in a plain text title, or a rich text paragraph.
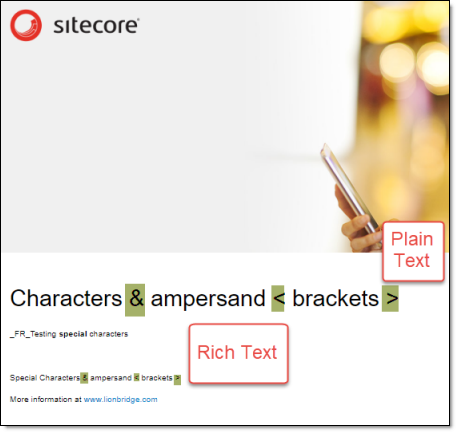
- In plain text, Sitecore does not escape special characters. It displays them as the actual characters. For example, it displays & as &.
- In rich text, Sitecore escapes special characters. It displays them as their corresponding entity references. For example, it displays & as &.
How does the Connector handle special characters?
When the Connector prepares content for translation, it packages all content into XML translation files. This necessitates escaping all special characters into their corresponding entity references. However, the Connector does not differentiate between plain text (which displays the actual special characters) and rich text (which displays the entity references instead of the special characters). Therefore, the Connector escapes all special characters.
As a result, the rich text that the translator receives may contain a combination of special characters and entity references.
For example:
Suppose that the rich-text paragraph contains the text that is rendered as follows in the Sitecore Content Editor: &.
Sitecore actually stores this rich-text content as its corresponding entity reference: &.
When the Connector processes this rich-text content to create XML files to send out for translation, it escapes this content as follows:
- & becomes &
- amp; remains amp;
As a result, this content is escaped twice (once by Sitecore and then by the Connector).
The Connector then stores this content as & in the XML translation file, which it sends to the translator.
However, some translation systems cannot handle double-escaped special characters such as & or a mix of single-escaped and double-escaped special characters.
17.1 - Why Do Translators Encounter Problems with Special Characters?
Some translation systems can handle double-escaped special characters, such as &, by displaying them as & or &. However, some translation systems cannot handle double-escaped special characters, such as &.
There are several ways to handle this.
Recommendation 1 – Same as Source option
If your translator’s translation system supports the “Same as Source” option, then instruct your translator to select this option. This converts and returns all special characters–actual characters, escaped characters, and double-escaped characters–as they were received.
However, this feature is not supported by all translation systems or they may not be able to change this setting. In those scenarios, or if you see a combination of single- and double-escaped characters, consider one of the following recommendations.
Recommendation 2 – All single encoded
Your translator should handle each type of special character consistently. For example, in the target XML:
- Your translator can return the following special characters as single escaped:
- <
- >
- &
- Your translator can return the following special characters as the actual characters:
- '
- "
Selecting the Add CData to Output check box instructs the Connector to wrap content in CData tags, which prevents the Connector from escaping special characters, and avoids the scenario of double-escaped characters. However, this setting does not prevent Sitecore from single-escaping special characters in rich text.
Note: The Connector adds and removes the CData tags, so they are not displayed within Sitecore’s Content Editor.
Important: If you change this setting, your translators must return the translated content in CData tags, just as they received the source content in CData tags. They should not run any post-translation scripts to escape the special characters before returning the content.
Warning: If you change this setting in the middle of a translation job, it can interfere with the integrity of the translation memory.
For detailed instructions on selecting the Add CData to Output check box, see Adding CData Tags to Translation Files.
17.2 - Adding CData Tags to Translation Files
You can select the Add CData to Output check box to add CData tags to translation files, which prevents your translators from viewing double-escaped special characters, such as &.
-
In the Content Editor, in the content tree, navigate to /sitecore/system/Settings/Lionbridge Settings/Lionbridge Connector Settings/.
-
Click the Lionbridge Connector Settings item to select it and open it in the content area.
-
Scroll down to the Output data formatting section.

- Specify the following option:
| Option |
Description |
| Add CData to Output |
This determines whether the Connector adds CData tags to translation files, which prevents your translators from viewing double-escaped special characters, such as &.
* If this check box is cleared (default value), then the Connector does not add CData tags.
* If this check box is selected, then the Connector adds CData tags. |
- Click the Save button
 in the top-left corner to save your changes.
The Connector will now automatically wrap every XML translation file it sends out for translation in CData tags.
18 - Configuring the In-Context Preview Feature
You can configure the settings for the In-Context Preview feature. This feature enables those without Sitecore access (such as translators) to preview items for translation as Sitecore would render them.
Note: This feature requires pre-configuration steps to be completed by Lionbridge. Please reach out to connectors@lionbridge.com before filling out any of these settings.
To configure the In-Context Preview feature:
-
In the Content Editor, in the content tree, navigate to /sitecore/system/Settings/Lionbridge Settings/Lionbridge Connector Settings/.
-
Click the Lionbridge Connector Settings item to select it and open it in the content area.
-
Scroll down to the Preview section.
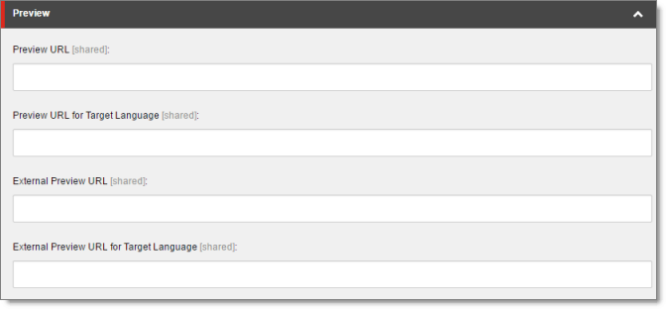
- Specify the following settings:
Tip: You can use the parameters listed in the table below this table to configure the URLs.
| Setting |
Description |
Sample Value |
| Preview URL |
The URL that the Content API Preview server uses to access the Sitecore instance and preview the source version of the item sent to translation. Typically this server needs access through your firewall to access the URL and credentials to log into your Sitecore instance. |
http://yoursitecoreurl/?sc_itemid={id}&sc_mode=preview&sc_lang={lang} |
| Preview URL for Target Language |
The URL that the Content API Preview server uses to access the Sitecore instance and preview the target version of the item sent to translation. Typically this server needs access through your firewall to access the URL and credential to log into your Sitecore instance. |
http://yoursitecoreurl/?sc_itemid={id}&sc_mode=preview&sc_lang={lang} |
| External Preview URL |
The URL that enables translators or external reviewers to preview the source item on the Content API Preview server. For instructions on configuring this setting, contact Lionbridge Connector Support, as described in How to Contact Lionbridge Connector Support. |
https://app.translationproxy.com/_el/ext/preview/source?chunk={chunkid}&lang={lang} |
| External Preview URL for Target Language |
The URL that enables translators or external reviewers to preview the target item the Content API Preview server. For instructions on configuring this setting, contact Lionbridge Connector Support, as described in How to Contact Lionbridge Connector Support. |
https://app.translationproxy.com/_el/ext/preview/target?chunk={chunkid}&lang={targetlang} |
You can use the following parameters listed in the table below to configure the URLs described above:
| Parameter |
Description |
| {id} |
The identifier of the source Sitecore item sent for translation. |
| {version} |
The version of the source Sitecore item sent for translation. |
| {lang} |
The source language of the Sitecore item sent for translation. |
| {targetversion} |
The version of the translated Sitecore item. |
| {targetlang} |
The target language of the translated Sitecore item. |
| {jobid} |
The Connector translation job ID. |
| {chunkid} |
The globally unique ID generated by the Connector, which identifies each translatable field (chunk) in the XML file generated by Content API.
Note: This parameter is relevant only to the External Preview URL and External Preview URL for Target Language settings, described above. |
- Click the Save button
 in the top-left corner to save your changes.


