Sending Content for Translation
When you send content for translation, you complete the following high-level steps:
-
Create the job. For details, see Creating a Translation Job.
-
Add one or more types of content to the job:
- Submit the job for translation. For details, see Reviewing and Submitting a Job.
1 - Creating a Translation Job
The first step in sending content for translation is creating a translation job.
To create a new translation job:
- Select Merchant Tools > Products and Catalogs > Translation from the menu.
The Manage Translation Jobs page opens.
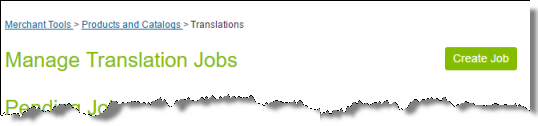
- In the top-right corner of the page, click Create Job.
The General tab of the Job Information page opens:
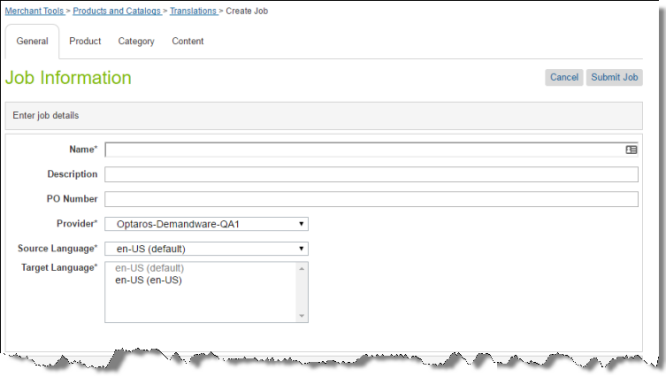
- In the Enter job details section, enter the following information about your job:
| Field |
Description |
| Name |
Your name for the translation job. |
| Description |
Optional. Your description of the translation job. |
| PO Number |
Optional. The purchase order reference number associated with this job. |
| Provider |
Select the translation provider for this job. |
| Source Language |
Select the source language for this job. The Cartridge will send items in this source language for translation. The list displays all locales selected in the Locales page. To open this page, select Merchant Tools > Site Preferences > Locales from the menu. |
| Target Language |
Select all the target languages into which you want to translate the source content in this job. The list displays all locales selected in the Locales page. To open this page, select Merchant Tools > Site Preferences > Locales from the menu.
Tips: To select a range of adjacent language, press the Shift key. To select multiple non-adjacent languages, press the Ctrl key. |
- Next, you select the type of content to include in the translation job.
Note: You can include content from multiple tabs in a single translation job.
2 - Adding Products and Catalogs to the Job
When you create a translation job, as described on Creating a Translation Job, you can add products and catalogs to it.
To add products and catalogs to a job you are creating:
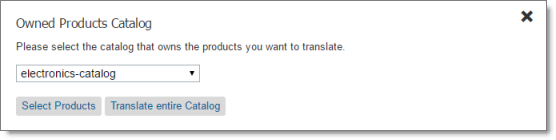
- Click the Product tab.
The Owned Products Catalog dialog box opens.
-
In the dropdown list, select the catalog that owns the products you want to translate.
-
Do one of the following:
- To select some but not all products in the catalog for translation, click Select Products.
- To translate the entire selected catalog, click Translate entire Catalog.
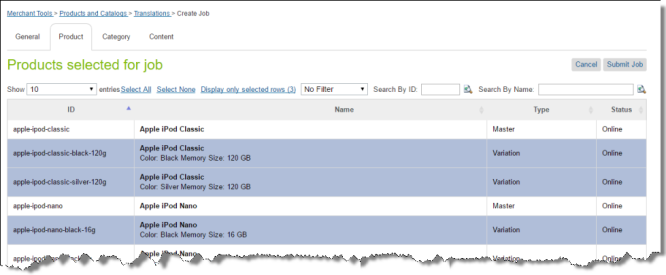
The Products selected for job page opens.
- If you clicked Translate entire catalog, this page displays a message that all products in the specified catalog are selected. Proceed to step 5.
- If you clicked Select Products, this page displays the following information about each product in the selected catalog:
- ID: The product ID in Salesforce Commerce Cloud.
- Name: The product name in Salesforce Commerce Cloud. If the product is a Variation, then the second row displays the variation values. For example, if a product has different sizes and colors the color and the size are displayed for each style..
- Type: The Salesforce Commerce Cloud product type.
- Status: The status of the product in Salesforce Commerce Cloud.
Tips: In the Show dropdown list, you can select how many products to display in this sub-page of the list. By default, 10 products are displayed. You can change this to 25, 50, or 100. You can navigate to other sub-pages using the number buttons below the list, on the right side.
- Do one or more of the following to select the products to send for translation:
- Click one or more rows to select the corresponding products.
- Click the Select All link to select all rows.
- Click the Select None link to clear the selected rows.
- Click the Display only selected rows link to display only the rows you selected. (Link is displayed only when all rows are displayed.)
Note: The text in this link displays the number of selected rows.
- Click the Show All link to display all rows in the list. (Link is displayed when only the selected rows are displayed.)
To locate the items to select, you can do one or more of the following:
-
In the dropdown list above the list of products, you can filter the products in the list by product type. This list displays all product types available in the catalog.
-
In the Search by ID box, enter a product ID and either click the search icon  or press Enter.
The list displays only products that match this ID.
- In the Search by Name box, enter a product name and either click the search icon or press Enter.
The list displays only products that match this name.
- When you are done, do one of the following:
The Job Summary - Items selected for translation dialog box opens. For details, see Reviewing and Submitting a Job.
3 - Adding Categories of Products to the Job
When you create a translation job, as described on Creating a Translation Job, you can add products to it by category.
To add categories of products to a job you are creating:
- Click the Category tab.
The Categories selected for job page opens.
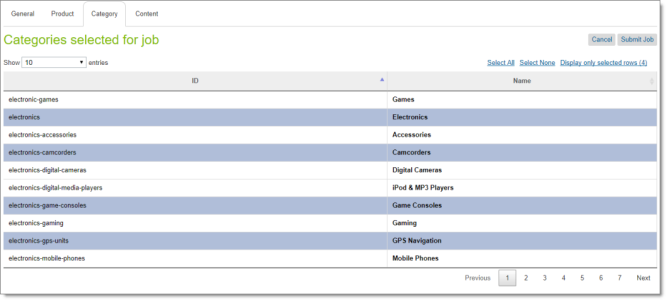
This page displays the following information about each product in the selected catalog:
- ID: The category ID in Salesforce Commerce Cloud.
- Name: The name of the category in Salesforce Commerce Cloud.
Tips: In the Show dropdown list, you can select how many categories to display in this sub-page of the list. By default, 10 categories are displayed. You can change this to 25, 50, or 100. You can navigate to other sub-pages using the number buttons below the list, on the right side.
- Do one or more of the following to select the products to send for translation:
- Click one or more rows to select the corresponding categories.
- Click the Select All link to select all rows.
- Click the Select None link to clear the selected rows.
- Click the Display only selected rows link to display only the rows you selected. (Link is displayed only when all rows are displayed.)
Note: The text in this link displays the number of selected rows.
- Click the Show All link to display all rows in the list. (Link is displayed when only the selected rows are displayed.)
To locate the items to select, in the Search box, you can enter a string and either click the search icon or press Enter. The list displays only categories that match this string.
- When you are done, do one of the following:
The Job Summary - Items selected for translation dialog box opens. For details, see Reviewing and Submitting a Job.
4 - Adding Static Website Content to the Job
When you create a translation job, as described on Creating a Translation Job, you can add static website content to it.
To add static website content to a job you are creating:
- Click the Content tab.
The Content selected for job page opens.
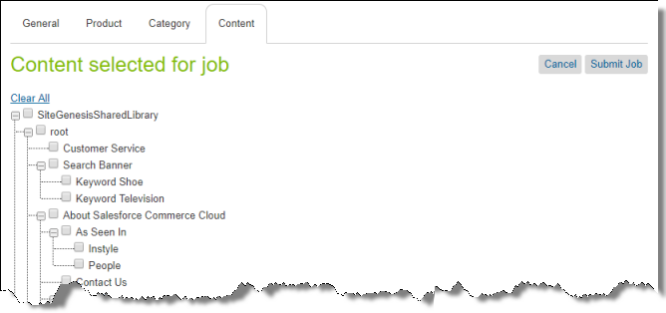
This page displays the static website content in a tree format, with the following hierarchy: Library > Library Folder > Library Subfolder > Library Content Asset.
Note: A library must be assigned to the selected website so that you can send its content for translation.
- Select the check boxes of one or more libraries, library folders, library subfolder, and library content assets to send for translation.
Notes: Selecting the check box for a parent item selects the check boxes for all child items. Text beside the selected parent item displays the number of selected items in the node and the total number of items in the node. Clearing the check box for a parent item does not clear the check boxes for the child items. To clear all selected check boxes, click the Clear All link.
Tips: To collapse a branch, click the collapse icon  . To expand a branch, click the expand icon
  .
.
- When you are done, do one of the following:
The Job Summary - Items selected for translation dialog box opens. For details, see Reviewing and Submitting a Job.
5 - Reviewing and Submitting a Job
After you create and specify general information for your translation job and add items to translate, you review the items in your job before submit the job for translation.
When you click Submit Job in any tab, the Job Summary - Items selected for translation dialog box opens. All the information in the dialog box is read only.
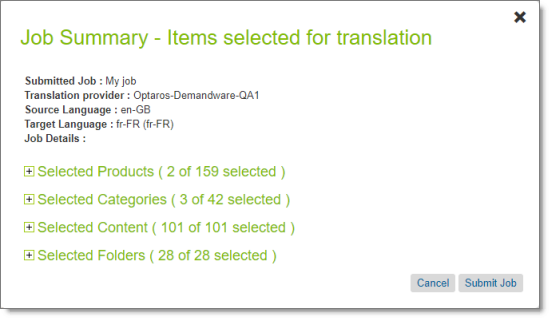
The information at the top of the dialog box is the information you entered earlier, in the General tab. To modify it, click Cancel and then click the General tab. For details, see Creating a Translation Job.
If items are selected in a particular section, the parentheses in the section header indicate the number of selected items.
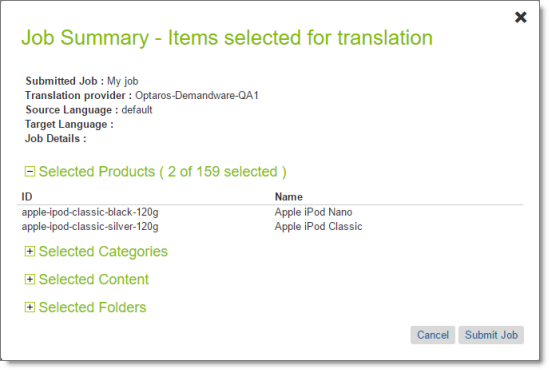
- To review the content items for submission in this job, click the expand icon
 to expand the appropriate section.
- The Selected Catalog section displays the IDs and names of the catalog you selected in the Product tab. To modify your selection, click Cancel and then click the Product tab. For details, see Adding Products and Catalogs to the Job.
- The Selected Products section displays the IDs and names of the products you selected in the Product tab. To modify your selection, click Cancel and then click the Product tab. For details, see Adding Products and Catalogs to the Job.
- The Selected Categories section displays the IDs and names of the products you selected in the Categories tab. To modify your selection, click Cancel and then click the Categories tab. For details, see Adding Categories of Products to the Job.
- The Selected Content section displays the IDs and names of the website content items you selected in the Content tab. To modify your selection, click Cancel and then click the Content tab. For details, see Adding Products and Catalogs to the Job.
- The Selected Folder section displays the IDs and names of the folders you selected in the Content tab. For details, see Adding Products and Catalogs to the Job.
Note: Either the Selected Catalog or the Selected Products section is displayed, depending on your selection earlier.
To submit this job, click Submit Job.
Note: If the general information about the translation job is incomplete, the General tab reopens so that you can complete it.
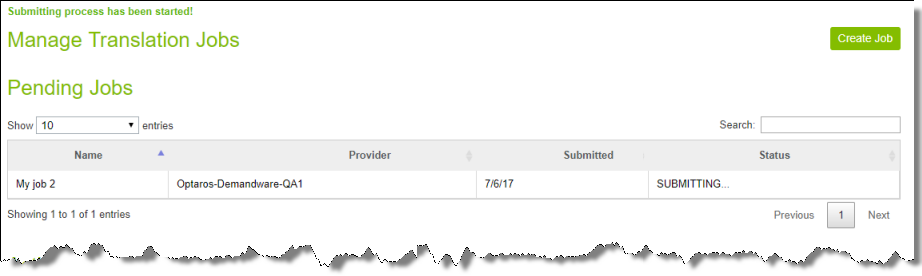
After submission, the Manage Translation Jobs page reopens, displaying a message that the submission process has started. The submitted job is displayed in the Pending Jobs section of the page. It is in Submitting status.
After submission, you can monitor your job from the Active Jobs section of the Manage Translation Jobs page. For detailed instructions, see Monitoring Translation Jobs.
Note about “Cannot submit the job” message: If you submit a job when another user is submitting a job, the Cannot submit the job message is displayed. If you click Continue, the current job is still displayed. Alternatively, if you click Save Job, the job is displayed in the Pending Jobs section, as follows:
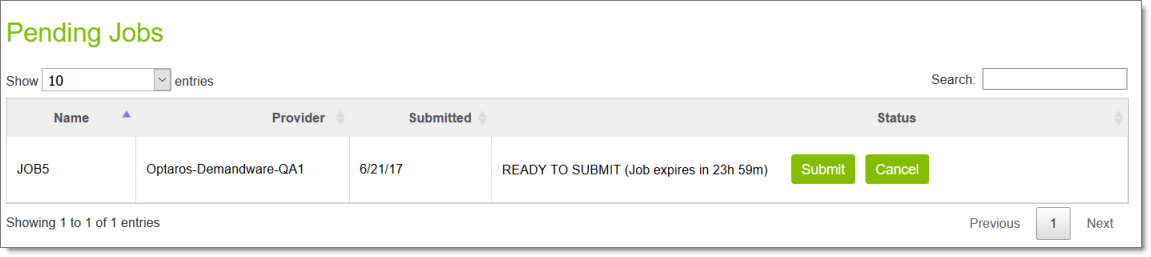
The Status column displays Ready to Submit and the time remaining until the job expires. When you are ready to resubmit the job, click the Submit button displayed in the column.