You complete the following steps to configure the Business Manager for the Cartridge:
This the multi-page printable view of this section. Click here to print.
Configuring the Business Manager
- 1: Setting Service Credentials
- 2: Configuring the Storefront Credentials
- 3: Mapping Locale Codes
- 4: Configuring Catalogs
- 5: Configuring Controller-Action Paths
- 6: Configuring Retention Days
- 7: Configuring Open Commerce API Settings
1 - Setting Service Credentials
To set service credentials:
-
In Salesforce Commerce Cloud, navigate to Administration > Operations > Services.
-
Click the Credentials tab.
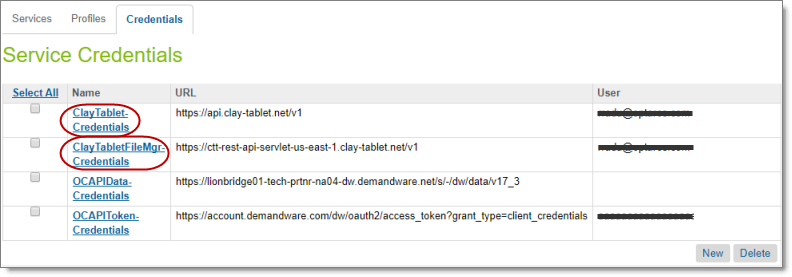
- In the Name column, click the links for the ClayTablet and ClayTabletFileMgr services.
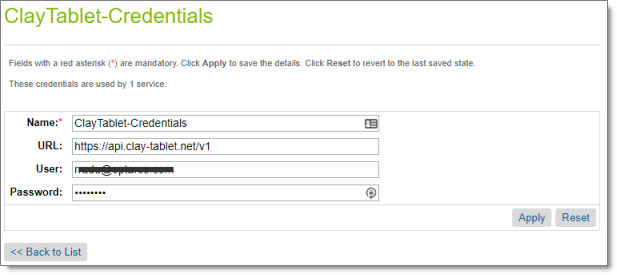
- For each service, update the user and password with the those provided by Clay Tablet, and click Apply.
2 - Configuring the Storefront Credentials
If you activated the Storefront Cartridge to protect your sites, as described in Installing the Lionbridge Cartridge, you now configure the storefront credentials.
If you activated the Storefront Cartridge to protect your sites, as described in Installing the Lionbridge Cartridge, you now configure the storefront credentials.
Note: If you did not activate the Storefront Cartridge to protect your sites, proceed to Mapping Locale Codes to Clay Tablet Language Codes.
To configure the storefront credentials:
-
Click the Merchant Tools menu and then select your site.
-
In the Merchant Tools menu, navigate to Site Preferences > Custom Preferences.
The Custom Sites Preference Groups page opens.
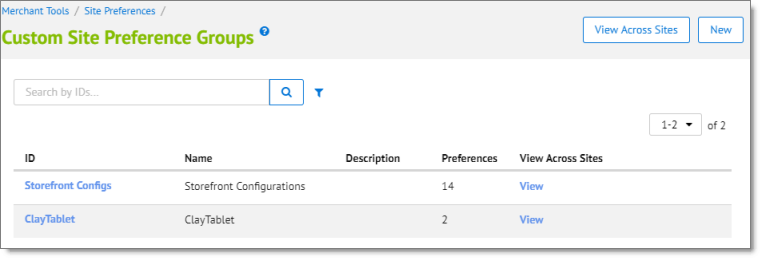
- In the ID column, click the ClayTablet link.
-
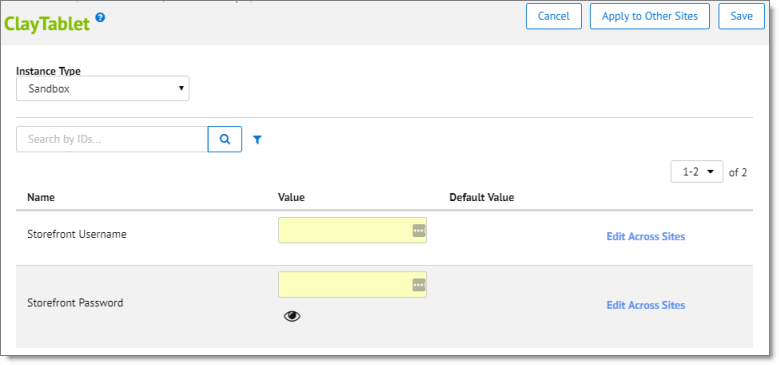
In the Storefront Username and Storefront Password fields, enter the base authentication credentials of the storefront.
-
In the top-right corner, click Save.
3 - Mapping Locale Codes
If any Salesforce Commerce Cloud locale codes are different from Clay Tablet language codes, you must map them.
To map locale codes to Clay Tablet Language Codes:
- Navigate to Administration > Global Preferences > Custom Preferences.
The Global Custom Preference Groups page opens.
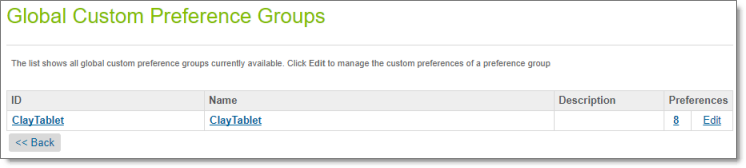
- In the ID column, click the ClayTablet link.
The Global Custom Preferences page opens.
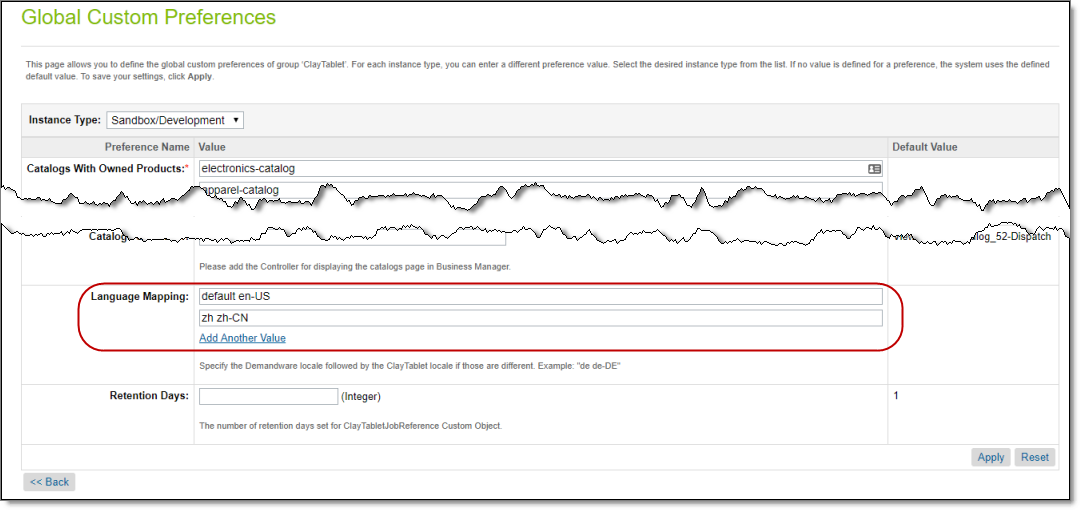
-
If a Salesforce Commerce Cloud locale code is different from the corresponding Clay Tablet language code, you can map them in the Language Mapping section.
- Click Add Another Value to add a new row.
- In the new row, enter the Salesforce Commerce Cloud locale code followed by a space and then the Clay Tablet language code, for example: zh zh-CN. For a list and description of Clay Tablet language codes, see Appendix: Language Codes.
- Repeat the previous steps for each language mapping to add.
-
In the bottom-right corner, click Apply.
4 - Configuring Catalogs
You configure which catalogs are available for translating products.
To configure catalogs:
- Navigate to Administration > Global Preferences > Custom Preferences.
The Global Custom Preference Groups page opens.
- In the ID column, click the ClayTablet link.
The Global Custom Preferences page opens.
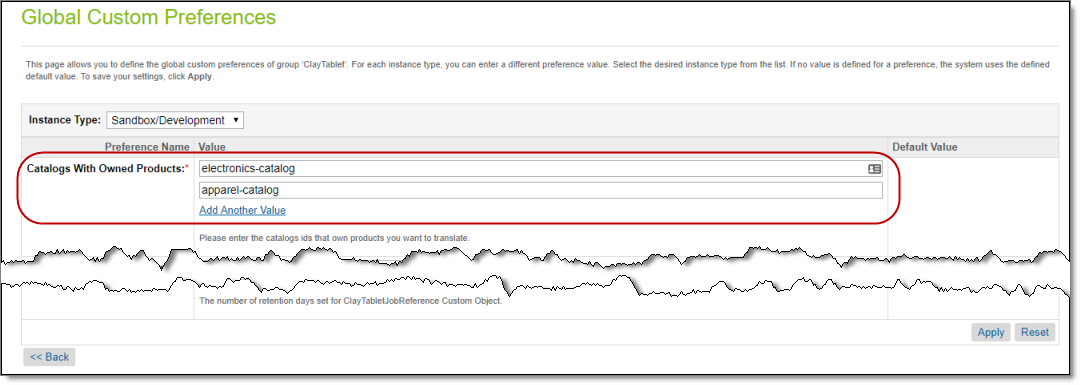
- In the Catalogs With Owned Products section, you specify the catalog IDs of the catalogs that will be available for translating products.
Note: You must specify the catalogs that own the products. These are usually master catalogs.
a. Click Add Another Value to add a new row. b. In the new row, enter the catalog ID of a catalog that will be available for translating products. c. Repeat the previous steps for each catalog ID to add.
- In the bottom-right corner, click Apply.
5 - Configuring Controller-Action Paths
Your Business Manager must use the default controller-action paths. If it is using other values, you must modify them.
To configure the controller-action paths:
- Navigate to Administration > Global Preferences > Custom Preferences.
The Global Custom Preference Groups page opens.
- In the ID column, click the ClayTablet link.
The Global Custom Preferences page opens.
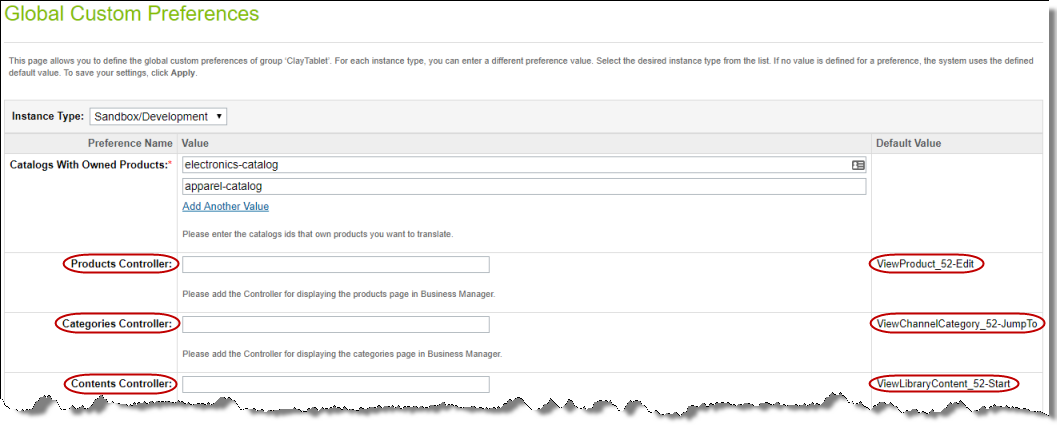
It includes the following fields:
- Products Controller
- Categories Controller
- Contents Controller
- Folders Controller
- Catalogs Controller
-
If any of the controllers do not use the default controller-action paths (displayed on the right), you must modify them.
-
In the bottom-right corner, click Apply.
6 - Configuring Retention Days
You configure the number of days that Clay Tablet retains your translation data using the ClayTabletJobReference custom object. If you changed that value, you must also change it in the Retention Days field, as described below.
To configure retention days:
- Navigate to Administration > Global Preferences > Custom Preferences.
The Global Custom Preference Groups page opens.
- In the ID column, click the ClayTablet link.
The Global Custom Preferences page opens.
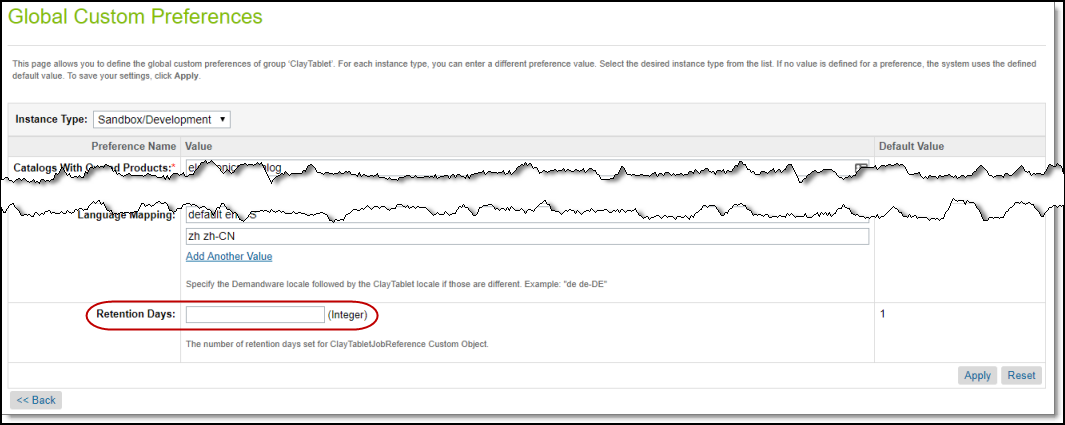
-
In the Retention Days field, enter the value that you specified for the ClayTabletJobReference custom object.
-
In the bottom-right corner, click Apply.
7 - Configuring Open Commerce API Settings
You must configure Open Commerce API (OCAPI) settings.
To configure Open Commerce API settings:
- Navigate to Administration > Site Development > Open Commerce API Settings.
The Open Commerce API Settings page opens.

- In the Select type dropdown list, select Data.
The page updates.

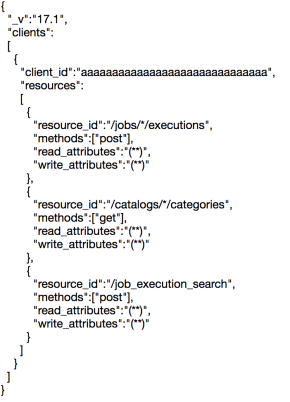
- Add the resource for jobs executions.
Note: For testing purpose, you can use the demo Client ID (aaaaaaaaaaaaaaaaaaaaaaaaaaaaaa), but in a production environment, obtain a Client ID from your Commerce Cloud Account Manager.
Your configuration should be similar to the following:
-
In the bottom-right corner, click Apply.
-
Navigate to Administration > Operations > Services to configure the OCAPI credentials.
-
Click the Credentials tab.
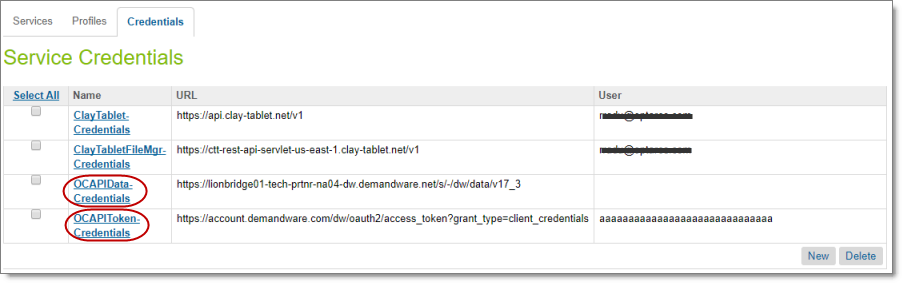
- In the Name column, click the link for the OCAPIToken service.
The OCAPIToken-Credentials page opens.
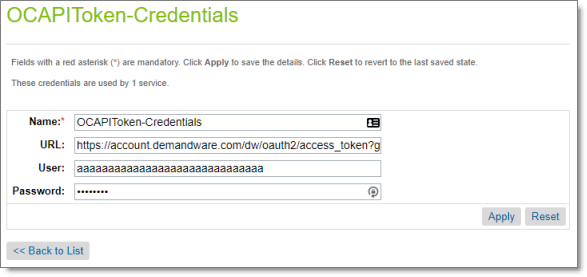
-
Enter the credentials for the OCAPIData service. a. In the User field, enter the OCAPI client ID. b. In the Password field, enter the OCAPI client password. c. Click Apply.
-
In the Name column, click the link for the OCAPIData service.
The OCAPIData-Credentials page opens.
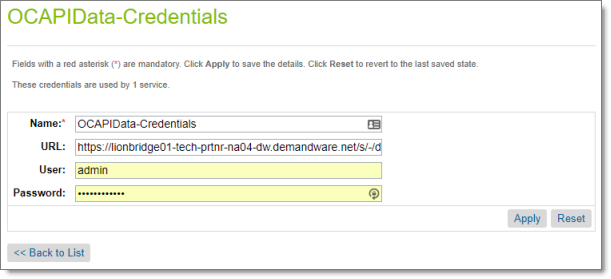
- In the URL field, enter your environment path in the following format: https://hostname/s/-/dw/data/version, where:
- hostname is your base URL.
- version is the OCAPI Data version set up in the Open Commerce API Settings page described in steps 2 and 3, above.
For example: https://myinstance.demandware.net/s/-/dw/data/v17_3.
- Click Apply.