4 - Configuring Language Mapping and Asset Packaging
In the Workspace settings tab:
- You map Optimizely languages to Lionbridge languages in the
language mapping.xml file.
- You configure how the Connector packages multiple assets in a translation project.
-
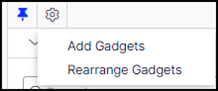
In the bottom-right corner of the Lionbridge Connector gadget in the right pane, click the Settings icon  , and then select Settings from the context menu.

-
In the Workspace settings tab, edit the Language Mapping XML field to map each Optimizely language code to the corresponding Clay Tablet language code. For a list and description of Clay Tablet language codes, see Appendix: Language Codes.
Important: if you are not using the Lionbridge 4 digit codes, see Appendix: Language Codes then you must use this Language Mapping to map your language code to the Lionbridge code. If the there is no language mapping for the 2 digit codes then unmapped languages cannot be accepted back for Import.
For example:
     <Languages>
       <Language>
           <Optimizely>sv</Optimizely>
           <CAPI>sv-SE</CAPI>
       </Language>
       <Language>
            <Optimizely>da</Optimizely>
            <CAPI>da-DK</CAPI>
        </Language>
        </Languages>
Note: If you leave this section empty, the Connector will use the default values.
-
In the Workspace settings tab, you can configure how the Connector packages multiple assets in a translation project.

- If you select the Use grouped asset handling check box, then the Connector packages all pages and blocks selected for translation into a single XML file for each target language.
Recommendation: Select this check box, especially if Lionbridge Freeway will translate terms for SEO. - If you clear the Use grouped asset handling check box, then the Connector sends each page and block selected for translation as a separate XML file.
The Optimizely automatically saves your changes.
5 - Configuring Content API connection information
Before you can use the Connector with Content API V2 platform, you must configure Content API V2 connection information. These are available with your Lionbridge license. Ensure that you have this information before proceeding.
To configure Content API V2 services connection:
In the bottom-right corner of the Lionbridge Connector gadget in the right pane, click the Settings icon , and then select Settings from the context menu.
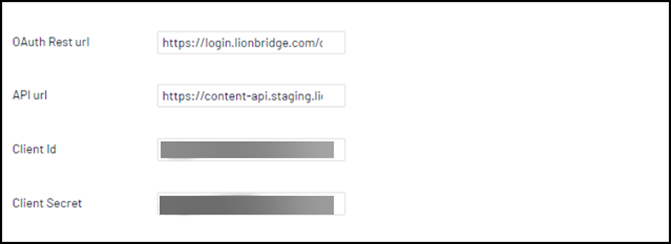
In the Workspace settings tab, edit information below:
- OAuth Rest url: Lionbridge authentication URL
- API Url: Path of Content API V2 services
- Client Id: is a public identifier for Content API services, it is available with your Lionbridge license.
- Client Secret: It is a secret known only to the application and the authorization for Content API services. It is available with your Lionbridge license.
6 - Content API Job Completion
In the Workspace settings tab, you can configure how the Connector to send completed confirmation to Content API V2 after a translation project is published.
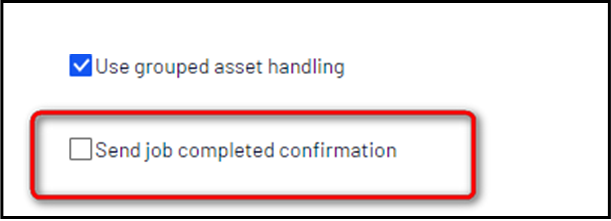
If you select the Send job completed confirmation check box, then the Connector sends completed confirmation to Content API V2 services when a Job is Published.
This means that after Publishing, a Completed status is sent to Lionbridge API and it will not be possible to make re-deliveries.
Recommendation: Do not select this check box, especially if Lionbridge Freeway can re-deliver new translations or correct errors.
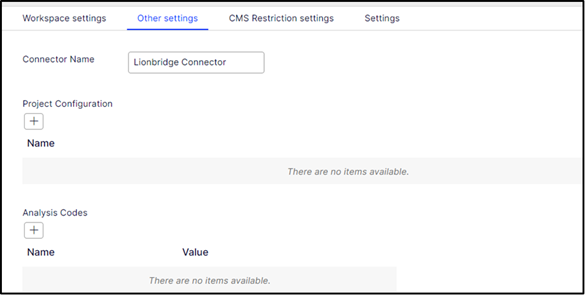
7 - Configuring CMS Name and Limit number of assets
To configure Configuring CMS Name and Limit number of assets:
- In the bottom-right corner of the Lionbridge Connector gadget in the right pane, click the Settings icon , and then select Settings from the context menu.
- Click the Other settings tab.
- You can configure the following settings:
| Setting |
Description |
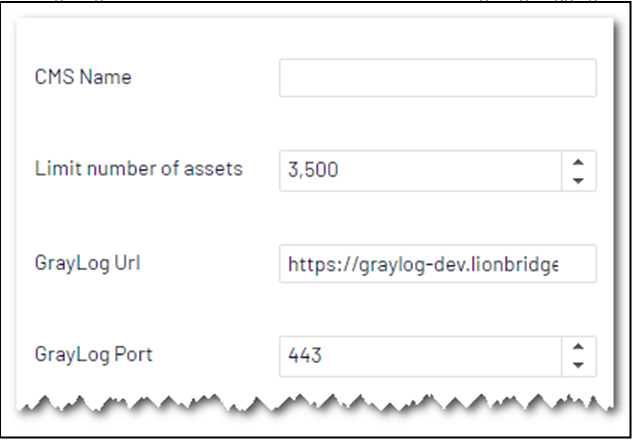
| CMS Name |
Optional. The name of CMS like website address |
| Limit number of assets |
Limits the maximum number of assets in a translation project |
8 - Configuring Lionbridge Freeway Settings
In the Other settings tab, you can configure Lionbridge Freeway-specific settings.
To configure settings for integration with Lionbridge Freeway:
-
In the bottom-right corner of the Lionbridge Connector gadget in the right pane, click the Settings icon , and then select Settings from the context menu.
-
Click the Other settings tab.
-
You can configure the following settings:
| Setting |
Description |
| Analysis Codes |
The name of a Lionbridge Freeway analysis code. Click the  icon to open a dialog box where you add an analysis code. Enter the name in the Name field and enter its value in the Value field, and then click Add. These analysis codes will be available for selection in the Analysis Codes section that is displayed when creating or editing a translation project. icon to open a dialog box where you add an analysis code. Enter the name in the Name field and enter its value in the Value field, and then click Add. These analysis codes will be available for selection in the Analysis Codes section that is displayed when creating or editing a translation project.
Important: You must contact your Lionbridge project manager to ensure that these analysis codes are in Freeway. |
| Freeway Link |
The link to the Lionbridge Freeway bundle ID. This will be providedby the Lionbridge Connector Team. There will be different links for staging and production environments. |
| Asset Link |
Optional. You can customize the links displayed in the Link column in the Lionbridge Connector Dashboard to display a non-default domain. Enter the non-default domain, for example: http://example.com.
Recommendation: Configure this if in the Admin tab, on the Manage Websites page, the URL configured for the public website (front-end URL) is different than the domain of the environment (back-end URL). This may cause the Dashboard to display errors when loading, or prevent links from being displayed. |
The Optimizely automatically saves your changes.
9 - Configuring Logging when the Connector is Installed Locally
Note: If the Connector is installed in a DXP cloud environment, see Configuring Logging in DXP Environments
In an environment where the Connector is installed locally, you can activate full verbose logging for it. This is useful for identifying errors.
To configure logging:
- Append the following to
log4net.config:
<appender name="lionbridgeFileLogAppender" type="log4net.Appender.RollingFileAppender" >
      <!-- Consider moving the log files to a location outside the web application -->
      <file value="App_Data\LionbridgeErrors.log" />
      <encoding value="utf-8" /> <staticLogFileName value="true"/> <datePattern value=".yyyyMMdd.'log'" /> <rollingStyle value="Date" /> <threshold value="Verbose" />
      <lockingModel type="log4net.Appender.FileAppender+MinimalLock"
/>
<appendToFile value="true" />
<layout type="log4net.Layout.PatternLayout">
  <conversionPattern value="%date [%thread] %level %logger:
  %message%n" />
 </layout>
</appender>
- Add the following logger:
</logger>
<logger name="Lionbridge" additivity="false">
<level value="Verbose" />
<appender-ref ref="lionbridgeFileLogAppender" />
</logger>
The generated log file is:\App_Data\LionbridgeErrors.log.
-
Add the logging setting for Log4Net into appsettings.json.
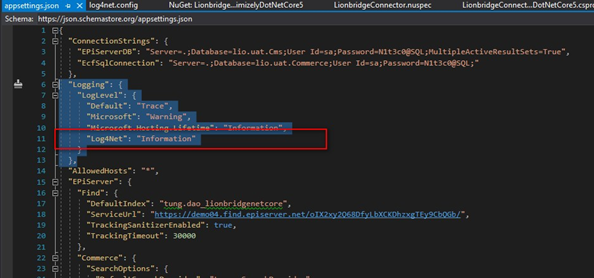
-
Configure Logging for Log4Net:
Add the AddLog4Net() call into your Configure method of the Program class.
public static IHostBuilder CreateHostBuilder(string[] args) =>
Host.CreateDefaultBuilder(args)
.ConfigureCmsDefaults() .ConfigureLogging(builder => { builder.ClearProviders(); builder.AddLog4Net(); })
.ConfigureWebHostDefaults(webBuilder =>
{
webBuilder.UseStartup<Startup>();
});
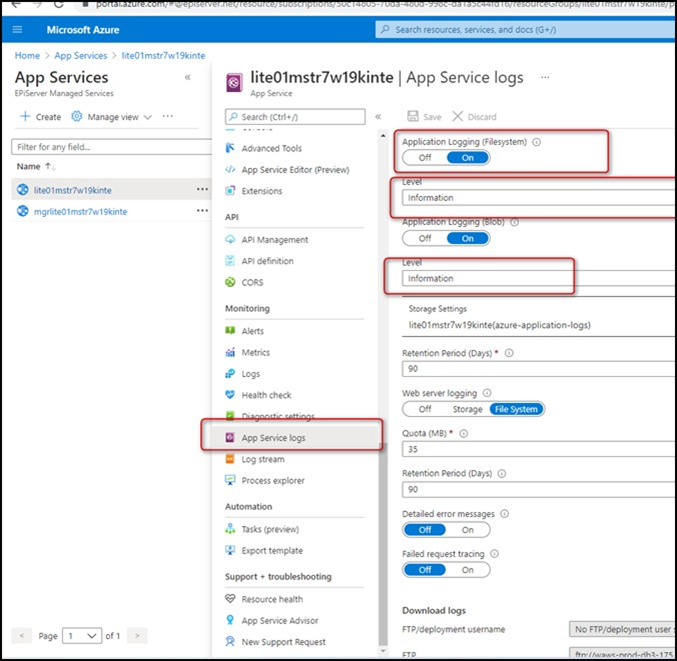
10 - Configuring Logging in DXP Environments
Note: If the Connector is installed locally, see Configuring Logging when the Connector is Installed Locally.
To access Connector log files in a DXP environment, turn on App service logs.
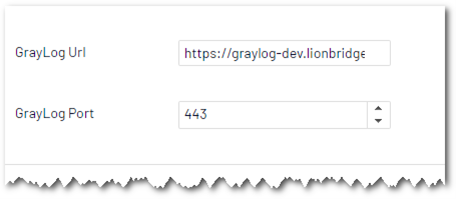
11 - Configuring Graylog
Graylog is a powerful platform that allows for easy log management of both structured and unstructured data along with debugging applications. From version 1.7.0 of the connector use it as optional local logging output.
To configure Graylog:
-
In the bottom-right corner of the Lionbridge Connector gadget in the right pane, click the Settings icon , and then select Settings from the context menu.
In the Other settings tab, edit information below:
-
You can configure the following settings:
| Setting |
Description |
| GrayLog Url |
Path of your graylog website |
| GrayLog Port |
Graylog port. This unique value for your site. Each site must have its own dedicated portal to distinguish it from different environments. |
12 - Configuring Multiple Users and Translation Workflows
The Connector supports multiple users. This enables configuring the Connector so that the creator of a translation project determines which Lionbridge Freeway account is assigned to that project. This requires setup in Freeway as well. To enable this configuration, contact the Lionbridge Connector Team and your Lionbridge project manager.
13 - Configuring Restriction Setting for CMS
This is a new optional setting for CMS feature. This setting allows the user to select the CMS properties which will not be sent out and translated by the translation provider.
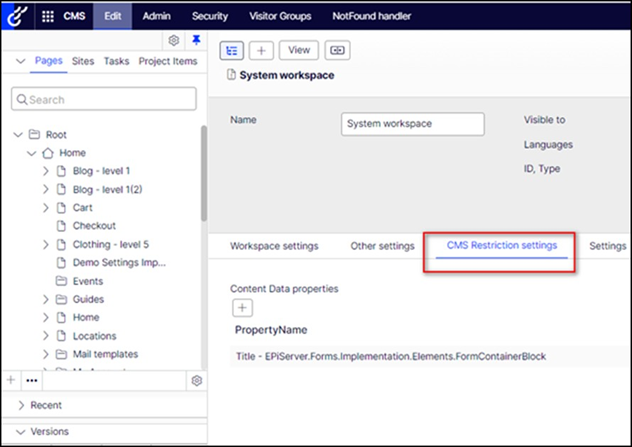
User can do the following actions to add the restriction fields:
-
Click on the button under the selected node properties.
-
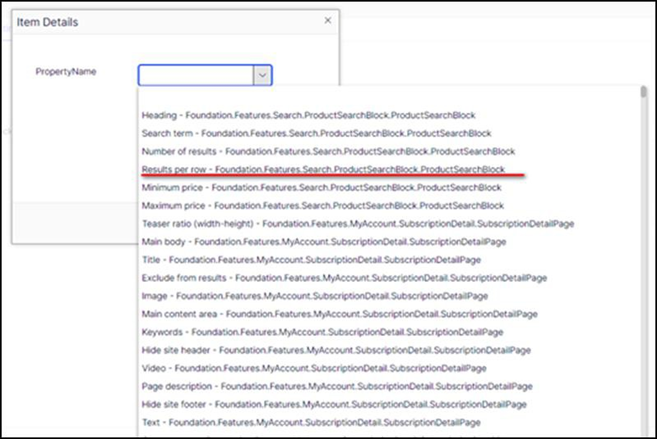
Select one of the restricted fields in the Property Name.
-
Click  button and the setting will be saved automatically.