Sending Assets for Translation
When you send out assets for translation, they are part of a translation project.
You can add assets for translation to a new or an existing project.
Note: You can add assets to an existing project only if it is in Draft status. You cannot add assets to a project after it has been submitted for translation.
You can send out the following types of assets for translation:
| Asset Type |
Description |
Additional Notes |
| Episerver Blocks |
Blocks that are referenced on a page in a Content Area or ContentReference fields. |
If the same block has multiple references, the Connector sends it out for translation once, in the context of the first page where it is referenced. |
| Episerver page properties |
The following page properties are supported:
* String
* XHtmlString
* ContentArea
* ContentReference |
Unsupported page properties will be blank, so you cannot publish the corresponding pages, as described in Publishing Translated Assets.
Tip: Review these pages manually and populate the blank page properties so that you can publish the pages. |
| custom properties |
Custom properties created by the customer. |
The Connector supports sending for translation only custom properties that inherit from the ProperyLongString and PropertyString classes. |
How the Connector packages the assets for translation
Either:
- The Connector sends each page and block for translation as a separate file.
- The Connector bundles all pages and blocks in the translation project for translation into a single XML file, creating one file for each target language.
You configure this setting using the Use grouped asset handling check box. For detailed instructions, refer to the Lionbridge Connector for Episerver Installation and Configuration Guide.
Recommendation: If Lionbridge Freeway will translate terms for SEO, select this check box.
When sending assets for translation, there are two basic steps:
-
Creating a translation project, including adding the assets to translate. You do this from the Lionbridge Connector gadget. For detailed instructions, see Creating or Editing a Translation Project.
-
Sending out the project for translation. You can do this either from the Lionbridge Connector gadget or from the Lionbridge Connector Dashboard. For detailed instructions, see Sending a Project for Translation.
1 - Creating or Editing a Translation Project
A translation project has two basic components:
- the project settings
- the collection of the assets to translate
You create or edit translation project from the Lionbridge Connector gadget.
To create a translation project:
-
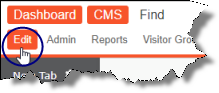
In Episerver CMS, click Edit.
-
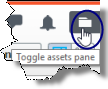
Click the Toggle assets pane icon.
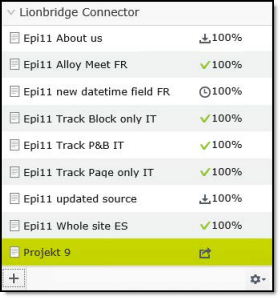
The Assets pane is displayed on the right. The Lionbridge Connector gadget is displayed at the bottom of the pane, displaying all the translation projects.
-
Do one of the following:
-
To create a new project, click the plus icon  at the bottom-left corner of the gadget.
-
To edit an existing translation project, click a project in the list to select it.
Note: You can edit an existing project only if it is in Draft status. You cannot edit a project after it has been submitted for translation.
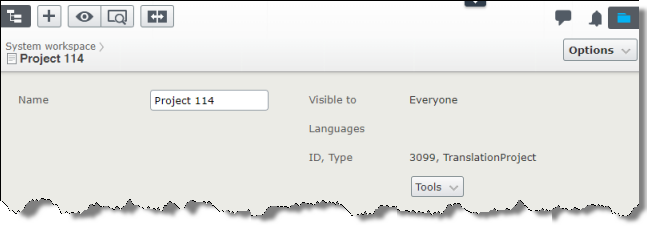
The System workspace, on the left, updates for the new or existing project.
-
In the Name field, you can enter or update the name of your translation project. This will also be the Freeway title of your project.
-
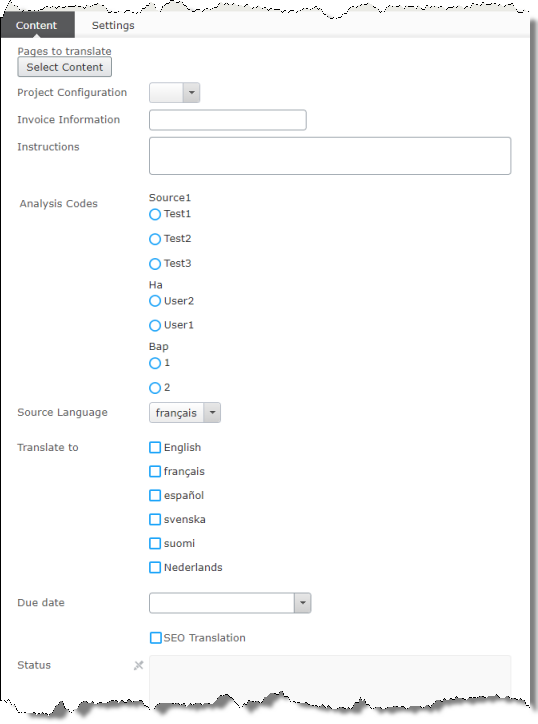
In the Content tab, specify the following settings for your translation project:
| Setting |
Description |
| Project Configuration |
Optional. In the dropdown list, select a workflow configuration for this project. There may be multiple workflow configurations for your translation provider that are configured by the Lionbridge Connector Team. For example, there may be one workflow for human translation and another configuration for machine translation. |
| Invoice information |
Optional. You can enter the project’s invoice number in this field. |
| Instructions |
Optional. You can enter instructions for the translators in this field. |
| Analysis Codes |
Optional. May not be displayed. The Freeway analysis codes for the translation.
You specify the analysis codes that are relevant to your assets. Your Lionbridge setup determines which analysis codes are available for you to specify, and the values available for selection for each analysis code. For example, the Region, Department, and Priority analysis codes may be available for you to specify. |
| Source Language |
Select the source language of the assets in the project. |
| Translate to |
Select the check boxes for the target languages for the assets in the project. These are the languages into which the assets will be translated. |
| Due date |
The requested delivery date. Either:
* Enter the date and time in the following format: M/D/YYYY H:MM,for example, 3/9/2016, 8:00 PM.
* Click the arrow and select the date and time in the calendar that opens. |
| SEO Translation |
If you want to mark the pages for SEO workflow processing, so that Lionbridge Freeway will translate terms for SEO. select the check box. When this check box is selected, the Connector includes the URLSegment property (name in URL) in pages it sends for translations.
Note: Episerver runs some validations on this property when it is edited in the Episerver GUI. These validations ensure that there are no characters that are invalid for URL names, and that the name is unique among sibling pages. For example, if you have a folder with the /cars/ URL, it cannot contain two pages with the same URL name, such as brandX, because the /cars/brandX address must point to a unique page. |
-
In the Settings tab, specify the following settings for your translation project:
-
Publish option—It can be Published in two options:
-
Publish if source is Published: If this is selected then the target assets can only be published if the source assets are published.
-
Publish if source is not Published: If this is selected then the target assets will publish even if the source assets are not yet published.
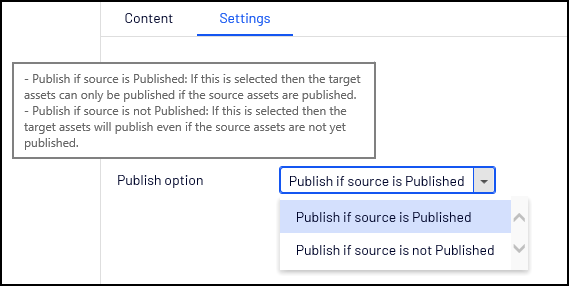
Note: To navigate, In the translation project click Settings and select Publish if source is Published or Publish if source is not Published from the dropdown of Publish option. By default, it is Publish if source is Published.
-
Import option—In configure Import Settings to allow target (translated) version specific content to be preserved when it does not exist in source version:
-
Keep all from source translation: If this is selected, when importing translation project, all data from the translated version will overwrite the current version.
-
Merge source translation and target: If this is selected, when importing translation project, system will:
-
+ Overwrite the blocks that has same ID from the translated version to current version.
-
+ Keep all blocks that available on current version but not in translated version.
-
+ Keep all blocks that available on translated version but not in current version.
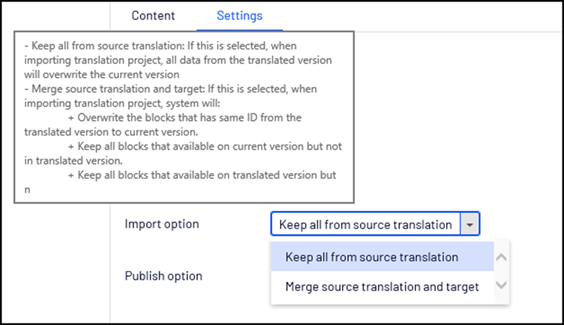
Note: To navigate, In translation project click Settings and select Keep all from source translation or Merge source translation and target from the dropdown of Import option. By default, it is Keep all from source translation.
-
To select the assets to translate, near the top-left corner of the workspace, under Pages to translate, and click Select Content.
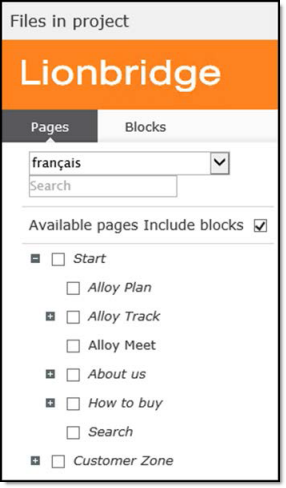
The Assets in Project dialog box opens.
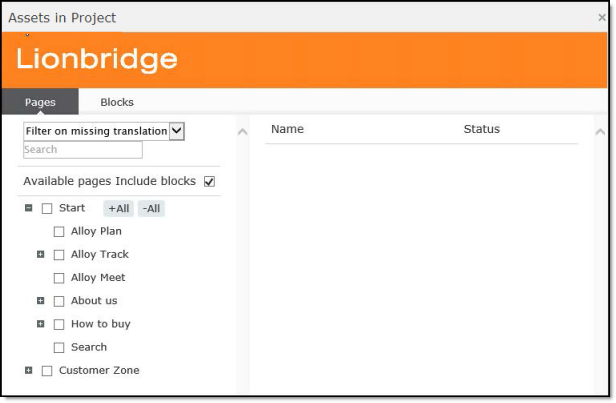
The Available pages pane on the left side displays a tree structure.
a. At the top of this pane, click the Pages or the Blocks tab to display the corresponding asset in the tree.
b. Expand the tree structure and select the check boxes of the assets to add to the translation project.
c. Optional. Mouseover the page to display the +All and -All buttons. Click these buttons to add or remove all child pages or blocks from the translation project.
d. To remove a page or block from your selection, click the corresponding Remove button. This button is displayed after a page or block is selected.
e. Optional. In the Pages tab, to automatically include all blocks associated with the selected pages in your translation project, select the Include blocks check box.
f. Optional. To view which pages have not yet been translated, select the desired target language in the Filter on missing translation dropdown list. The tree updates to display any pages that have not yet been translated into that language in Italic font. Pages that have already been translated into that target language are displayed in regular font.
g. Click Save to save your changes.
The System workspace reopens. The Connector automatically saves the translation project in Draft status. To undo the auto-save, click the Undo link in the top-center of the workspace.
Now you are ready to send your translation project to Lionbridge Freeway for translation. For detailed instructions, see Sending a Project for Translation.
2 - Sending a Project for Translation
When a translation project has Draft status, you can send it to Lionbridge Freeway for translation. You can do this either from the Lionbridge Connector gadget or from the Lionbridge Connector Dashboard (“Dashboard”).
There are two ways to send a project for translation:
2.1 - Sending a Project for Translation from the Gadget
Sending a Project for Translation from the Gadget
When a translation project has Draft status, you can send it to Lionbridge Freeway for translation.
To send out a project for translation from the Lionbridge Connector gadget:
- In Episerver CMS, click Edit.
- Click the Toggle assets pane icon.
The Assets pane is displayed on the right. The Lionbridge Connector gadget is displayed at the bottom of the pane, displaying all the translation projects.
-
Click a project in the list to select it.
-
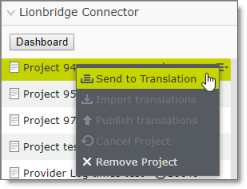
Mouseover the right end of the project in the Lionbridge Connector gadget, click the Options icon  and then select Send to Translation in the project’s context menu.
A message box opens, confirming that you want to send the project for translation.
- Click Yes to proceed.
Another message box opens, stating that the project was sent for translation.
- Click OK to close the message box.
The Connector sends your translation project as a scheduled job. It displays a clock icon  next to it, which indicates that it now has In Translation status.
- When your project displays a status of 10%, it has been delivered to Lionbridge Freeway.
- When your project displays a status of 100%, it is ready to be imported into Episerver, where you can review it.
2.2 - Sending a Project for Translation from the Dashboard
When a translation project has Draft status, you can send it to Lionbridge Freeway for translation.
To send out a project for translation from the Dashboard:
-
In the Dashboard, locate a translation project with Draft status. This is displayed in the Status column. For information on opening the Dashboard, see Getting Started with the Connector for Episerver.
-
In the Actions column, click the arrow and select Send to Translation](#) from the context menu.

A message box opens, confirming that you want to send the project for translation.
- Click Yes to proceed.
Another message box opens, stating that the project was sent for translation.
- Click OK to close the message box.
The Connector sends your translation project as a scheduled job, and when it is delivered to Lionbridge Freeway, it has In Translation status.
3 - Canceling a Translation Project
If a translation project is in either In Translation or Ready for Import status, you can cancel it. This prevents the Connector from checking whether the translation is complete and removes it from the Connector. This functionality is not reversible. For a list and description of translation-project statuses, see Monitoring Translation Status.
Important: This step does not cancel the translation process in Lionbridge Freeway. If your translation project has In Translation status, you must also contact your Lionbridge project manager immediately to cancel the project in Lionbridge Freeway.
There are two ways to cancel a translation project in the Connector:
3.1 - Canceling a Translation Project in the Gadget
If a translation project is in either In Translation or Ready for Import status, you can cancel it to prevent the Connector from checking whether the translation is complete and to remove it from the Connector. This functionality is not reversible.
Important: This step does not cancel the translation process in Lionbridge Freeway. If your translation project has In Translation status, you must also contact your Lionbridge project manager immediately to cancel the project in Lionbridge Freeway.
To cancel a translation project from the Lionbridge Connector gadget:
- In Episerver CMS, click Edit.
- Click the Toggle assets pane icon.
The Assets pane is displayed on the right. The Lionbridge Connector gadget is displayed at the bottom of the pane, displaying all the translation projects.
-
Click a project in the list to select it.
-
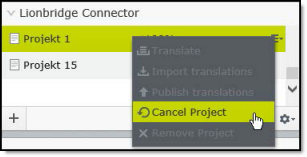
Mouseover the right end of the project in the Lionbridge Connector gadget, click the Options icon , and then select Cancel Project in the project’s context menu. This menu item is available only when the project is in either In Translation or Ready for Import status.
A message box opens, confirming that you want to cancel the project.
- Click Yes to confirm.
Another message box opens, stating that the project was canceled and removed from the Connector. It instructs you to contact your Lionbridge project manager immediately to stop the translation process in Lionbridge Freeway.
- Click OK to close the message box.
3.2 - Canceling a Translation Project in the Dashboard
If a translation project is in either In Translation or Ready for Import status, you can cancel it to prevent the Connector from checking whether the translation is complete and to remove it from the Connector. This functionality is not reversible.
Important: This step does not cancel the translation process in Lionbridge Freeway. If your translation project has In Translation status, you must also contact your Lionbridge project manager immediately to cancel the project in Lionbridge Freeway.
To cancel a translation project from the Dashboard:
-
In the Dashboard, locate a translation project with either In Translation or Ready for Import status. This is displayed in the Status column. For information on opening the Dashboard, see Getting Started with the Connector for Episerver.
-
In the Actions column, click the arrow and select Cancel Project from the context menu.

A message box opens, confirming that you want to cancel the project.
- Click Yes to confirm.
Another message box opens, stating that the project was canceled and removed from the Connector. It instructs you to contact your Lionbridge project manager immediately to stop the translation process in Lionbridge Freeway.
- Click OK to close the message box.